


5
U-CONTROL UMA25S
1. Introduction
Thank you for showing your confidence in us by purchasing the
UMA25S. The UMA25S is an extremely flexible master keyboard
with a control section that can be used for a wide array of
applications. Whether you need independent control of computer
rack synthesizers, General MIDI sound modules and effects
devices, or want to use the UMA25S for conveniently operating
sequencing software or computer plug-ins—the UMA25S offers
you tremendous ease of use and allows you to realize your
ideas intuitively.
The following user manual is intended to familiarize
you with the unit’s control elements, so that you
can master all the functions. After having thoroughly
read the user manual, store it at a safe place for
future reference.
1.1 Before you get started
1.1.1 Shipment
The UMA25S was carefully packed at the factory to ensure
safe transport. Nevertheless, if the box is damaged, inspect the
unit immediately for signs of damage.
If the unit is damaged please do NOT return it to us,
but notify your dealer and the shipping company
immediately; otherwise, claims for damage or
replacement may not be granted.
Use the supplied soft bag to avoid damage during
storage and transport.
Make sure that children cannot play unsupervised
with the unit or its packaging.
Please ensure proper disposal of all packing
materials.
1.1.2 Initial operation
Ensure adequate air supply, and to avoid overheating, do not
place your UMA25S on top of a power amplifier or near radiators,
etc.
The UMA25S runs via USB, batteries or an external power
adapter.
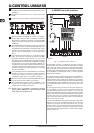
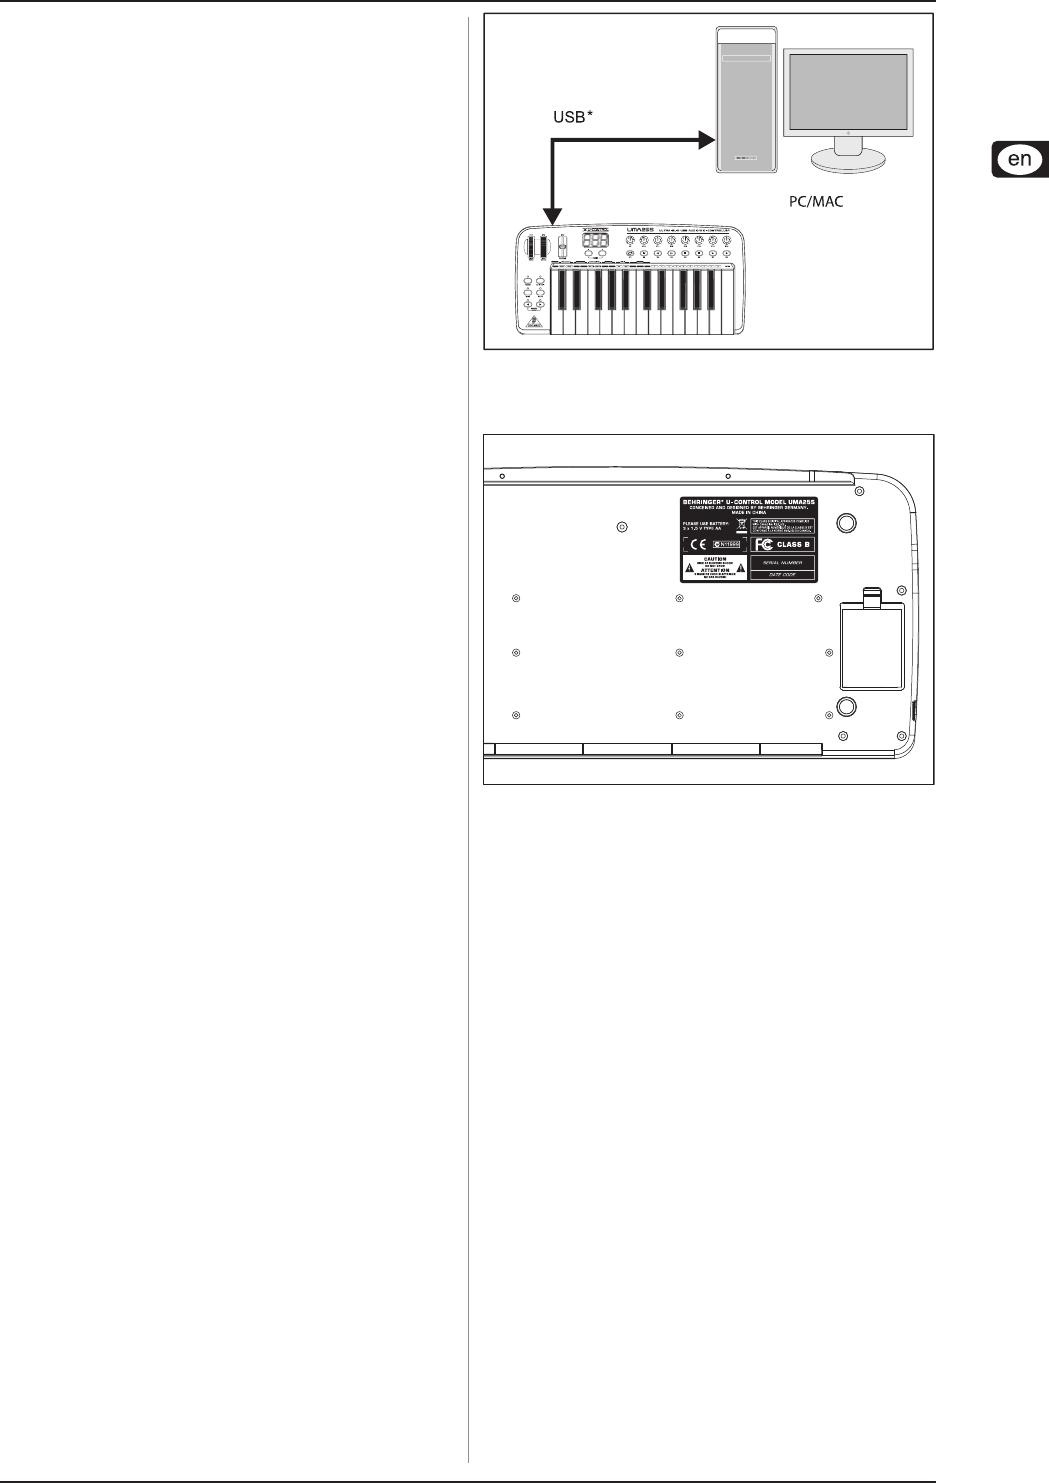
USB:
For the installation of the UMA25S in a studio environment, it is
possible to connect the device directly to a free USB port of the
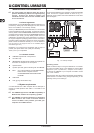
computer using the supplied USB cable (see Fig. 1.1).
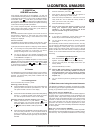
Batteries:
In case it is not possible to establish the power supply with USB
(for example, several USB devices are connected to the host
computer which may result in an overload), you can operate the
UMA25S with three 1.5-Volt batteries (type “AA”, see Fig. 1.2).
* included
Fig. 1.1: Power supply via USB
Fig. 1.2: Battery compartment on the bottom side of the
UMA25S
Open the battery compartment by pressing the release tab
carefully in the direction of the battery compartment while pulling
the lid of the compartment upward.
Please note the following points when inserting the batteries:
V The + symbol of the batteries must coincide with the
+ symbol of the compartment! Incorrect polarity will damage
the electronics!
V Do not use old and new batteries together! When replacing
batteries, always change all 3 batteries at the same time.
V Do not use damaged batteries. The UMA25S might also be
damaged because of chemical leakage.
V If you do not use the UMA25S for an extended period of
time, please remove the batteries from the compartment.
The batteries could leak and damage the device.
After inserting the batteries, please close the battery compartment
and make sure the release tab snaps into place.
External power supply:
If you neither want to draw the power supply via USB nor power
the device with batteries, there is yet another possibility to connect
the UMA25S to an external power supply unit. Please observe
the correct operational data (DC 9 V; 300 mA) and correct polarity
of the connector. Further information can be found above the DC
input on the rear panel of the device. Reverse polarity may cause
damage to the electronics.
1. Introduction