


This guide provides instructions for an experienced installer to set up, install, and
connect the Extron® VLP 102 Pendant Microphone or VLH 102 Handheld Microphone,
the VLC 202 Charging Station, the VLR 102 Receiver, and the VLR 102SR Secondary Receiver.
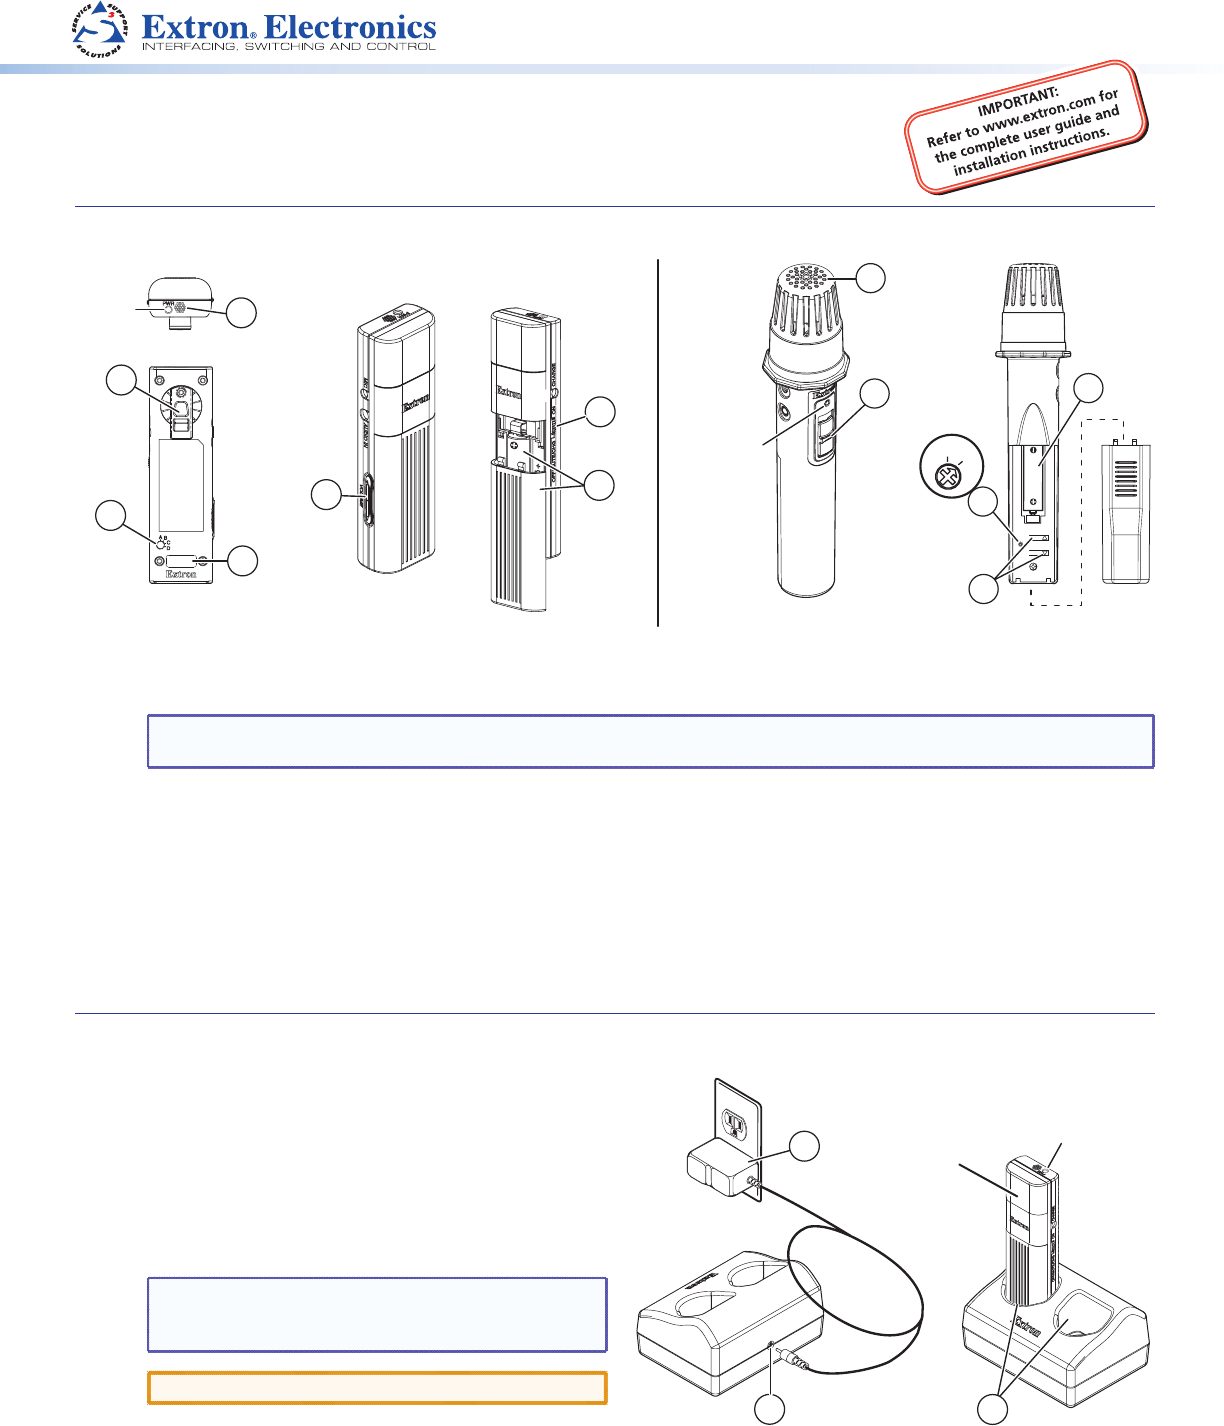
Setting Up the VLP 102 and VLH 102 Microphones
1. Set the channel using the rotary switch. A and C = 2.3 MHz; B and D = 2.8 MHz. For the VLH 102, remove the battery
cover to access this switch.
NOTE: Each microphone must be on a different frequency. On the pendant microphone, set the channel to C or D
to disable the volume buttons (the handheld microphone has only channels A and B).
2. (Pendant microphone only) Apply the appropriate sticker to identify the microphone.
3. Remove the battery cover and insert the AA battery. If necessary, replace the battery cover and charge the battery.
4. (Pendant microphone only) Attach the lanyard to the rotating clip. Adjust the lanyard to position the microphone
approximately 4 inches (10.2 cm) below the chin of the user.
5. Turn the microphone on by sliding the power switch up.
6. Speak in a normal tone of voice. Do not block the microphone port or grille opening.
7. Adjust the volume if necessary. On the VLH 102, replace the battery cover.
Installing the VLC 202 Charging Station
To install the VLC 202 Charging Station:
1. Plug the wall charger (5 V, 1 A) into a wall outlet.
2. Connect the wall charger cable to the charging station
power jack.
3. Place the microphone in one of the slots in the charger,
with the charging contacts facing down.
The charge is complete when the LED turns green. (This
can take up to 5 hours.)
NOTE: The microphone can be left to charge for
extended periods. In maintenance mode,
the charge is retained when complete.
CAUTION: Do not charge alkaline batteries.
Top
1
4
6
2
Power
Indicator
LED
Power
Indicator
LED
A
B
VOLUME
VLH 102 Handheld Microphone
A
B
3
5
7
6
1
2
3
1
Pwr LED
Pendant or
Handheld
Microphone
5
7
3
VLP 102 Pendant Microphone
1