


48 Input & Output Patching
01V96i—Reference Manual
5. Move the cursor to the desired IN parameter
box, then rotate the Parameter wheel or
press the [INC]/[DEC] buttons to select the
inputs, ADAT IN channels, or slot input chan-
nels to be patched to the Insert In.
Refer to the explanation regarding the Input Patch for
more information on the parameter values (see page 43).
6. Press [ENTER] to confirm the change.
7. To enable the specified Insert patch, move
the cursor to the ON/OFF button in the
INSERT section, and press [ENTER] to turn it
on or off.
Viewing and Changing Insert In
Patch
You can view and also change the items patched to the Insert
Ins of all Input Channels (or all Output Channels). This is
useful when you wish to find out if multiple channels have the
same patch.
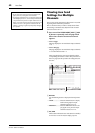
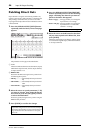
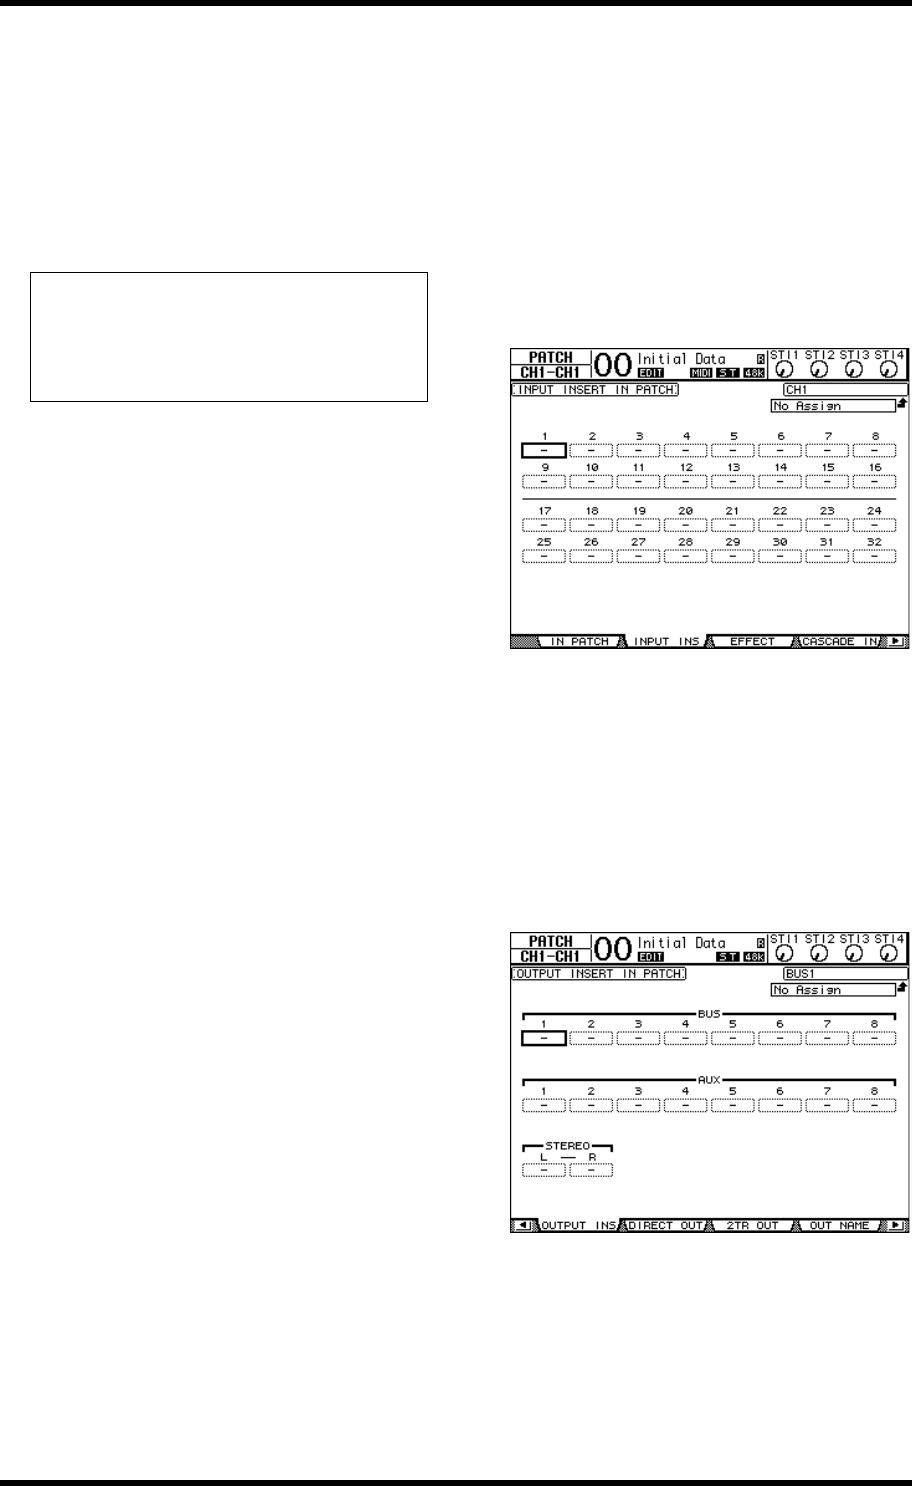
1. To view the Input Channels’ Insert Ins, press
the [PATCH] button repeatedly until the
Patch | Input Ins page appears.
This page displays Input Channels 1–32 Insert In Patches.
2. Move the cursor to a channel patch parame-
ter box you wish to change, then rotate the
Parameter wheel or press the [INC]/[DEC]
buttons to modify the patching.
3. Press [ENTER] to confirm the change.
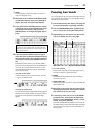
4. To view the Output Channels’ Insert Ins, press
the [PATCH] button repeatedly until the
Patch | Output Ins page appears.
5. Move the cursor to a channel patch parame-
ter box you wish to change, then rotate the
Parameter wheel or press the [INC]/[DEC]
buttons to modify the patching.
6. Press [ENTER] to confirm the change.
Tip: Move the cursor to an empty OUT or IN parameter box
and press the [ENTER] button. The Patch Select window
appears. Rotate the Parameter wheel or press the cursor but-
tons to select an item to be patched, then press [ENTER].
Move the cursor to the YES button, then press [ENTER]. The
selected item is now patched.