


Pro Tools Remote Layer 89
01V96i—Reference Manual
Remote Control
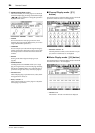
Selecting Channels
To select a single Pro Tools channel, press the [SEL] button
that corresponds to the desired channel.
To select multiple Pro Tools channels simultaneously, while
holding down one [SEL] button, press the [SEL] buttons of
the other channels you wish to add. Press the [SEL] buttons
again to cancel the selection.
Setting Channel Levels
1. Make sure that the FADER MODE [HOME]
button indicator is lit steadily.
If the indicator is flashing, press the [HOME] button to
turn on the button indicator.
2. Operate the faders to set channel levels.
Press and hold down the [AUX 6] button and press the
desired [SEL] button to reset the corresponding channel
fader level.
Muting Channels
To mute Pro Tools channels, press the [ON] buttons. The
[ON] button indicators of muted channels turn off. Grouped
channels are muted together.
Press the [ON] buttons again to unmute channels. The [ON]
button indicators of unmuted channels light up.
There are two mute modes in Pro Tools: Implicit mute and
Explicit mute. You can check the mute mode by viewing the
[ON] button indicators.
• Implicit mute
This is a forced mute mode in which the channels are
muted because other channels are soloed. In this mode,
the [ON] button indicators flash.
•Explicit mute
In this mode, the channels are turned off manually. In this
mode, the [ON] button indicators turn off.
Panning Channels
You can adjust the Pro Tools channel pan settings.
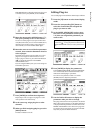
1. Press the FADER MODE [AUX 7] button.
The button indicator lights up.
2. Press the [F3] button to select Channel Dis-
play mode.
On a Channel Display mode page, parameter controls
1–16 indicate the pan settings.
3. Press the [SEL] button of the channel for
which you want to adjust the pan setting.
To adjust the stereo channel panpots, press the STEREO
[SEL] button, then press the [AUX 7] button to select the
L or R channel. Pressing the [AUX 7] button repeatedly
toggles between the left and right channels. When the left
channel is selected, the [AUX 7] button indicator lights
up and the SELECT ASSIGN parameter on the display
indicates “Pan.” When the right channel is selected, the
[AUX 7] button indicator flashes and the SELECT
ASSIGN parameter indicates “PanR.”
4. Adjust the selected channel panpot using the
SELECTED CHANNEL [PAN] control.
5. To reset the corresponding channel panpot
to center, move the cursor to the parameter
control on the display, then press and hold
down the [AUX 6] button and press [ENTER].
You can reset the pan settings only when the [AUX 7] but-
ton indicator is lit steadily.
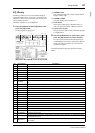
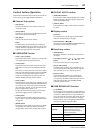
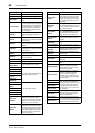
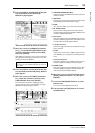
DAW REC/RDY 1
Pressing the buttons (to which these
functions are assigned) places the
corresponding channel strips in
Record Ready mode. At this time,
the indicator of the button you
pressed flashes. It lights up when
recording starts.
DAW REC/RDY 2
DAW REC/RDY 3
DAW REC/RDY 4
DAW REC/RDY 5
DAW REC/RDY 6
DAW REC/RDY 7
DAW REC/RDY 8
DAW REC/RDY 9
DAW REC/RDY 10
DAW REC/RDY 11
DAW REC/RDY 12
DAW REC/RDY 13
DAW REC/RDY 14
DAW REC/RDY 15
DAW REC/RDY 16
DAW REC/
RDY ALL
If no channel strips are in Record
Enabled mode, pressing the button
(to which this function is assigned)
places all channel strips in Record
Enabled mode. The button indicator
flashes if any channel strip in any
bank is in Record Enabled mode.
Pressing the button while the button
indicator is flashing cancels Record
Enabled mode for all channel strips.
Parameter Function
Note: Before you adjust monaural channel panpots, first be
sure the [AUX 7] button indicator is illuminated steadily. If
the indicator is flashing, operating the [PAN] control will be
ineffective.