


Using the AW16G with external devices
164
Recording/playing AW16G mix
operations on the workstation’s
sequencer
Here’s how you can synchronize the AW16G and the
built-in sequencer of your workstation synth, and use the
sequencer to record/play the fader and pan operations
you perform on the AW16G.
Since operating the AW16G’s mix parameters will cause
a large number of control change messages to be trans-
mitted, we will use MIDI Clock (which uses less data) as
the synchronization signal rather than MTC.
1
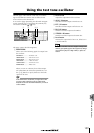
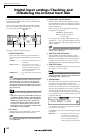
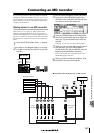
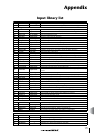
Connect the AW16G and your workstation as
shown in the following diagram.
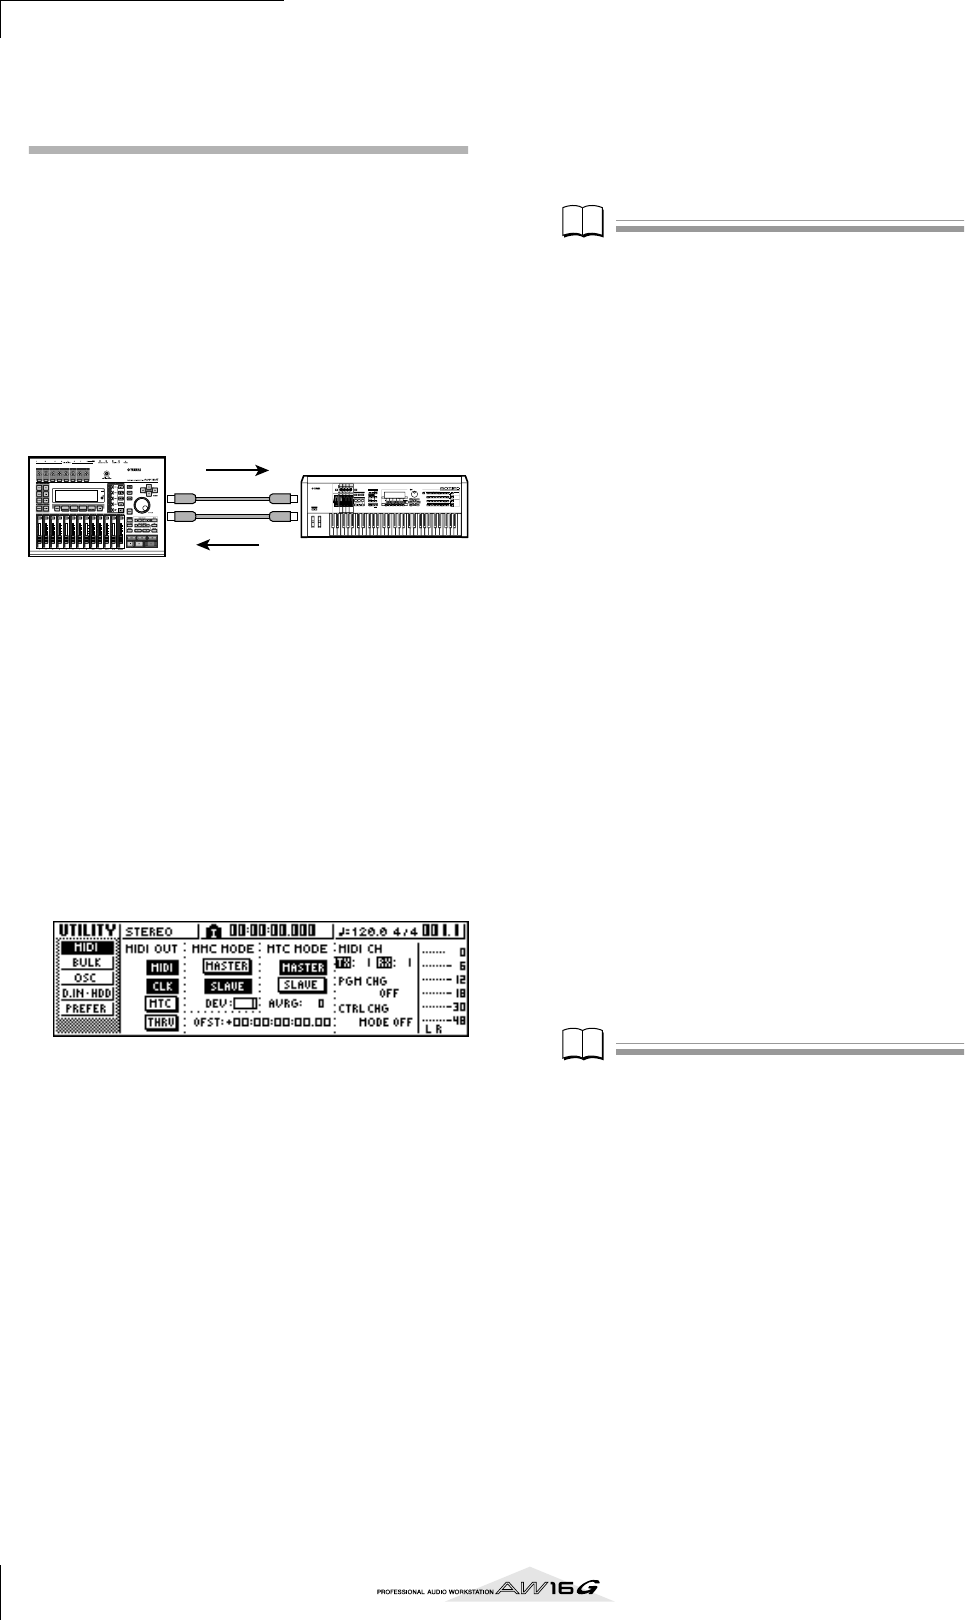
2
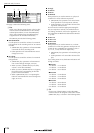
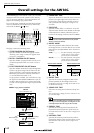
In the Work Navigate section, use the [UTIL-
ITY] key to access the MIDI page of the UTIL-
ITY screen. Turn on the MASTER button in
the MTC MODE area, and turn on the MIDI
button and CLK button in the MIDI OUT
area.
With these settings, the AW16G will transmit MIDI
Clock, Start/Stop/Continue, and Song Position
Pointer messages from its MIDI OUT/THRU con-
nector when it is running.
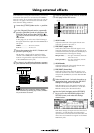
● Example settings for synchronization using
MIDI Clock and Start/Stop/Continue
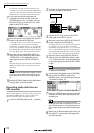
3
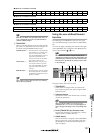
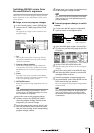
Move the cursor to the CTRL CHG MODE
area, and turn the [DATA/JOG] dial to select 1
out of the possible range of 1–3.
The CTRL CHG MODE lets you choose one of three
combinations (1–3) that specify how control
changes will correspond to the mix parameters of
the AW16G. (For details on the contents of each
choice, refer to page 152.)
If you want to divide your operations into a separate
MIDI channel for each of the AW16G’s track chan-
nels, choose 1. If you want all track channels to be
controlled on a single MIDI channel, choose 2 or 3.
If you chose 2 or 3, you will also need to set the
MIDI CH field to specify the MIDI channel that will
be used to transmit and receive the control changes.
4
Make settings on your workstation synth so
that its built-in sequencer will follow external
MIDI Clock messages. Also set the sequencer
to record-ready mode.
For details on how to make these settings, refer to
the manual for your workstation synth.
Note
Note
If your workstation synth has a function by which MIDI
messages received at its MIDI IN connector are retrans-
mitted from its MIDI OUT connector (a function called
“MIDI Echo” or “MIDI Thru”), you must turn it off. If this
function is turned on while you are recording, the control
change messages transmitted when you operate the
AW16G will be immediately returned to the AW16G,
causing malfunctions.
5
Play back the AW16G song from the begin-
ning.
When the AW16G begins playing, it will transmit a
Start message and MIDI Clock messages to the
sequencer, and the sequencer will begin running in
synchronization with the AW16G.
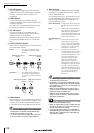
6
Operate the AW16G’s mix parameters such
as fader and pan.
The control changes assigned to each parameter
will be recorded on the sequencer.
The type of mix parameters that can be recorded
will depend on the setting of the CTRL CHG MODE
field (→ p. 151).
7
When you are finished recording, stop the
AW16G song.
8
Switch the workstation’s sequencer to play-
back-ready mode, and play back the AW16G
song from the beginning.
The recorded control changes will be transmitted to
the AW16G, and the corresponding mix parameters
will change.
If necessary, you can use the editing functionality of
your sequencer to edit the values and timing of the
control changes that were recorded.
Note
Note
If you set CTRL CHG MODE to 1, operating track chan-
nels 1–16 will transmit control changes on the corre-
sponding MIDI channel 1–16. For this reason, you should
normally record operations only for a single channel at a
time, unless your sequencer is able to record multiple
MIDI channels simultaneously.
MIDI OUT MIDI IN
MIDI IN MIDI OUT
AW16G
REC
SONG SCENE
MUSIC
PRODUCTION
SYNTHESIZER
Integrated
Sampling
Sequencer
Real-timeExternalControl
Surface
Modular
SynthesisPlug-in
System
MIDI Clock
Control change
Control
change
Synthesizer with
built-in sequencer