


165
Using the AW16G with external devices
15
Switching AW16G scenes from
the workstation’s sequencer
Here’s how you can transmit program changes from the
built-in sequencer of your workstation to switch scenes
on the AW16G.
■ Assign scenes to program changes
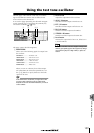
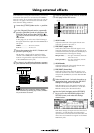
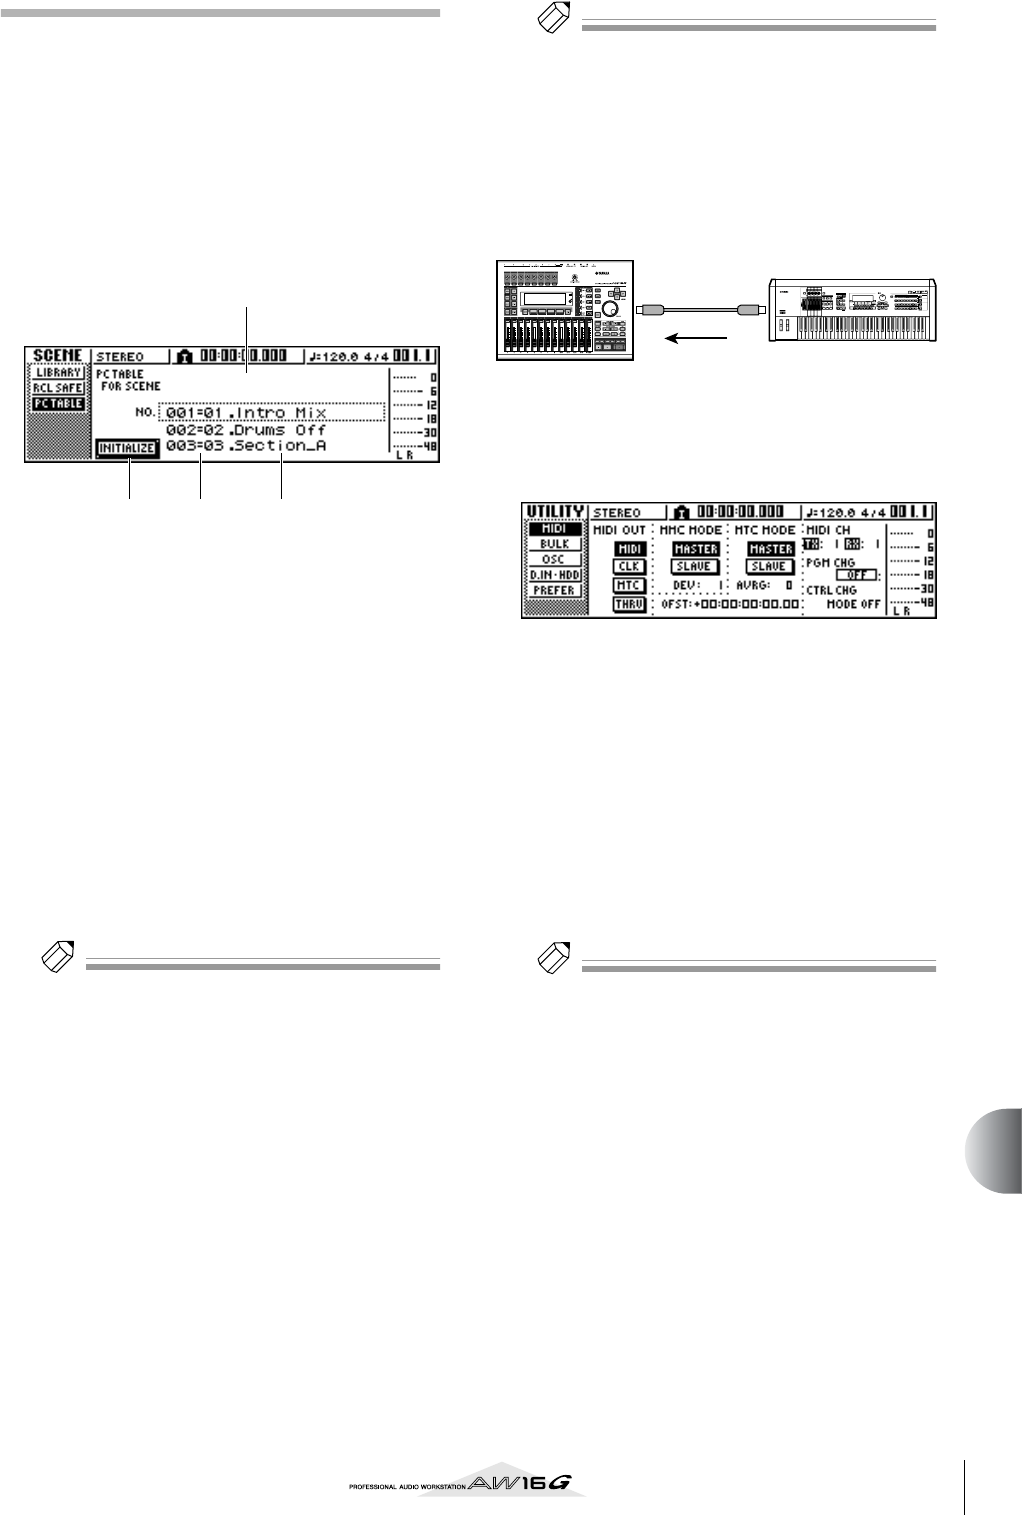
1
In the Control section, use the [SCENE] key
to access the PC TABLE page of the SCENE
screen.
This page lets you assign a scene number to each
program change.
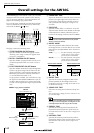
1 List
This lists the scenes of the current song. The line
enclosed by a dotted frame is the scene currently
selected for operations.
B Program change number
This indicates the program change number 001–
128. Move the cursor to this number and turn the
[DATA/JOG] dial to scroll the list upward or down-
ward.
C Scene
Move the cursor to this area and turn the [DATA/
JOG] dial to select the scene that you want to assign
to the corresponding program number.
D INITIALIZE button
Returns the program change assignments to the ini-
tial state.
Tip!
Tip!
With the initial settings, program changes 1–96 corre-
spond to scenes 1–96, and program changes 97–128 are
set to NO ASSIGN (no assignment).
2
Move the cursor to the program change
number, and turn the [DATA/JOG] dial to
select the program change number whose
assignment you want to change.
3
Move the cursor to the scene in the list, and
turn the [DATA/JOG] dial to select the scene
that you want to assign to the corresponding
program change number.
4
Repeat steps 3–4 to assign the desired scenes
to other program change numbers.
Tip!
Tip!
If you want to reset the scene assignments to the initial
setting, move the cursor to the INITIALIZE button and
press the [ENTER] key.
■ Transmit program changes to switch
scenes
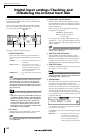
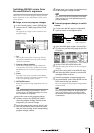
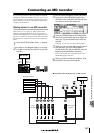
1
Connect the AW16G and your workstation
synth as shown in the diagram below.
2
In the Work Navigate section, use the [UTIL-
ITY] key to access the MIDI page of the UTIL-
ITY screen.
3
Set the PGM CHG MODE field to RX.
With this setting, the AW16G will receive program
changes.
4
Move the cursor to RX in the MIDI CH area,
and select the MIDI channel on which MIDI
messages will be received.
5
Transmit a program change message from
your workstation synth to the AW16G on the
MIDI channel that you selected.
The scene assigned to that program change number
will be recalled.
Tip!
Tip!
If you insert program changes into the appropriate loca-
tions of your sequencer track, scenes will be recalled
automatically as the AW16G and your sequencer run in
synchronization.
1
4 2 3
MIDI IN MIDI OUT
AW16G
REC
SONG SCENE
MUSIC
PRODUCTION
SYNTHESIZER
Integrated
Sampling
Sequencer
Real-timeExternalControl
Surface
Modular
SynthesisPlug-in
System
Program
change
Synthesizer with
built-in sequencer