


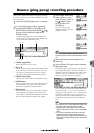
Mixdown and bounce operations
90
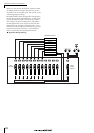
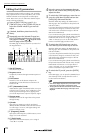
Using meters to check the level
of each channel
During mixdown or bouncing, you can watch meters
that indicate the input levels in a single screen. To do so,
repeatedly press the Selected Channel section [VIEW]
key or hold down the [VIEW] key and use the CURSOR
[ ]/[ ] keys to access the METER page of the VIEW
screen.
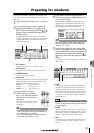
In the METER page, the display will change depending
on the channel that is currently selected (shown in the
upper left of the screen). Press an [INPUT SEL] key to
view the meters for the input channels/pad channels, or
press a [TRACK SEL] key to view the meters for the track
channels.
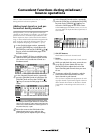
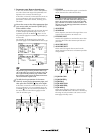
● If a track channel is selected
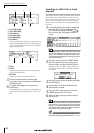
● If an input channel/pad channel is selected
1 PEAK button
This button switches the level meter peak hold func-
tion on/off. When this button is on, a indicator
will show the peaks of the level meters, and this
indicator will be held. To reset the indicator, tempo-
rarily turn off the PEAK button. This setting is shared
with the BUS page of the VIEW screen.
B PRE/POST buttons
These buttons select whether the level meters in the
METER page will indicate the pre-fader levels (PRE)
or the post-fader levels (POST). This setting is inde-
pendent from the BUS page of the VIEW screen.
C Level meters
These indicate the input level of each channel.
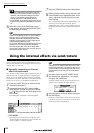
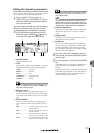
Viewing all parameters for a cer-
tain channel
Sometimes you will want to see all mix parameters for a
certain channel in a single screen. To do this, repeatedly
press the Selected Channel section [VIEW] key or hold
down the [VIEW] key and use the CURSOR [ ]/[ ]
keys to access the CH VIEW page of the VIEW screen.
(Some items can also be edited from this page.)
The display in the CH VIEW page will change depending
on the currently selected channel (shown in the upper
left of the screen). Use the [INPUT SEL] keys, pads 1–4,
[TRACK SEL] keys, and [STEREO SEL] key to select the
channel that you want to view.
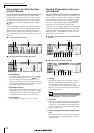
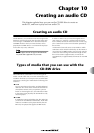
● If an input channel, pad channel, or track channel is
selected
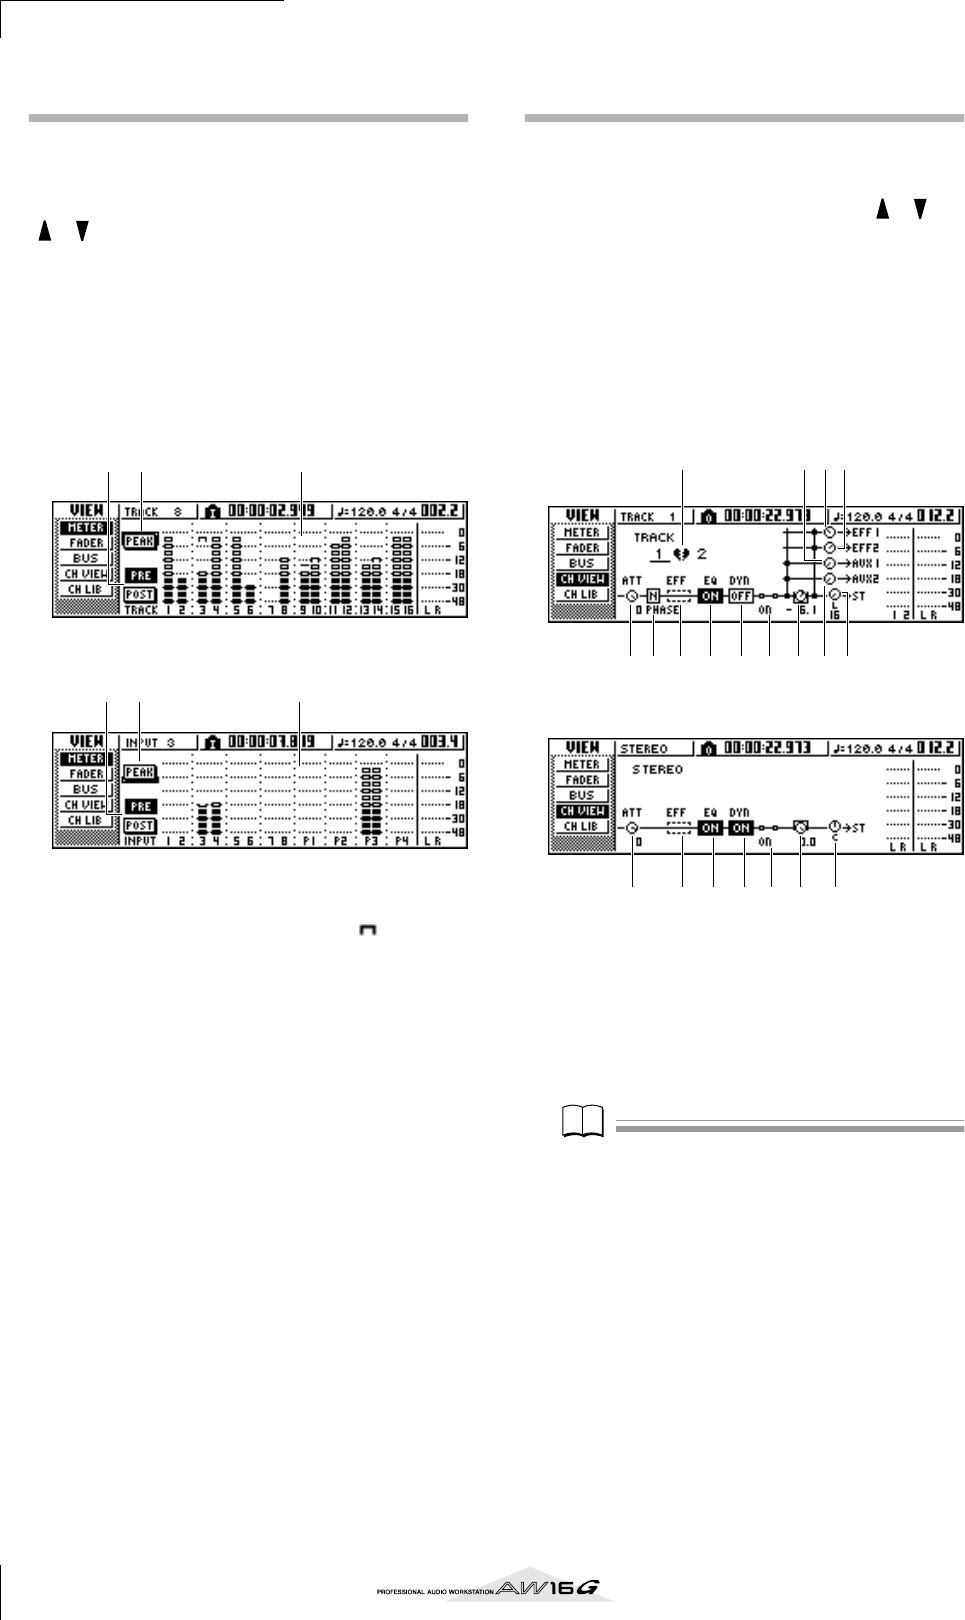
● If the stereo output channel is selected
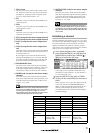
1 Pairing
Indicates the pairing status of adjacent odd-num-
bered/even-numbered channels. Paired channels
are indicated by a heart-shaped symbol, and
unpaired channels are indicated by a broken heart.
Move the cursor here and press the [ENTER] key to
switch pairing on/off.
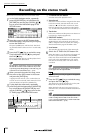
Note
Note
Pairing cannot be switched off for track channels 9/10–
15/16, pad channels 1–4, and the stereo channel.
B ATT knob
Move the cursor to this knob and turn the [DATA/
JOG] dial to adjust the attenuation of the signal over
a range of 0 to –96 dB before it enters the EQ. This
is the same function as the ATT. knob in the EDIT
page of the EQ screen.
C Phase (except for the stereo output chan-
nel)
Move the cursor here and press the [ENTER] key to
switch the phase of the signal between N (Normal)
and R (Reverse).
1 32
1 32
2 3 4 5 6 M K L7
1
89J
2 4 5 6 N7 L