


Arpeggio Mode
246
■ Meas (Measure)
Sets the measure number where recording will begin,
using the Sequencer keys (the Cursors cannnot be
used).
❏ Settings: 001~016
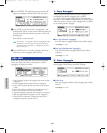
■ Time Signature
Sets the time signature for an arpeggio.
❏ Settings: 1/4~8/4, 1/8~16/8, 1/16~16/16
You can change the time signature after recording.
■ Track
Selects the track for recording. Tracks 1~4 can also
be selected using the TRACK [1~4] (EX5/7 only).
❏ Settings: Tr1~4(tracks1~4)
The arpeggio tracks 1~4 are positioned in the same
line at the top of the screen.
Recording Mode
In the Arpeggio Record mode various recording
modes have been assigned to[F3] and [F5]~[F7].
[F5]: STEP
Sets the STEP recording mode to “on” or “off.”
Press [F5], STEP is highlighted and the STEP
recording mode is turned on. Then notes can be
programmed in one at a time. Press [F6]~[F7] to
cancel STEP recording mode and return to real
time recording.
When STEP is not highlighted, real time recording is
always engaged.
[F6]: OVER(Over Dubbing)
Sets the OVER dubbing recording to “on” or “off.”
Press [F6], OVER is highlighted and the OVER
Dubbing is turned on. When recording in real
time, you can record over previously recorded data.
For example, after first recording quarter notes,
you can use this function to record fine 16th notes
on top without erasing the original data. Press
[F5]/[F7] to cancel the Over Dubbing recording.
[F7]: RPLC (Replace)
Sets Replace recording to “on” or “off.” Press [F7],
RPLC is highlighted and the Replace recording is
turned on. When recording in real time, you can
record over previously recorded data (erasing and
replacing the original data with the new data as
you record). Press [F5]/[F6] to cancel the Replace
recording.
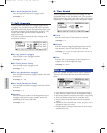
Real Time Recording
Real Time recording is just like a multi-track recorder
where you record as you play on each track (Tr1-4).
There are two types of recording methods, Over
Dubbing (recording over original data but not erasing
it) and Replace (erasing and replacing the original
data).
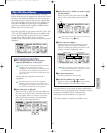
1In the Arpeggio Mode screen, press [REC] to enter
Arpeggio Record mode (stand-by record status).
Before displaying the Arpeggio Mode screen, you are
required to select a user arpeggio number for recording.
2In the ARP display, set the necessary settings for
recording, such as the length, time signature and
tempo, as well as the click.
3Set the beginning measure number for recording
with the Meas parameter.
4Select the track (Tr1-4) for recording with the Track
parameter.
5Select one of the following recording modes: [F6]
(Over Dubbing) or [F7] (Replace).
6Press [PLAY] and recording will begin after a two
measure countdown. Record something by playing
the keyboard. The [PLAY] green light will blink in
sync with the metronome click.
During the two measure countdown, Meas (measure)
will display the countdown from –2 to -1.
7Press [STOP] to stop recording, the EX automatically
returns to the Arpeggio Mode screen.
After you have finished recording, there are various edit
functions that let you correct misplayed notes or the
timing in the Arpeggio Edit mode (page 247) and the
Arpeggio Job mode (page 249).
Step Recording
In Step recording the performance data (note length,
pitch, and velocity) is programmed one note at a time.
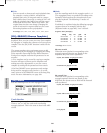
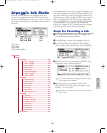
Step Recording Screen
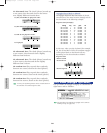
When in Step Recording (after you press [PLAY]), the
following screen will be displayed.
All of these functions are the same as those explained
in STEP recording of the Song Record mode. For more
information about each parameter and the ways to
input notes, see page 198.
Arpeggio/E/qx 5/21/98 11:50 AM Page 246