


Keyboard Stand Assembly
H01 Owner’s Manual
ENGLISH
22
Keyboard Stand Assembly
CAUTION
• Be careful not to confuse parts, and be sure to install all parts in the correct direction. Please assemble the unit in the appropri-
ate sequence.
• Assembly should be carried out by at least two persons.
• Be sure to use the included screws only, and insert screws of the correct size in the correct hole locations. Do not use any other
screws. Use of incorrect screws can cause damage or malfunction of the product.
• Be sure to tighten all screws upon completing assembly of each unit.
•To disassemble, reverse the assembly sequence.
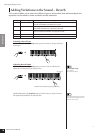
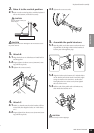
1. Place A on top of the pads.
1-1Locate two pads (F) so that they will be posi-
tioned about 30 cm inside from the left and right
edges of A.
1-2Place A on top of the pads.
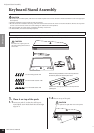
Have a Phillips-head (+) screwdriver ready.
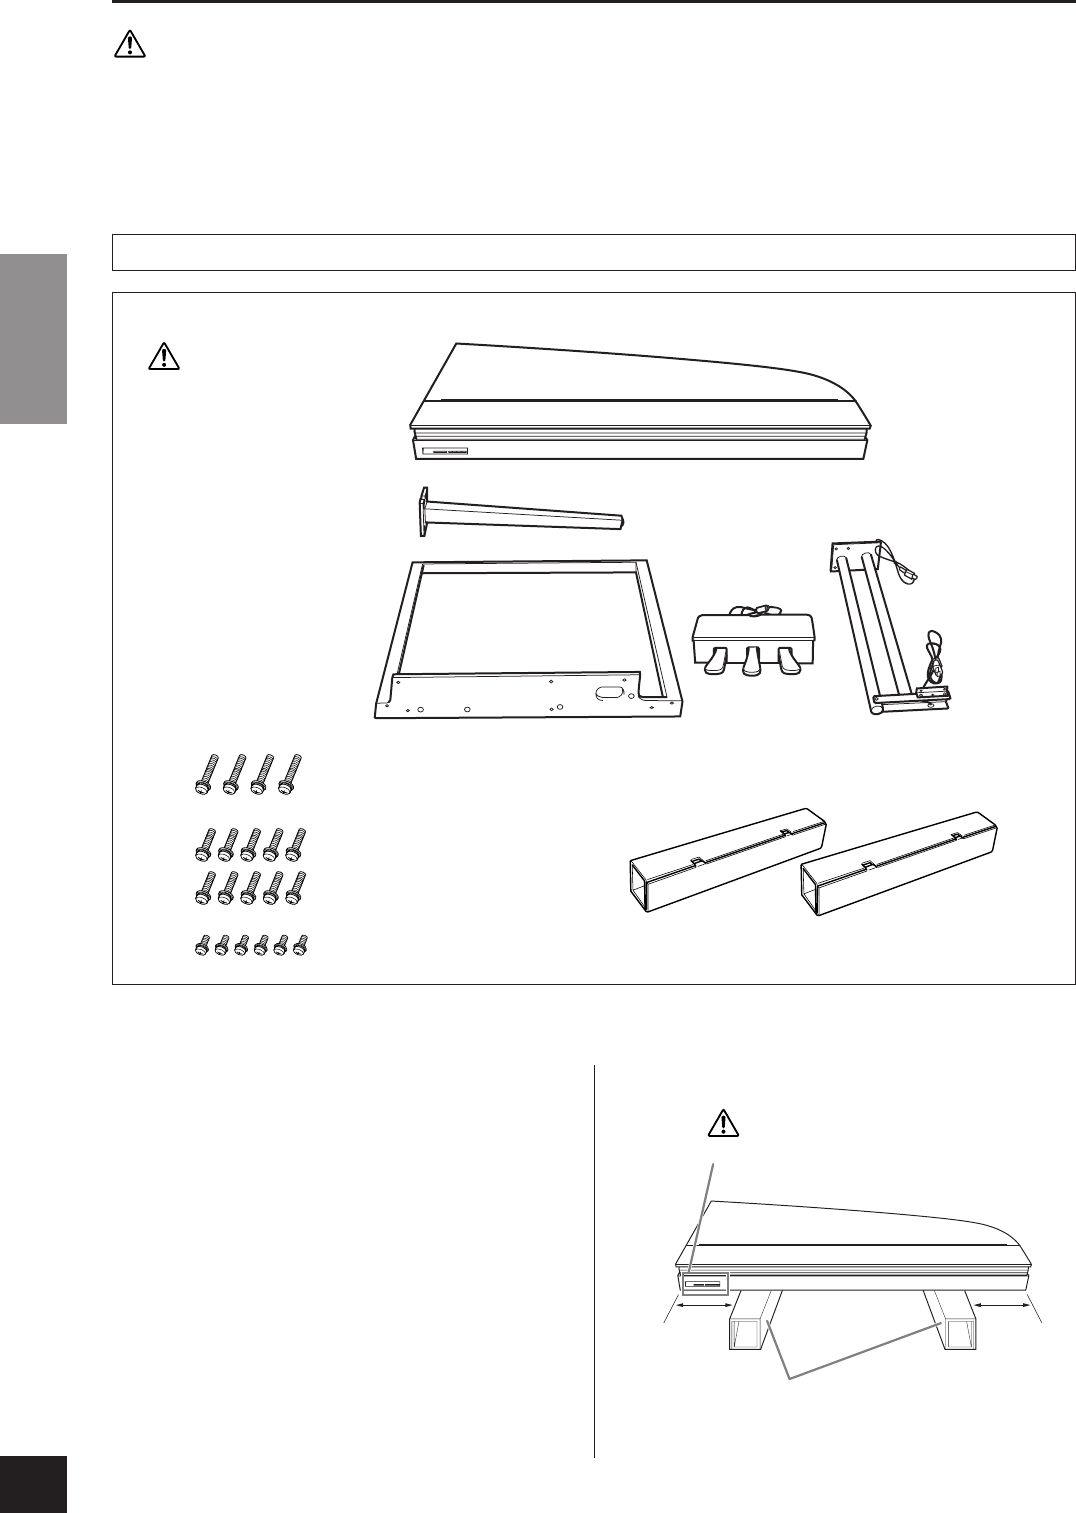
Remove all parts from the box. Confirm that all parts shown in the illustration are provided.
C
D
E
C
D
E
A
B
F
6 x 30 mm long screws x 4
Before starting installation, remove the vinyl ties that
bundle the pedal cord and AC power cord.
6 x 20 mm short screws x 10
4 x 6 mm small screws x 6
Remove two rectangle pads (800 x 130 mm) from the
packing box.
CAUTION
Be careful not to pinch your fin-
gers when setting the instrument
on the floor.
A
CAUTION
Do not position the pad under the control panel.
pads
30 cm 30 cm
20