


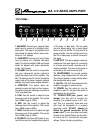
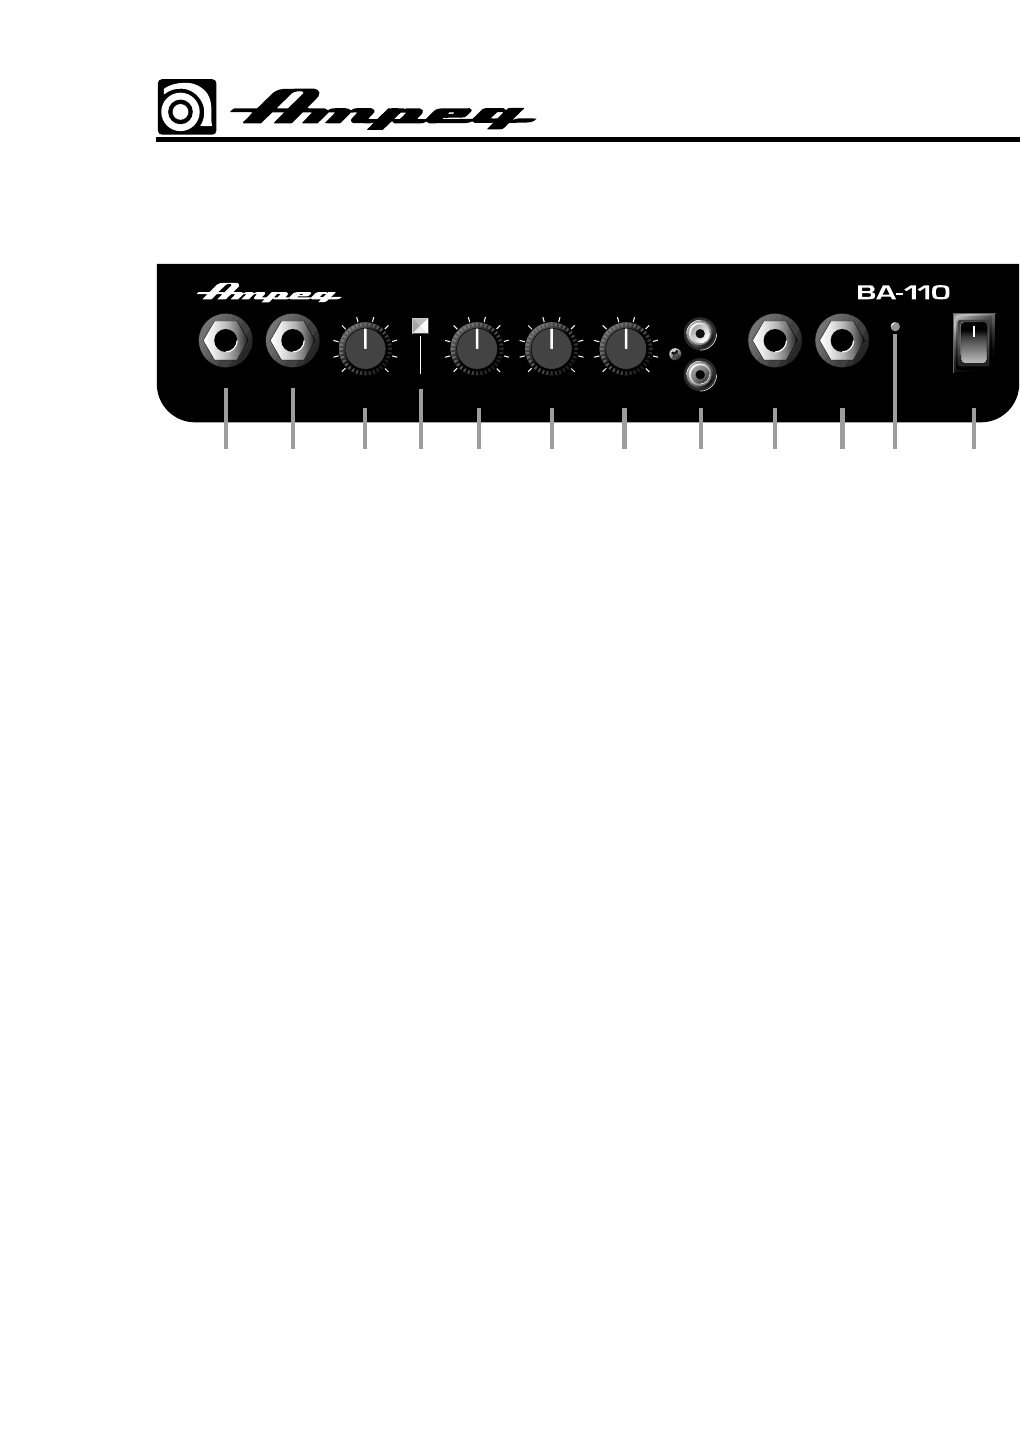
TOP PANEL:
BA-110 BASS AMPLIFIER
0dB
0dB
-15dB
-15dB
Input
Contour
Contour
Headphones
Headphones
Line Out
Line Out
Power
CD Input
CD Input
On
On
Volume Low Mid High
010
5
4
3
2
1
9
8
7
6
010
5
4
3
2
1
9
8
7
6
010
5
4
3
2
1
9
8
7
6
010
5
4
3
2
1
9
8
7
6
1 2 3 4 5 6 7 8 9 10 1211
1. 0dB INPUT: Connect your “passive” bass
guitar here by means of a shielded instru-
ment cable. This input is not padded and is
best suited for basses without active elec-
tronics or “hot” pickups.
2. -15dB INPUT: Connect your “active” bass
here by means of a shielded instrument
cable. This input is padded 15dB and is best
suited for basses with active electronics
and/or “hot” pickups.
3. VOLUME: Use this control in conjunction
with your instrument’s volume controls to
adjust the output level of the amplifier. The
BA-110 employs a built in limiter to keep the
output clean at full power, however, extreme
settings may cause some audible distortion.
4. CONTOUR: This switch, when de-
pressed, boosts the high and low frequen-
cies while cutting the midrange to provide a
“funk” slap-bass tone.
5. LOW: Use this control to adjust the low
frequency level of the amplifier. This control
has a 28dB range at 100Hz.
6. MID: Use this control to adjust the
midrange level of the amplifier. This control
has a 26dB range at 600Hz.
7. HIGH: Use this control to adjust the high
frequency level of the amplifier. This control
has a 35dB range at 10kHz.
8. CD INPUT: Use these RCA jacks to con-
nect the line level (or headphones) output of
a CD player or tape deck. The two jacks
sum the stereo signal into a mono signal
which is fed into the BA-110 just prior to its
power amplifier. Use the volume control on
the CD or tape player to control the level of
this signal.
9. LINE OUT: This jack supplies a post-eq,
unbalanced line level signal for connecting
to a house sound board, recording unit or
external amplifier. The level of this signal is
controlled by the Volume control (#3).
10. HEADPHONES: For private practice
sessions, plug headphones into this jack.
The internal speaker is disconnected when
the headphones jack is used.
11. ON LED: This LED illuminates when the
amplifier is plugged in and turned on.
12. POWER: Use this switch to turn the
amplifier on and off – the top of the switch is
depressed in the on position.
13. POWER CORD (rear panel, not
shown): Use this cord to connect the
amplifier to a suitable source of A.C. volt-
age. This is a grounded, three-wire cord
and must be connected to a properly
grounded outlet. DO NOT attempt to
defeat the ground connection of the
power cord! If your amp was purchased
outside of the United States, see the stick-
er next to the A.C. connector for its power
ratings. Follow the above guidelines.