


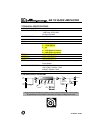
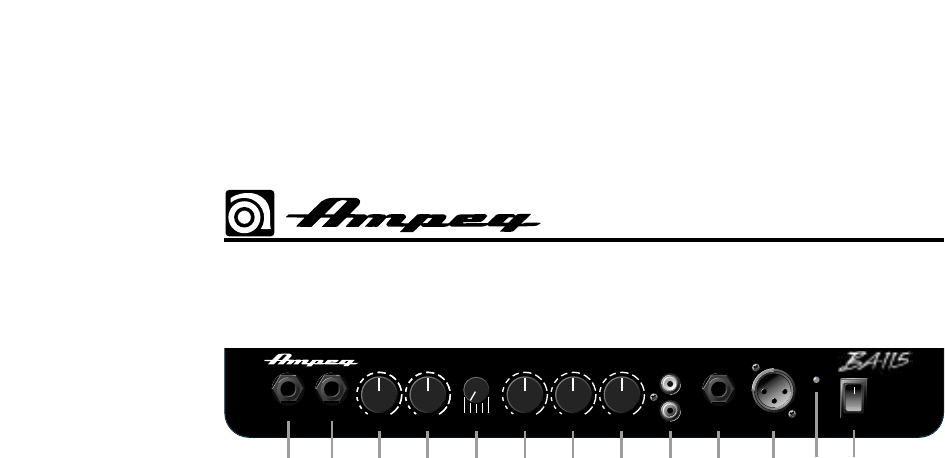
TOP PANEL:
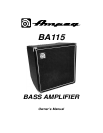
BA115 BASS AMPLIFIER
HEADPHONES LINE OUT
POWER
CD INPUT
GAIN MASTER STYLE TREBLE ULTRA MID BASS
12345
0dB -15dB
INPUT
ON
1 2
3 4 5 6 7 8 9 10 11
1312
1. 0dB INPUT: Connect your “passive”
bass guitar here using a shielded instru-
ment cable. This input is not padded and
is best suited for basses without active
electronics or “hot” pickups.
2. -15dB INPUT: Connect your “active”
bass here using a shielded instrument
cable. This input is padded 15dB and is
best suited for basses with active elec-
tronics and/or “hot” pickups.
3. GAIN: Use this control in conjunction
with your instrument’s volume controls to
adjust the level of the signal sent to the
preamp.
4. MASTER: Use this control to adjust
the overall listening level of the amplifier.
This control is also used to adjust the sig-
nal level at the Line Out jack (#11).
5. STYLE: This five-position switch is
used to control the tone of the amplifier.
Please refer to the TECHNICAL SPECI-
FICATIONS on the back page of this
manual for an explanation of the function
of each position. Experiment with the
Style and other eq controls (#6,7,8) for
the results which suit you best.
6. TREBLE: This control is used in con-
junction with the style control to adjust
the high frequency level of the amplifier.
7. ULTRA MID: This control is used in
conjunction with the style control to
adjust the midrange level of the amplifier.
8. BASS: This control is used in con-
junction with the style control to adjust
the low frequency level of the amplifier.
9. CD INPUT: These jacks (RCA type)
are used to connect the line level (or
headphones) output of a CD player or
tape deck. The inputs to these jacks are
summed into a mono signal which is fed
into the BA115 just prior to its power
amplifier. Use the volume control on the
CD or tape player to control the output
level.
10. HEADPHONES: The internal speak-
er is disconnected when the head-
phones jack is used.
11. LINE OUT: This jack supplies a post-
eq, balanced line level signal for con-
necting to a house sound board, record-
ing unit or external amplifier. The ampli-
tude of this signal is adjusted by the
Master control (#4).
12. ON LED: This LED is illuminated
when the amplifier is plugged in and
turned on.
13. POWER: This switch is used to turn
the amplifier on or off.