


72
A MESSAGE FROM THE OWNER
Thank you for choosing an Anchor Audio portable sound system. Our products incorporate state-of-the-art design and the finest
quality of materials and workmanship. We’re proud of our products and appreciate the confidence which you have shown by select-
ing an Anchor system.
I hope you’ll take a few minutes to review this manual. We’ve incorporated several unique features into our products, and your
knowledge of how to use them will enhance the performance and your enjoyment of the system.
David Jacobs, President
on behalf of all Anchor Employees
GETTING STARTED
Please check your new unit carefully for any damage which may have occurred during shipment. Each Anchor product is carefully
inspected at the factory and packed in specially designed boxes for safe transport.
Notify the freight carrier immediately of any damage to the shipping box or product. Repack the unit in the original box and wait
for inspection by the carrier’s claim agent. Notify your dealer of the pending freight claim.
NOTE: All damage claims must be made with freight carrier!
RETURNING SYSTEMS FOR SERVICE OR REPAIR
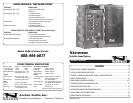
For service or repair, please contact the dealer you purchased your system from or Anchor Audio Customer Service at (888) 444-6077
to obtain a RA (Return Authorization) number. All shipments to Anchor Audio must include an RA number and must be shipped
prepaid. C.O.D. shipments will be refused and returned at your expense.
IMPORTANT: Save the shipping box & packing materials,
they were specially designed to ship your unit!
WARRANTY REGISTRATION
Visit our website at www.anchoraudio.com and select “Warranty Registration”. Complete the online form to activate the six-year
limited warranty on your Xtreme sound system and two-year limited warranty for the CD player and microphones.
NOTE: The line-output feature can also be used to send the signal to a
sound system in a different room or a separate recording device.
USING YOUR WIRELESS MICROPHONES
After you have set the transmitter channel (see above) you are ready to use your wireless microphone:
CAUTION: Harmful feedback may occur when walking in front of a sound system or
speaker with a wireless microphone. Always point microphone away from speakers!
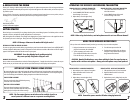
1. Body-pack transmitter users must insert the mic
plug into the transmitter jack marked MIC
2. Turn the transmitter power switch to ON
(The red LED will flash when the mic is turned on.
If the red LED stays on, the battery is low)
3. Turn the Xtreme power switch to ON
4. The RX indicators will light (only one indicator
will light at a time) when the wireless signal is
being transmitted and received
OPERATING THE WIRELESS MICROPHONE/TRANSMITTER
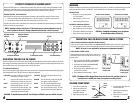
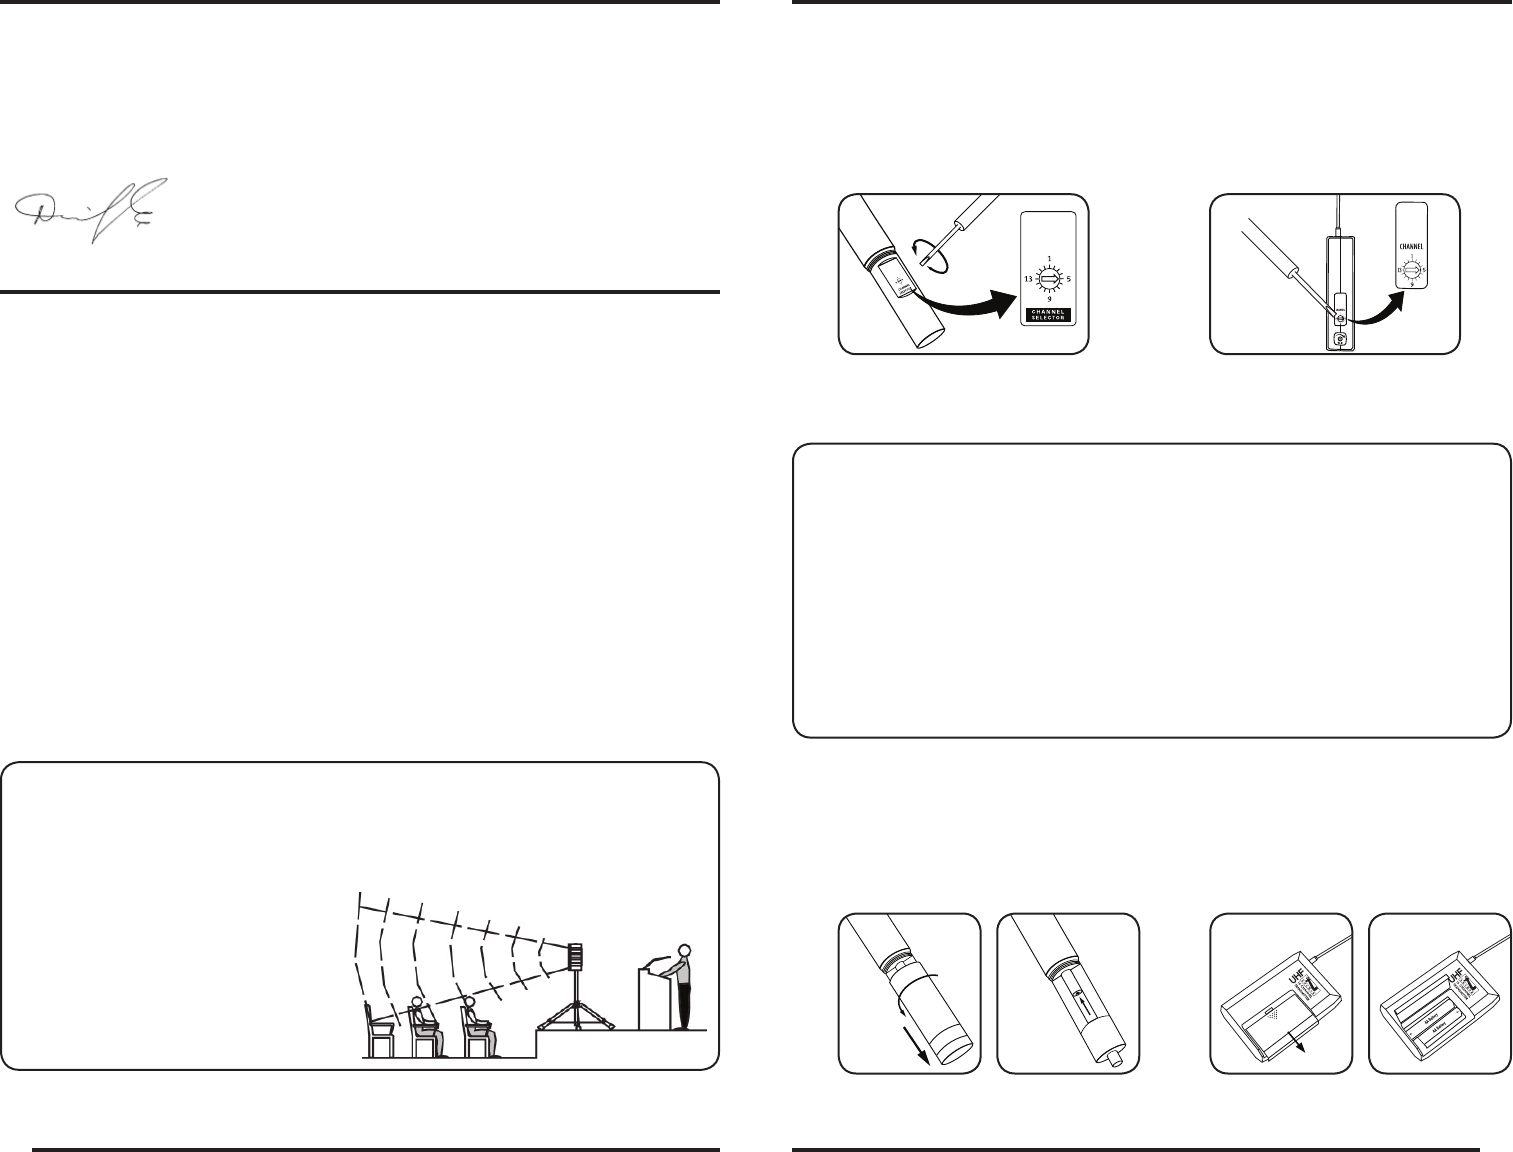
CHANNEL SELECTION - HANDHELD TRANSMITTER
1. Unscrew battery cover on bottom of microphone
2. Set the CHANNEL SELECTOR dial to match the
channel setting of your receiver
3. Replace battery cover and tighten firmly
CHANNEL SELECTION - BODY-PACK TRANSMITTER
1. The channel selection dial is located on the
side of the transmitter
2. Set the CHANNEL selection dial to match
the channel setting of the receiver
NOTE: When using dual wireless, each microphone must be set to a different channel!
REPLACE BATTERY - HANDHELD TRANSMITTER
1. Unscrew battery cover on bottom of microphone
2. Replace old batteries with 2 fresh size ‘AA’
alkaline batteries
3. Replace battery cover and tighten firmly
REPLACE BATTERY - BODY-PACK TRANSMITTER
1. Slide open battery cover on front of transmitter
2. Replace old batteries with 2 fresh size ‘AA’
alkaline batteries
3. Replace battery cover by sliding firmly into place
NOTE: Transmitter power must be OFF when changing batteries!
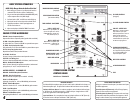
SETTING UP YOUR XTREME SOUND SYSTEM
We recommend placing your sound system between the audience and the presenter, facing the audience and raised above their
heads using a speaker stand or table. This benefits listeners in the rear of the crowd, minimizes the risk of overpowering those
in the front and helps prevent feedback by keeping microphone users behind the sound system.
SINGLE SYSTEM PLACEMENT
Place your unit along the least trafficked aisle pointing
towards the center of the audience.
MULTIPLE SYSTEM PLACEMENT
Place units along aisles pointing just off the audience
center line, over the crowds head. With the sound system
placed properly it should provide sufficient coverage.