


Page 2 of 5
Balanced stereo Line output can be
congured for many recording and
live applications
Adjustable auto-chromatic tuner
plus eective global congurations
and equalization easily adopts the
V-AMP 3 to any situation outside
your home studio
MIDI implementation includes
program changes, control changes
and SysEx, allowing complete MIDI
remote control or automation with
your preferred DAW
High-quality components and
exceptionally rugged construction
ensure long life
Conceived and designed by
BEHRINGER Germany
Top tone—in full eect
The V-AMP 3 gives you anger, chorus,
compression, delay and 12 other beautiful
digital eects to apply to your sound.
Adjust the eect’s level in the mix via the
EFFECTS dial. To adjust eect parameters,
you can rhythmically press the TAP
button to alter delay times or LFO speeds,
or hold down the TAP button and twist
the EFFECTS knob to access e.g. feedback
or depth. By using a MIDI pedal, such as
the BEHRINGER FCB1010, you can access
an additional Wah Wah eect. You can
adjust the lter characteristic by entering
EDIT mode, selecting the DRIVE menu and
turning the EFFECTS knob while holding
the TAP button.
Presenting the presets
All of these elements have been
combined into 125 dierent presets
divided into 25 banks, accessible through
the BANK UP/BANK DOWN buttons.
Within each bank, you can press buttons
A through E to explore its dierent
presets. You can also create and save your
own presets. Start by selecting a preset,
then making any changes you wish:
amp, EQ, eect, etc. The preset LED will
begin to ash, indicating that the V-AMP
3 is ready to save your settings. To do this,
hold the preset button down for about
two seconds. Once the LED stops ashing,
you have saved the modied preset.
On top of all this, the V-AMP 3 also
features a built-in tuner and noise gate.
In essence, it’s a Swiss Army Knife for the
home recording enthusiast or gigging
guitarist who can’t seem to settle
on one amp.
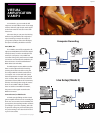
Stunning in the studio
The V-AMP 3 features several
congurations that make it an
invaluable asset in the studio. Access the
conguration menu by pressing the
B and D buttons at the same time.
Then use BANK UP and BANK DOWN
to select a conguration.
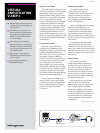
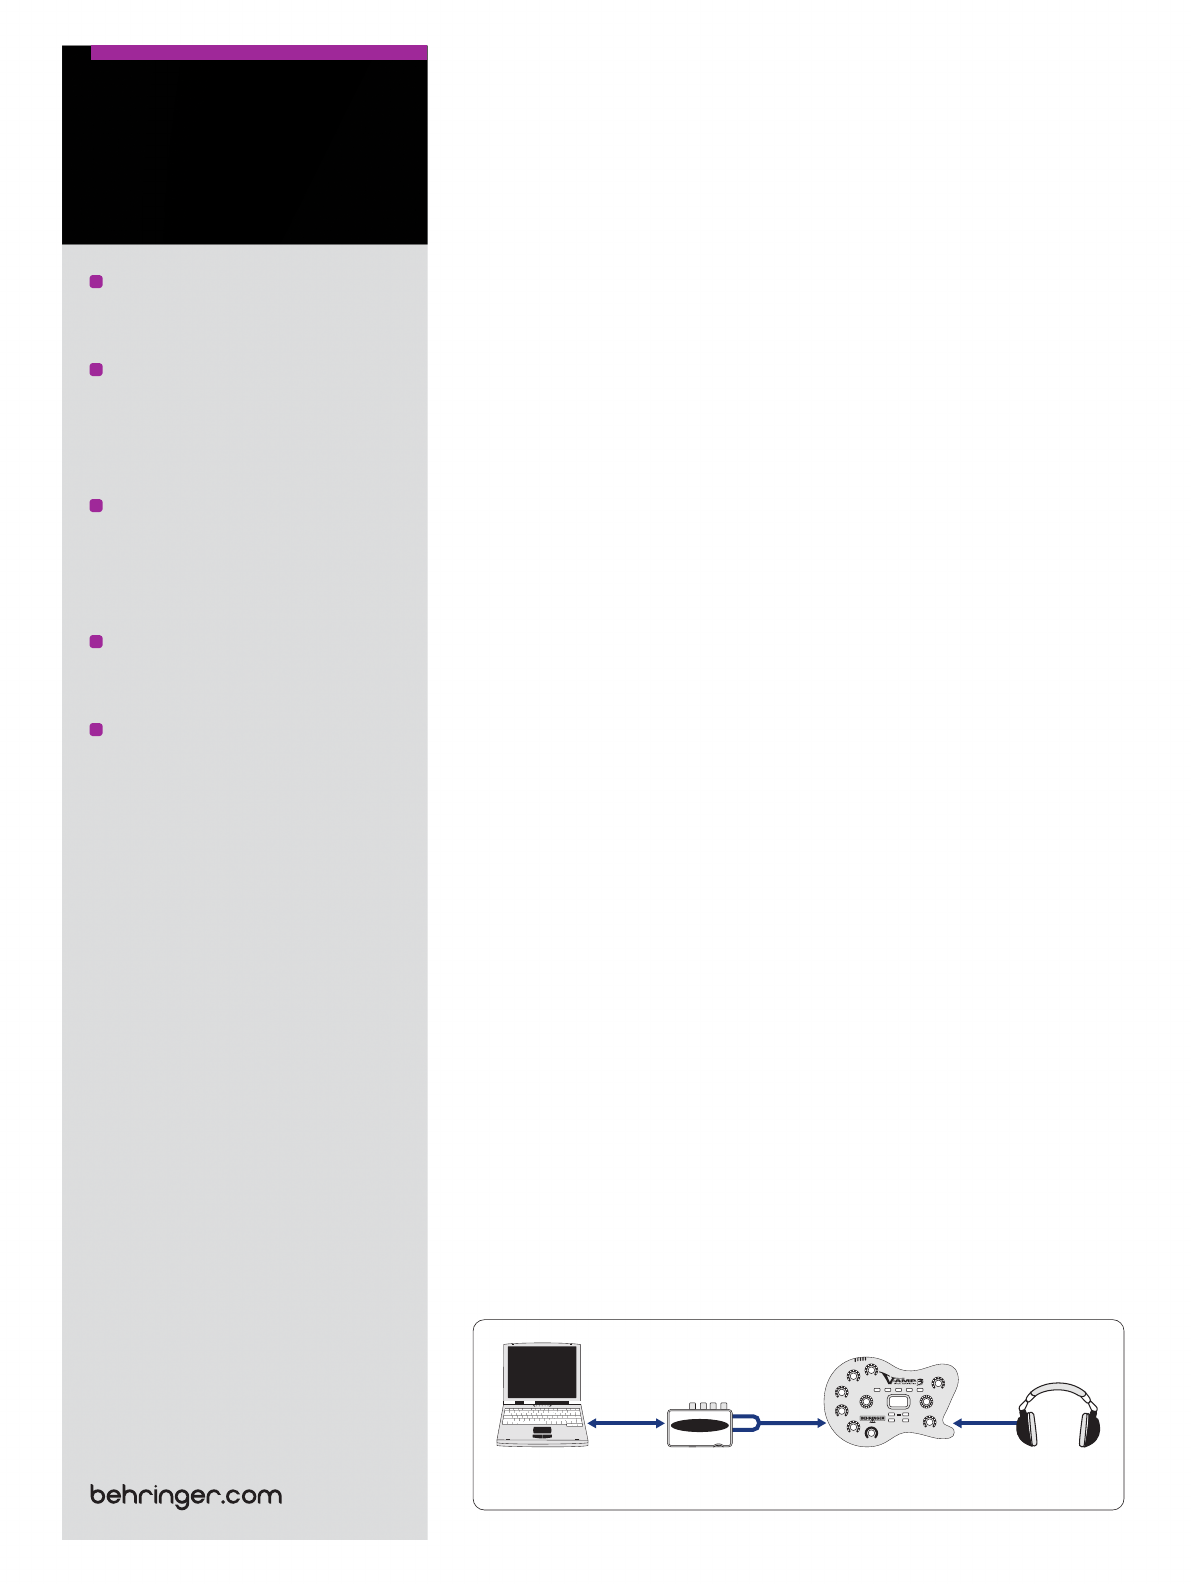
When using headphones, the V-AMP3
will switch into Studio Mode 1 (S1).
This stereo mode works well for both
monitoring and recording with eects,
amp and speaker modeling. It doesn’t
apply the additional three-band EQ to the
signal, but most recording programs have
their own EQ.
In Studio Mode 2 (S2), the V-AMP 3
sends a signal with amp and speaker
simulation, but only the right output has
eects. You can either record both left and
right outputs to separate tracks, or record
the “dry” left output while monitoring the
right output.
Stellar on stage
The V-AMP 3 has three live
congurations. When performing live
with this device, you can either run it
to an amp on stage, run directly to the
mixing board, or both. Live Mode 1 is
the best choice for running the outputs
directly to the mixer, because it applies
amp and speaker simulation, eects and
an additional 3-band EQ.
Use Live Mode 2 to run the V-AMP
3 into the eects return inputs of 2
dierent guitar amps. This conguration
does not feature speaker simulation,
allowing the amplier’s natural speaker
sound to go unaltered. In this scenario,
the amps would be mic’d on stage to get
the sound to the house speakers, and
having a dedicated monitor would be
less important.
Continued on next page
HPS3000V-AMP3
UCA222
USB Audio Interface
Laptop
VIRTUAL
AMPLIFICATION
V-AMP 3