


CME35 4 Cu Ft. Cement Mixer Assembly & Operating Instructions Manual
5
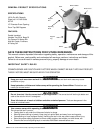
ASSEMBLY WARNING! - IT IS RECOMMENDED THAT TWO PERSONS ASSIST IN ASSEMBLY
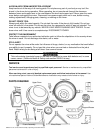
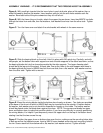
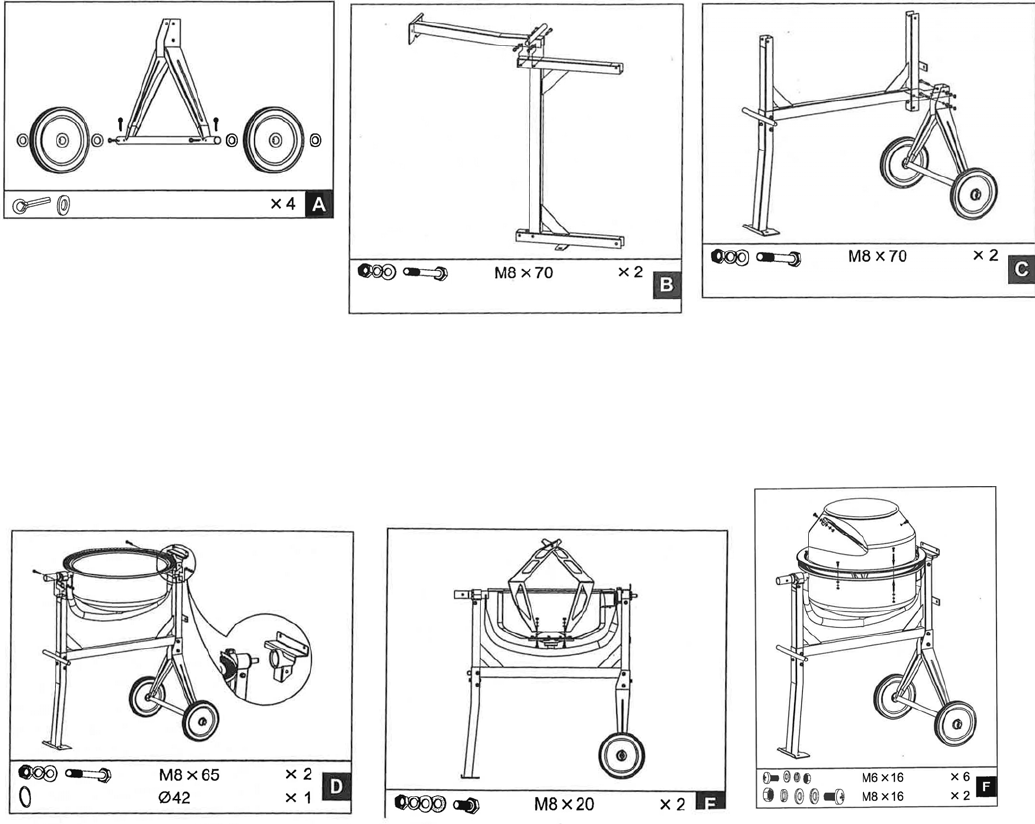
Figure A. With a split pin inserted into the inner holes in each stub axle, place a flat washer, then a
wheel followed by another flat washer. Insert another split pin into the axle holes outside each flat
washer. Bend each side of the pins outward so they do not fall out.
Figure B. With the frame lying on its side, attach the support leg as shown. Insert two M8X70 hex bolts
through the holes from one side, then flat washers, lock washers and nuts from the other side. Tighten
down.
Figure C. Turn the frame over and attach the axle bracket with wheels in the same manner.
Figure D. Slide the bearing block on the shaft. Hold it in place with 042 spiral ring. Carefully, and with
two people, set the bottom drum with support arm onto the side supports of the stand as shown, so that
the bearing blocks slot into the channels provided by the side supports. The larger diameter shaft
should be at the leg end of the stand. At each side, line up the holes in the side support with those in
the bearing block and insert a M8X65 hex bolt from one side, then a flat washer, lock washer and nut
from the other side. Tighten with a wrench.
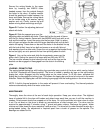
THE MIXING BLADES
Figure E. Mount the mixing blades inside the bottom drum loosely as shown - Two holes are provided
at the base of the drum into which a M8X20 bolt may be inserted from the outside. A leather washer,
flat washer, lock washer and a nut should be threaded on loosely on the inside. The leather washer
should be placed under the blade down against the drum. NOTE: Two arrows are labeled on upper
drum and bottom drum to make their position relation. If you have any difficulty in correctly positioning
the mixing blades, it is helpful if you temporarily mount the upper drum on the top of the bottom drum,
rotating it so that the two arrows line up.
Figure F. Position the upper drum on bottom drum over the rim, making sure the mounting holes align
in both as well as the labeled arrows. Insert a M6X16 cross headed screw into each mounting holes in
the rim. Secure each bolt from below with a flat washer, lock washer and nut. Tighten all bolts.