


English
Assembling the Stand
E-29
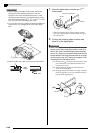
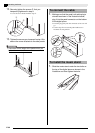
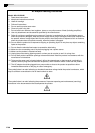
3.
Keeping side panel A tilted at an angle, align
the side panel with side of the digital piano.
IMPORTANT!
• When performing step (3-1) above, make sure that
you position side panel
A
so its top edge reaches
the bottom of the digital piano top panel. If it does
not, you will not be able to stand side panel
A
straight up in step (3-2).
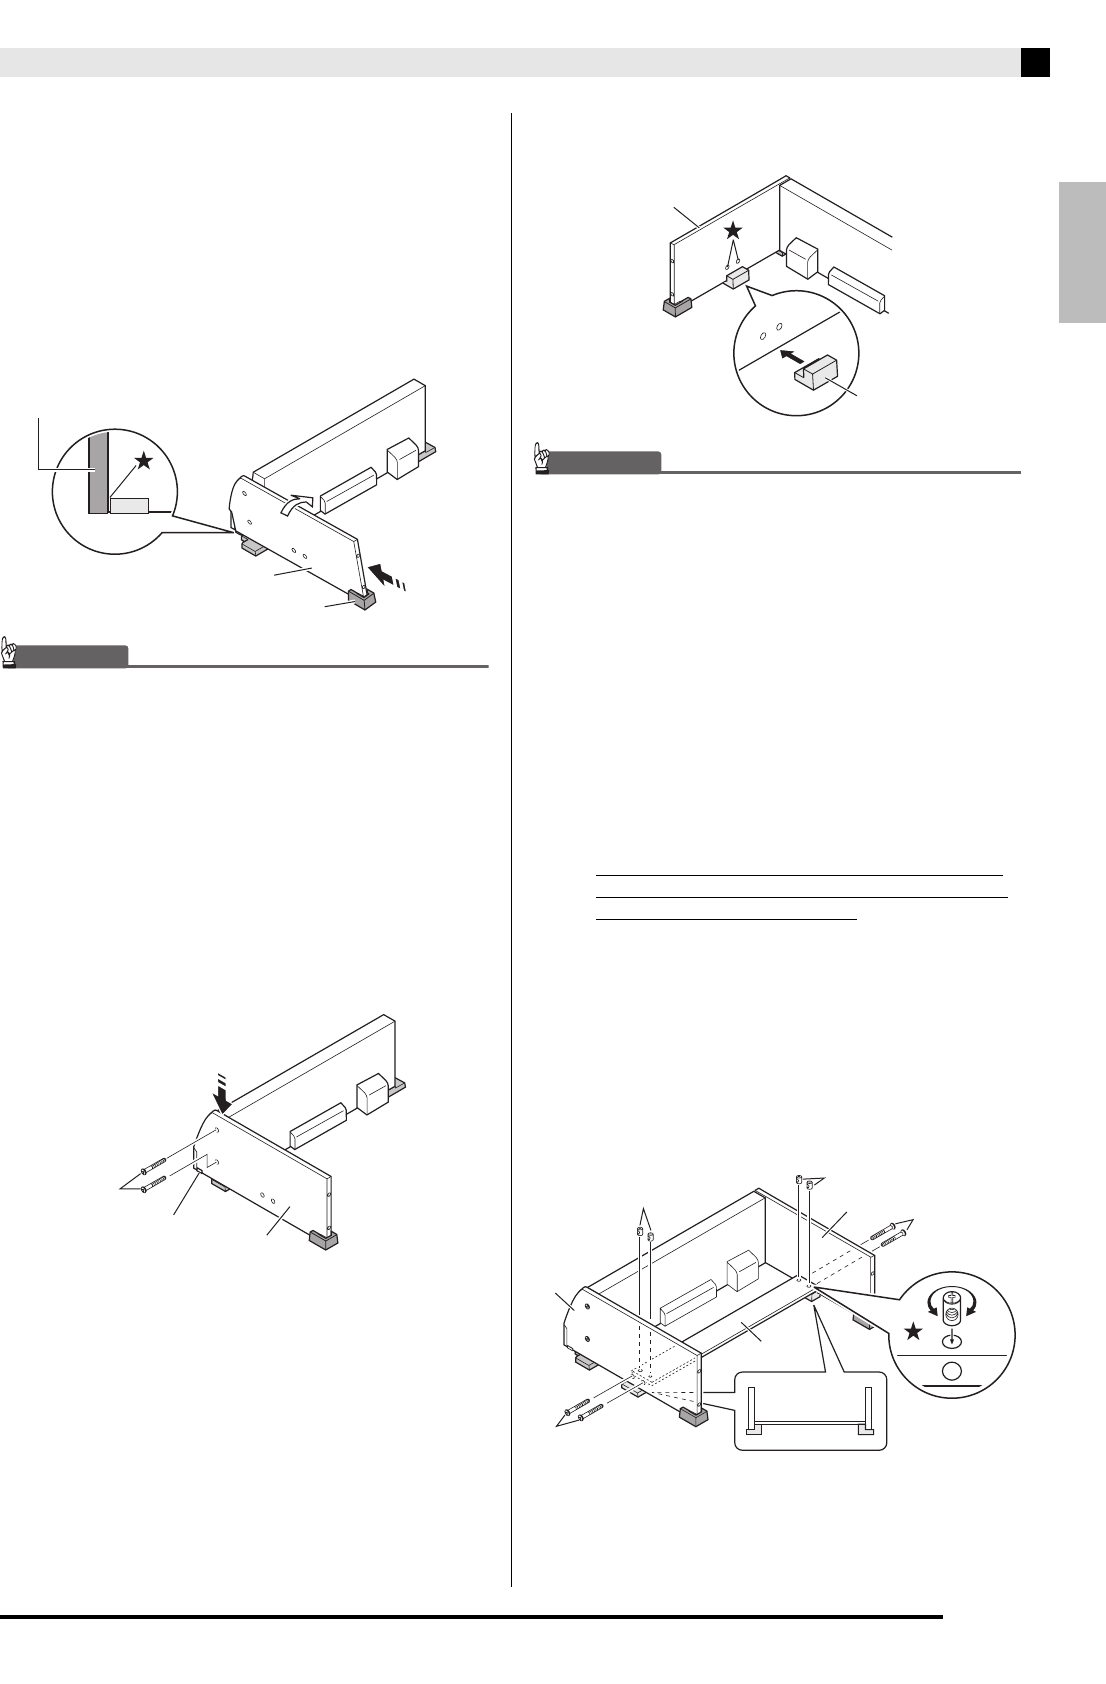
4.
Perform the following steps to secure the side
panel to the digital piano.
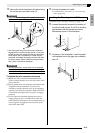
5.
Insert foam piece L
-(
c
)
under side panel A
as shown in the illustration.
IMPORTANT!
• The foam piece should be located directly under the
two screw holes (
) in the side panel.
6.
Repeat steps 2 through 5 to attach side panel
B to the other side of the digital piano.
7.
Attach back panel C to side panels A and B.
Use the four screws
D and four joint
connectors
K.
• Insert the four joint connectors at the four locations
on back panel
C. The holes in the joint connectors
should be aligned with the holes in the back panel.
•Lift up back panel
C so its screw holes align with the
screw holes in the side panels, and then tighten the
screws
D.
• If you have trouble inserting the screws
D into the
joint connector K holes, use a screwdriver to rotate
the joint connector (
in Figure).
*CAUTION
• Never try to force the screws! Forcing the screws D
to turn while the joint connector K holes are not
aligned correctly can strip the screw threads.
• Partially tighten the screws on one side of the Back
panel
C
and then fully tighten the screws on the
other side.
• Next, fully tighten the screws that you partially
tightened.
(3-1) Push side panel
A
in the direction indicated by
the black arrow in the illustration to align the side
panel so there is as little space as possible between
its top edge
A
and the bottom of the top panel of
the digital piano (
).
(3-2) After alignment is complete, stand side panel
A
straight up so it is firmly against the side of the
digital piano.
(4-1) Press downwards on side panel
A
to ensure that it
is inserted as far as it will go into the bracket on
the side of the digital piano.
(4-2) Use the
D
screws to secure side panel
A
to the
digital piano.
(3-2)
(3-1)
L
-(b)
A
Top panel of the digital piano
(4-1)
(4-2)
A
D
Bracket
L
-(c)
A
B
A
D
K
C
K
D