


Crown International, Inc.
1718 W. Mishawaka Rd.
Elkhart, IN 46517-9439
TEL: 574-294-8000
FAX: 574-294-8FAX
www.crownaudio.com
© 2008 Crown Audio
®
, Inc. Specifi cations subject
to change without prior notice. Latest information
available at www.crownaudio.com. Crown and
Crown Audio are registered trademarks of Crown
International, Inc.
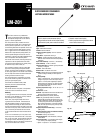
Fig. 3b
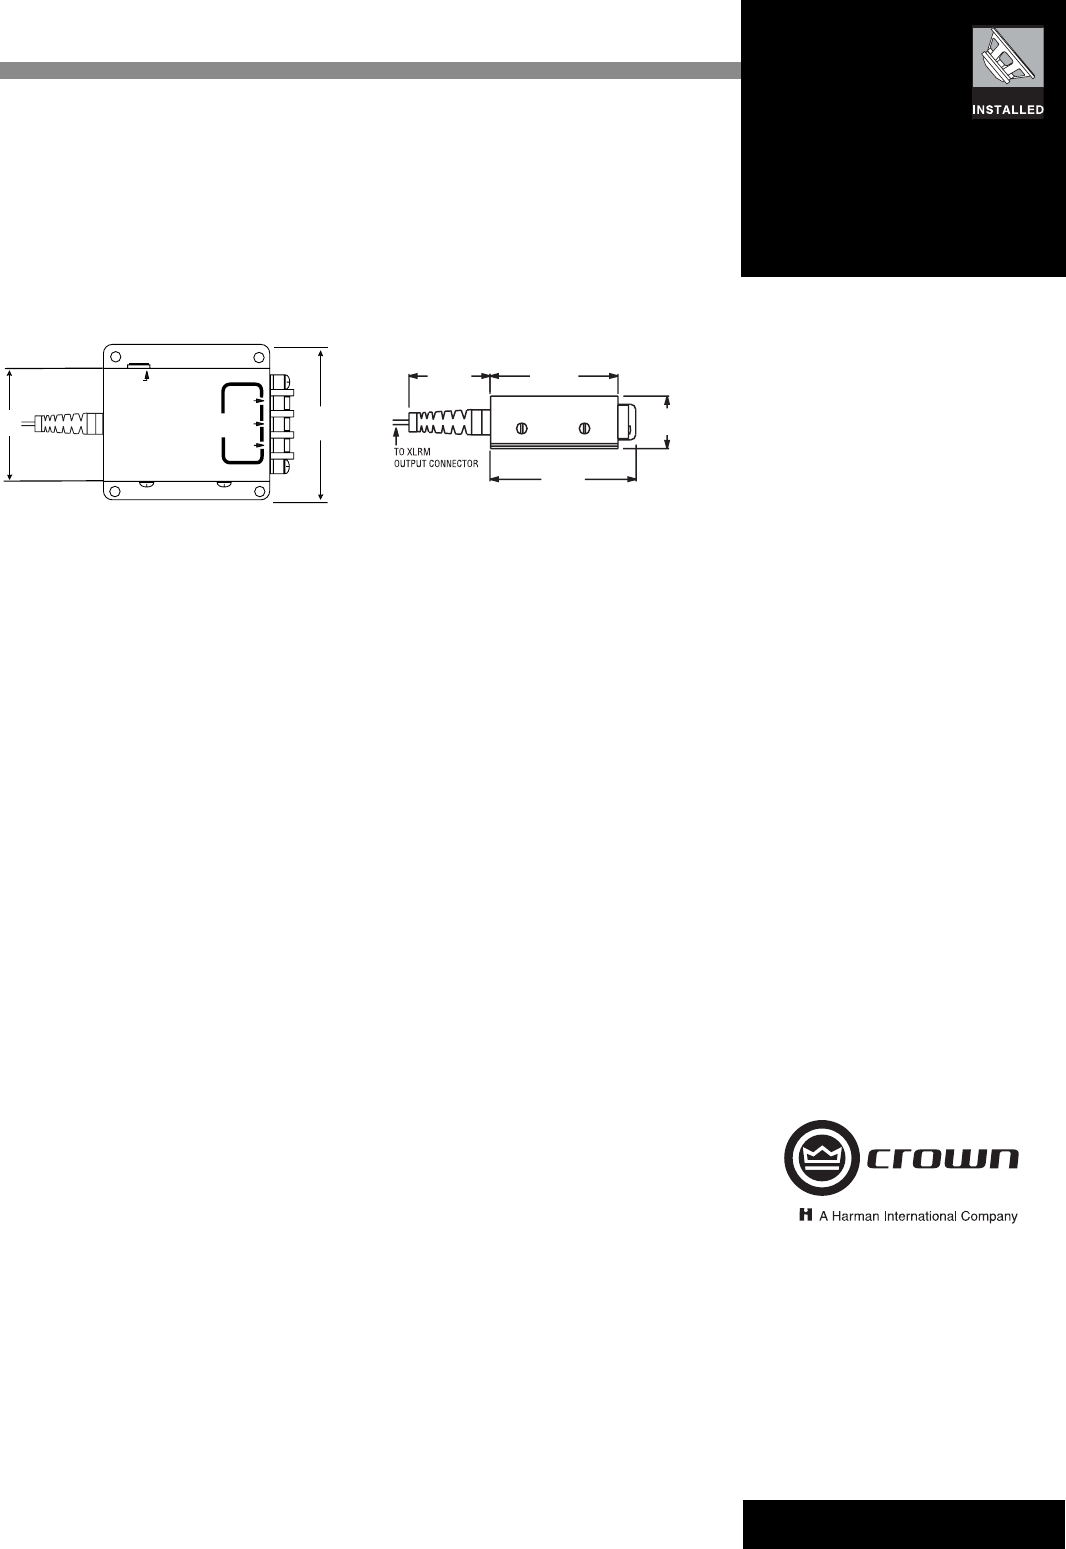
Fig. 3c
7/08 125958-8
LM-201
3. Using the supplied mounting screws and wash-
ers, screw the swivel mount to the lectern top.
Tighten the mounting screws securely. Do not
overtighten. Some slight wobbling of the base is
normal when the microphone is moved.
4. For unlimited microphone rotation, remove the
set screw in the base of the microphone. Caution:
If the boom arm is rotated fully around, it may
twist and damage the microphone cable.
5. Using woodscrews, mount the base plate of the
electronics module inside the lectern or wherever
desired. You can remove the module cover by un-
doing the screws on the side of the module.
Powering: The LM-201 is factory set for use with
12-48 volt phantom power. To change to 12-24
volt DC power, obtain from an electronics retailer
a 12-24V DC power supply with a 1/8-inch phone
plug connector, positive tip. Then follow the in-
structions inside the electronics module cover.
Connections: Connect the LM-201 cable spade
lugs to the electronics module as shown in Figure
3b. Plug the cable going to your mixer into the 3-
pin XLRM output connector (see Figure 3c).
Warning: Do not lubricate the microphone swivel
mount, as it may lose its friction and not stay in
place. Use only mild soap and water to clean the
microphone.
Tension Adjustment: If the swivel becomes loose,
remove the swivel mount from the lectern and look
under the mount. You’ll see a ring with two holes
180 degrees apart. Place the tips of a needlenose
pliers in these holes, and rotate the ring clockwise
until the swivel is suffi ciently tight. Remount the
unit.
Architects’ and Engineers’ Specifi cations
The microphone shall be the Crown model LM-201
or equivalent. The microphone shall be a supercar-
dioid electret-condenser type with shock-mounted
capsule, a built-in shock-mounted swivel mount
and pop-fi lter grille. Permanently attached to the
microphone shall be a 6.5-ft (2-m), two-conductor
shielded cable that connects to a supplied electron-
ics module. The output of the electronics module
shall have an 18-in. (0.5-m) microphone cable
terminated with an XLRM audio connector.
The microphone shall be powered from 12 to
48 volts phantom powering or 12-24 volts DC.
Frequency response shall be uniform from 100 Hz
to 15,000 Hz. Open-circuit sensitivity shall be 6.0
mV/Pa. Impedance shall be 150 ohms balanced.
Maximum SPL capability shall be 120 dB SPL at
3% THD. Equivalent noise shall be 24 dBA typical
(0 dB =.0002 dyne/cm
2
).
The LM201P shall have a black fi nish; the LM-
201B shall have a brown fi nish.
The Crown Model LM-201 microphone is specifi ed.
3.055"
(7.8 cm)
1.950"
(4.95 cm)
1.250"
(3.2 cm)
3.500"
(8.9 cm)
2.00"
(5.1 cm)
2.80"
(7.1 cm)
12-24 VDC
SUPER CARDIOID
MICROPHONE
MIC IN
WHITE
BLACK
SHIELD
Microphone Warranty
Crown professional microphones are guaranteed
against malfunction for a period of three years
from date of original purchase. See enclosed war-
ranty sheet for additional information.
Service
If the unit fails to work, replace or repair any
additional mic cables, or check the power sup-
ply. A Service Return Authorization (SRA) is
required for product being sent to the factory for
service. A SRA can be completed on line at www.
crownaudio.com/support/factserv.htm. If service
is required, return the microphone in its original
packaging to: Crown Factory Service, 1718 West
Mishawaka Road, Elkhart, Indiana 46517-9439.
For further assistance or technical support call
800-342-6939.
At the factory, the electronics module is
matched to your particular microphone’s fre-
quency response. If you determine that just the
microphone or the module needs service, send
both anyway. Then we can match your electron-
ics to your microphone. The serial number is on
both pieces.
125958-8_7-08_LM201_datasheet.in3 3 7/9/2008 4:04:33 PM