


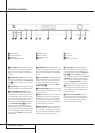
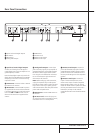

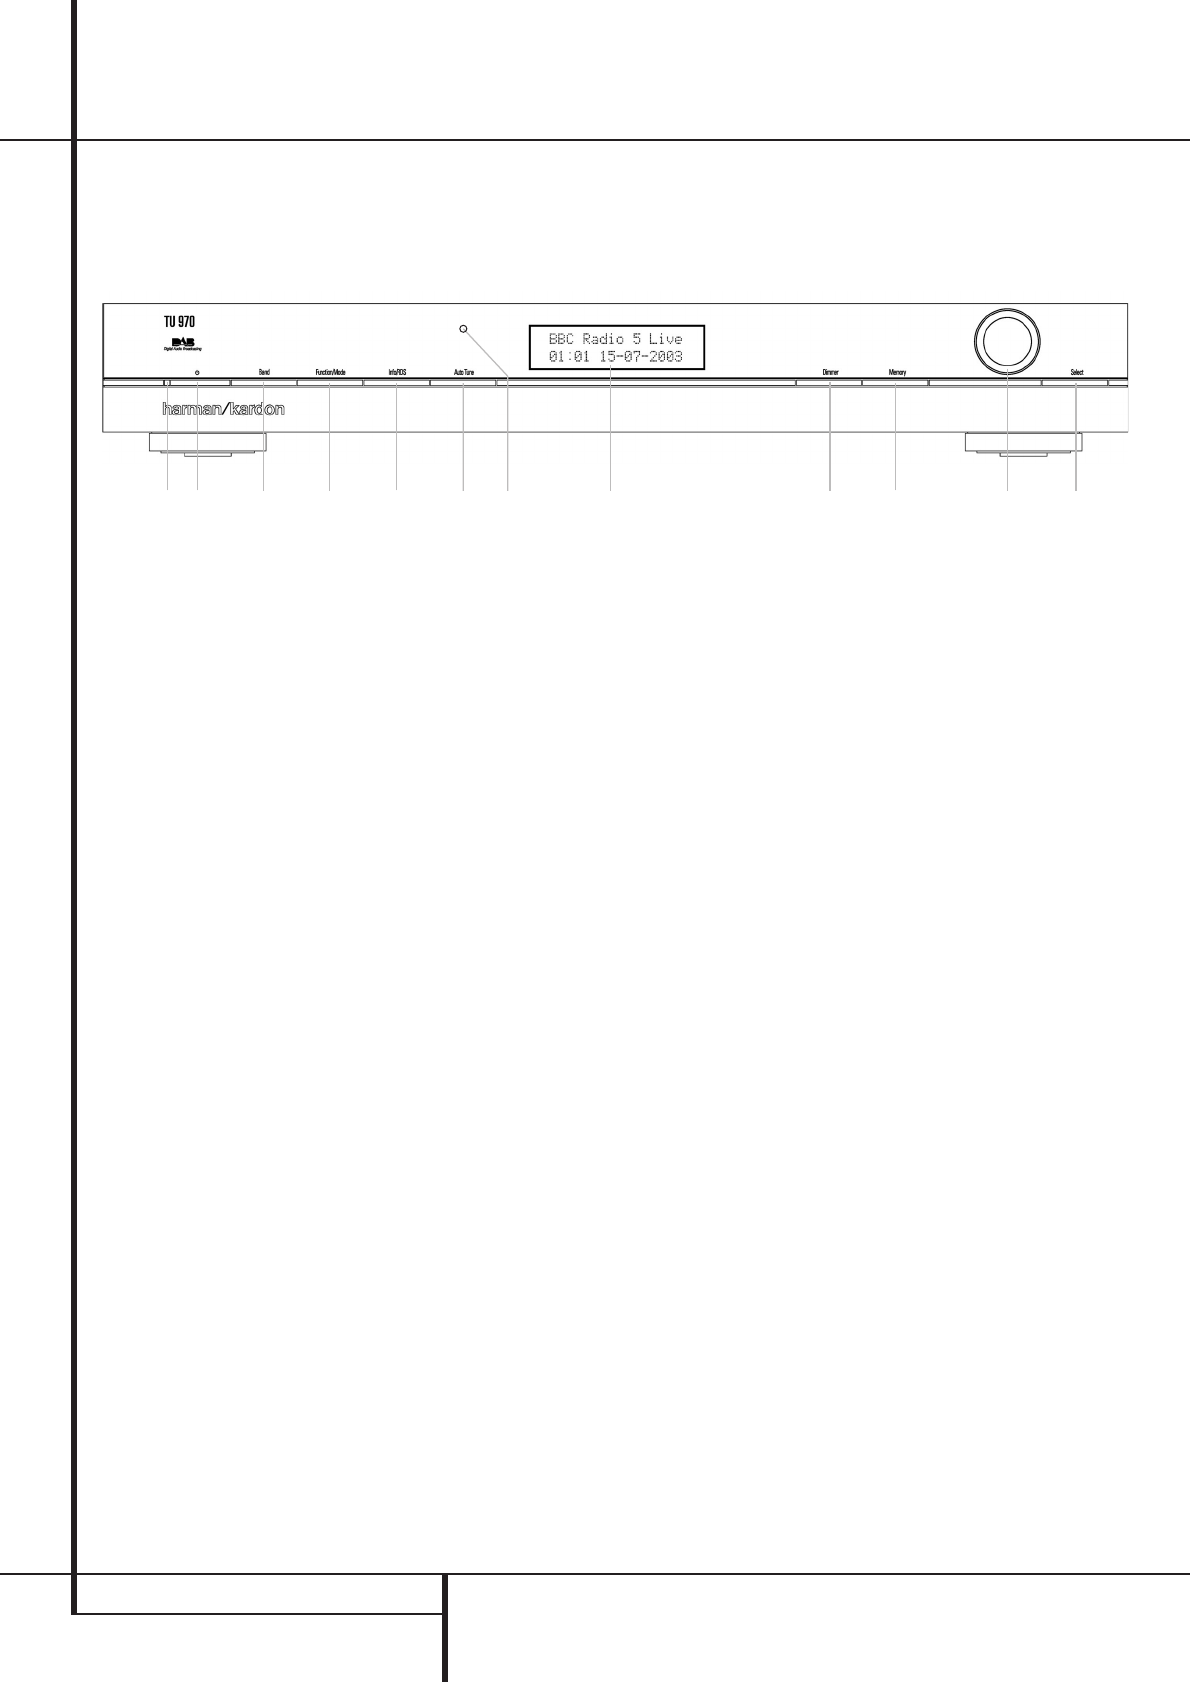
1
Power Indicator: This LED will illuminate in
amber when the unit is in the Standby mode to
signal that the unit is ready to be turned on.
When the unit is in operation, the indicator will
turn blue.
2
System Power Control: Press this button
to turn on the TU 970; press it again to turn the
unit off (to Standby). Note that the Power Indi-
cator
1
next to the switch will turn blue when
the unit is on.
3
Band Selector: Press this button to change
between the DAB, FM and AM frequency bands.
4
Function/FM Mode Selector: In DAB
mode, pressing this button will activate station
order, signal error rate, preset tune, software ver-
sion, Dynamic Rate Control or manual tune fea-
tures. In FM mode, press this button to select the
stereo or mono mode for FM tuning. In the
stereo mode, the word
STEREO
will be shown
in the Information Display
7
, and stereo
reception will be provided when stations are
transmitting stereo signals. In the mono mode,
the left and right signals from stereo broadcasts
will be mixed together and reproduced through
all channels. Select
MONO
for better reception
of weak signals.
5
Info/RDS Button: In DAB mode, pressing
this button will change the content of the lower
display line of the Information Display. In RDS
mode, it will change between the different RDS
options.
6
Auto Tune Button: In DAB mode, press this
button to automatically scan all available local
stations. To scan for all available stations, keep
the button pressed for three seconds, until
AUTOSCAN FULL
is shown in the Infor-
mation Display
7
.
7
Information Display: This dual line display
delivers messages and status indications to help
you operate the tuner.
8
Dimmer: Press this button to dim the front
panel display. The first press of the button will
dim the displays to one-half normal brightness;
the next press will turn back to normal bright-
ness. The display will return to normal brightness
the next time the unit is turned on.
9
Memory Button: Press this button to open
the memory position that stores a preset loca-
tion in the tuner. 10 DAB presets can be stored,
as well as 30 FM and 30 AM presets. (See page
9 for more information on tuner presets.)
)
Control Ring: Turn counterclockwise to
tune lower frequency stations and clockwise to
tune higher frequency stations. When a station
with a strong signal is tuned, the Information
Display
7
will read
TUNED
. Turn again to
tune to the next frequency increment in Manual
Tune Mode, or automatically to the next sta-
tion with a signal strong enough for acceptable
reception in Auto Tune Mode.The ring also
controls the parameters in the different menus.
! Select: In FM or AM mode, press this but-
ton to select Auto Tune, Manual Tune or Preset
Tune. In DAB mode, press this button to select
the displayed station.
@
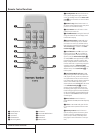
Remote Sensor Window: The sensor
behind this window receives infrared signals
from the remote control.Aim the remote at this
area and do not block or cover it unless an
external remote sensor is installed.
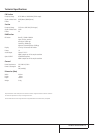
1
3
4
5
6
7
8
2
0
!
@
9
4 FRONT PANEL CONTROLS
Front Panel Controls
1
2
3
4
5
6
7
8
9
)
!
@
Power Indicator
System Power Control
Band selector
Function/FM Mode Selector
Info/RDS Button
Auto Tune Button
Information Display
Dimmer
Memory
Control Ring
Select
Remote Control Sensor