14
To set Trigger Values for buttons or Sustain Pedals:
1. Select a button as described earlier.
2. Press the Edit button.
3. Press the Control Assign key. The LCD screen will read "ASIGN" and display the currently selected control (for example "F10"), and
the current MIDI CC assignment (for example "87").
4. Type 146 using the number keys. This configures the button to operate as a trigger (press/release).
5. Press the Enter key.
6. Press the Edit button.
7. Press the Data 1 key. The LCD screen will display the currently assigned function (for example "NOTE"), the selected control (for
example "F10"), and the current value.
8. Type 10 using the number keys. This specifies which parameter the button will trigger and release. In this example, MIDI CC 10
(Pan).
9. Press the Enter key.
10. Press the Edit button.
11. Press the Data 2 key. The LCD screen will read "MIN" and display the currently selected control (for example "F10"), and the
current value (for example "64").
12. Type 0 using the number keys. This sets the "release" value to zero, and the sound will be panned "hard left" when the button is
released.
13. Press the Enter key.
14. Press the Edit button.
15. Press the Data 3 key. The LCD screen will read "MAX" and display the currently selected control (for example "F10"), and the
current value (for example "87").
16. Type 127 using the number keys. This sets the "press" value to the maximum value, so that the sound is panned hard right when
the button is pressed.
17. Press the Enter key.
It can be useful to transmit two other specific values instead of sending minimum (zero) and maximum (127) values as in the above
example. When assigning a button to control Pan (MIDI CC 10), you can, for example, configure Data 2 to send value 38, and Data 3 to
send value 93, effectively causing pan to switch between the approximate "ten o'clock" and "two o'clock" positions when pressing and
releasing the button.
Assigning MMC Control to Buttons
The transport functions of some hardware recording devices and DAW applications can be controlled remotely via MMC (MIDI Machine
Control) commands. MMC is a specialized transport control protocol that requires a somewhat different configuration method. The following
values need to be specified:
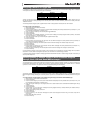
Key Parameter Value
Control Assign MMC Control 149
Channel Assign (example) Device ID 127
Data 2 (example) MMC Function 2 (Play)
To configure a button to send the MMC command "Play":
1. Select an assignable button as described earlier.
2. Press the Edit button.
3. Press the Control Assign key. The LCD screen will read "ASIGN" and display the currently selected control (for example "F10"), and
the current MIDI CC assignment (for example "146").
4. Type 149 using the number keys. This sets the button to send MMC (MIDI Machine Control).
5. Press the Enter key.
6. Press the Edit button.
7. Press the Channel Assign key. The LCD screen will read "CHAN" and display the currently selected control (for example "F10"),
and the current MIDI channel is it assigned to (for example "0").
8. Enter 127 (Poly On) using the number keys. This ensures that all receiving devices will respond to the MMC messages.
9. Press the Enter key.
10. Press the Edit button.
11. Press the Data 2 key. The LCD screen will display the current function for the Data 2 (in this case, "MMC") and the number of the
current MMC command. Refer to the table below.
12. Enter a number from the table below to select the MMC command for the button. This determines which transport function will be
controlled by the button. For example, enter "2" for the Play command.
13. Press the Enter key.
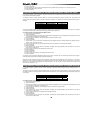
Number MMC Command
01 Stop
02 Play
03 Deferred Play
04 Fast Forward
05 Rewind
06 Record Strobe (Punch In)
07 Record Exit (Punch Out)
08 Record Pause
09 Pause
10 Eject
11 Chase
12 MMC Reset


