(U.S.) Should your Nady DKW-1 Wireless Microphone System require service, please contact the Nady Customer Service
Department via telephone: (510) 652-2411 or e-mail: service@nadywireless.com.
(INTERNATIONAL) For service, please contact the Nady distributor in your country through the dealer from whom you
purchased this product.
The warranty card supplied with this system provides valuable warranty and service information. Store it in a safe place
for future reference. Do not attempt to service this unit yourself as it will void your warranty.
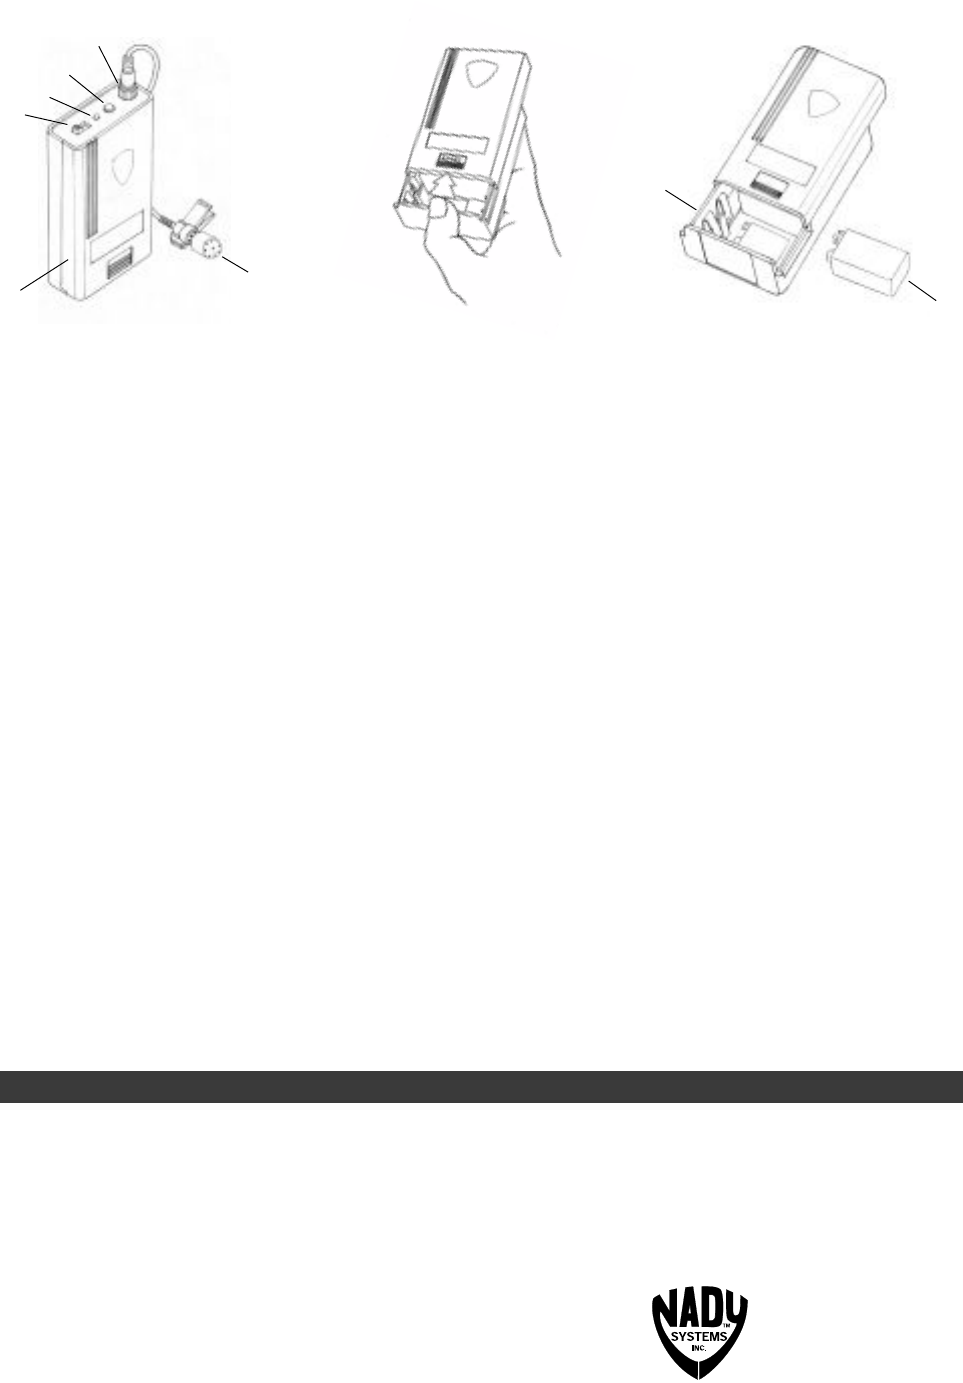
C. WLT-14 LAVALIER/LAPEL OR HEADWORN MICROPHONE BODYPACK TRANSMITTER
1. Snap open the BATTERY COMPARTMENT (13) and insert a fresh 9V BATTERY (14), observing the correct polarity.
Close the compartment.
2. The WLT-14 is provided with a 3.5mm LOCKING JACK (18) for connecting the microphone. Plug in either the
LAVALIER/LAPEL (19) or the HEADWORN MICROPHONE, as supplied. To secure the connection, turn the metal slip
ring on the plug clockwise to thread it on to the jack. To unplug, reverse the process. Slip the transmit
ter into a pocket or clip on to your clothes. To use the lavalier mic, attach it at chest level. Do not place too close to
the mouth—a distance of about six inches usually works best. To use the headworn mic, place it on the head and
adjust the mic boom so that the mic is about one inch to the side of the front of the mouth. (
Note: the lavalier or
headworn mic wire is also the transmit antenna, and rolling up or shortening the wire may reduce the effective
operating range. Extend the wire fully during use, and keep it as straight as possible.)
3. Turn on the WLT-14 by sliding the OFF/MUTE/ON SWITCH (15) to the MUTE position (transmitter on, audio
muted) or the ON position (transmitter and audio both on). The BATTERY INDICATOR LED (16) will give a single
quick flash, indicating usable battery strength. In the case of a dead or low battery, the LED either will not go on at
all or will stay on continuously, indicating that the battery should be replaced with a fresh one.
4. The microphone is now ready to use. The TRANSMITTER SIGNAL RECEIVED LED (5) on the DKW-1 receiver should
now be lit. When ready to speak, slide the transmitter switch to the ON position and adjust the mixing board volume
level as needed.
[Note: Observe care in selecting P.A. volume, transmitter location and speaker placement so that
acoustic feedback (howling and screeching) will be avoided. Please also observe the pickup patterns of the
microphone selected: omnidirectional mics pick up sound equally from all directions and are prone to feedback if
not used carefully. Unidirectional mics are more resistant to feedback, but pick up sound sources best that are
directly in front of the mic. Also, mics that are farther from the sound source, such as lavaliers, require more
acoustic gain and thus are also more prone to feedback than close-source mics such as handheld or headworn mics
that are used close to the mouth.]
5. For optimum performance, an AUDIO INPUT LEVEL CONTROL (17) is provided. Adjust the microphone gain with a
small slot-head screwdriver. Set for maximum possible gain without noticeable distortion on the high level peaks.
Turning the trim control clockwise increases the audio level; turning it counterclockwise decreases the audio level.
Experiment for the best sound for your application. The AUDIO PEAK LED (4) will flicker on the receiver with audio
peaks on the microphone input. This is normal. If the indicator lights continuously, it means the signal is too loud and
there is the possibility of overload distortion. Re-position the microphone farther from the source or adjust the AUDIO
INPUT LEVEL CONTROL (17) until the indicator flickers only on the loudest inputs.
SERVICE
15
16
17
18
13
19
14
13
Nady Systems, Inc.
6701 Shellmound Street
Emeryville, CA 94608
www.nadywireless.com
WLT-14
Opening Battery Compartment


