


3
En
English
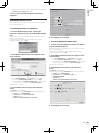
6 Select the type of installation for VIRTUAL DJ LE, then
click [Next].
— When [Typical] is selected, plug-ins and other components are
installed simultaneously. Normally select [Typical].
— When [Custom] is selected, you can select which components to
install.
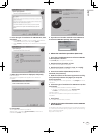
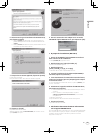
7 When the screen below is displayed, click [Install].
Installation begins.
The installation completed screen appears once installation is
completed.
8 Click [Finish].
This completes the installation procedure.
VIRTUAL DJ LE is launched if [Launch VirtualDJ] on the screen is
checked when [Finish] is clicked.
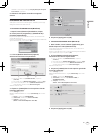
9 Input the serial number attached to the VIRTUAL DJ
LE software CD-ROM’s package, then click [OK].
About the installation procedure (Mac OS X)
1 Insert the included VIRTUAL DJ LE software CD-ROM
in the computer’s CD drive.
The [VirtualDJ_LE] icon appears on the screen.
2 Double-click the [VirtualDJ_LE] icon.
The contents of the CD-ROM are displayed.
3 Double-click [install_virtualdj_le_ergo_v7.x.x.pkg].
The VIRTUAL DJ LE installer is launched.
4 Once the VirtualDJ LE (DDJ-ERGO) installer is
launched, click [Continue].
5 Read the contents of the license agreement carefully,
click [Continue] and then click [Agree] to accept the
license agreement.
If you do not agree to the license agreement, click [Disagree] to cancel
installation.
6 Select the type of installation for VIRTUAL DJ LE, then
click [Install].
— Normally select standard installation to install.
— To install in a different location, click [Change Install
Location...] and choose the place of installation.
Installation begins.
The installation completed screen appears once installation is
completed.
7 Click [Close].
This completes the installation procedure.
Checking the latest information on the VIRTUAL
DJ LE software
For the latest information on the operating environment and compatibil-
ity, and to acquire the latest operating system, please visit the following
Atomix productions website:
http://www.virtualdj.com