


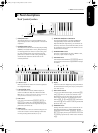
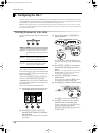


Panel descriptions
6
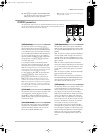
M
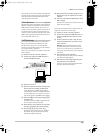
ENTER button
Press this button to confirm a setting or a selection.
N
EXIT button
Press this button to leave the currently selected EDIT
level, or to ignore the value you just set (thus return-
ing to the previously set value).
O
DOWN/UP buttons
These buttons duplicate the DOWN/UP PATCH but-
tons.
P
Strap pin
This is where you need to attach one end of the sup-
plied strap. (The other end needs to be attached to
one of the pins on the bottom panel.)
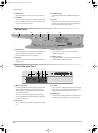
Bottom panel
Q
Sustain button
This button has the same function as a Hold/Sustain
pedal connected to a synthesizer or stage piano:
press it to hold the notes you are playing.
R
Strap pins
This is where you need to attach the other end of the
supplied strap.
S
Battery compartment
This is where you need to insert the supplied (or
replacement) batteries.
T
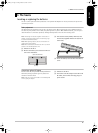
Function overview
These lists provide at-a-glance information about the
available Edit and D Beam functions.
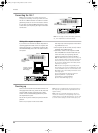
Connection panel (rear)
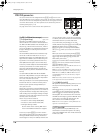
U
MIDI IN, OUT sockets
Connect the MIDI IN socket to the device that should
transmit MIDI messages to the AX-7. Connect the
MIDI OUT socket to the MIDI instrument you wish to
control with your AX-7.
The AX-7 is capable of merging the MIDI messages
received via MIDI IN with the messages you generate
by playing on the AX-7.
V
DC IN socket
This is where you can connect an optional ACA adap-
tor.
W
Cord hook
If you connect an optional ACA adaptor to the DC IN
socket, be sure to wind the cable around this hook as
a safeguard against accidental disconnection.
X
POWER switch
Set this switch to the ON position to switch the AX-7
on. Select the OFF position to power off your AX-7.
QERTSR
U
V W X
AX-7_UK Page 6 Sunday, October 21, 2001 2:12 PM