


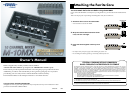

3
Bottom
4
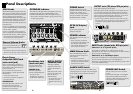
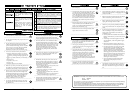
Panel Descriptions
SENS Knobs
These knobs adjust the input sensitivity,
allowing you to set the input level so that
the sound of each channel can be mixed
while avoiding noise or distortion.
Turning the SENS knob toward the right
will increase the sensitivity (increase the
input level), and turning it toward the
left will decrease the sensitivity (decrease
the input level).
If you’ve connected a mic to phone jacks
1–6, turn the SENS knob toward the right
near the “MIC” position.
If you’ve connected a line-level device
such as a keyboard, turn the SENS knob
toward the left near the “LINE” position.
* Each SENS knob simultaneously affects
the L/R inputs for a pair of channels.
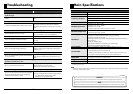
Channel Volume Knobs
These knobs adjust the volume
of each channel. Normally, you
should use these in the marked
region.
* Each channel volume knob simultaneously
affects the L/R inputs for a pair of channels.
OVERLOAD Indicator
This indicator will light if the mixed signal is too loud.
If it lights frequently, turn the SENS knob of each
channel toward the left to reduce the input level (p. 9).
* This indicator will light 6 dB before clipping level (the level
at which clipping begins).
Plug-in Power
Compatible INPUT Jack
(stereo mini jack)
This is a input jack for connecting a
plug-in power compatible stereo mic.
The sound from the connected mic is
input to channels 1/2.
If you connect a device to the rear
panel’s INPUT 1/2 jacks, both sounds
will be mixed.
* A mono mic cannot be used.
* The SENS 1/2 knob does not affect the
input from this jack.
VOLUME Knob
This knob adjusts the volume of the
input from the connected mic.
To minimize the volume, turn this
knob all the way to the left.
Headphone Jack
(stereo mini jack)
You can connect stereo
headphones to this jack.
VOLUME Knob
This knob adjusts the
volume of the headphones.
* The volume of the
headphones is not affected
by the MAIN volume knob.
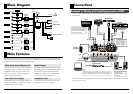
DIGITAL OUTPUT
Connector/Jack
These jacks digitally
output the same audio
signal as the OUTPUT
jacks.
Both optical and coaxial
jacks are provided, and
both can be used
simultaneously.
* No signal will be output
from these jacks if the
POWER SAVE switch is
on.
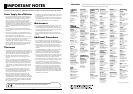
POWER Switch
This turns the power on/off.
Set this switch to “DC IN” if you’re
using the AC adaptor, or to
“BATT” if you’re using batteries;
the power will turn on, and the
POWER indicator will light.
DC IN
(AC Adaptor)
Jack
Connect the supplied AC
adaptor to this jack.
OUTPUT Jacks
(TRS phone/RCA pin jacks)
These jacks output the mixed signal.
Both phone jacks and RCA pin jacks are provided, and you
can connect to both jacks and send the output to separate
devices. These are TRS jacks, which allow you to use stereo
phone plugs for a balanced audio connection, or use mono
phone plug cables for an unbalanced connection.
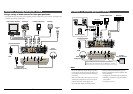
* If you’re using a balanced connection, check to make sure that
the input jacks of your equipment are wired as shown below. Be
aware that on some equipment, the HOT and COLD are
reversed.
INPUT Jacks
(phone jacks, RCA pin jacks)
Channels 1–4, 5, 6 (phone jacks)
These jacks are suitable for use with electronic musical
instruments or mics. If you’re connecting a mic or other monaural
device, use the L (MONO) jack.
Channels 5, 6, 7–10 (RCA pin jacks)
These jacks are suitable for connecting desktop media production
devices or audio equipment such as CD/MD players.
Channels 5/6 provide both phone jacks and RCA pin jacks, which
can be used simultaneously.
POWER Indicator
This will light when the power is
turned on.
* If you’re operating on batteries,
the brightness of this indicator will
show the state of the batteries.
If the indicator becomes dim, you
need to replace the batteries.
MAIN Volume Knob
This knob adjusts the overall
volume for the mixed inputs of
each channel.
* The output level from the
headphone jack will not be affected
even if you use the MAIN volume
knob to lower the volume.
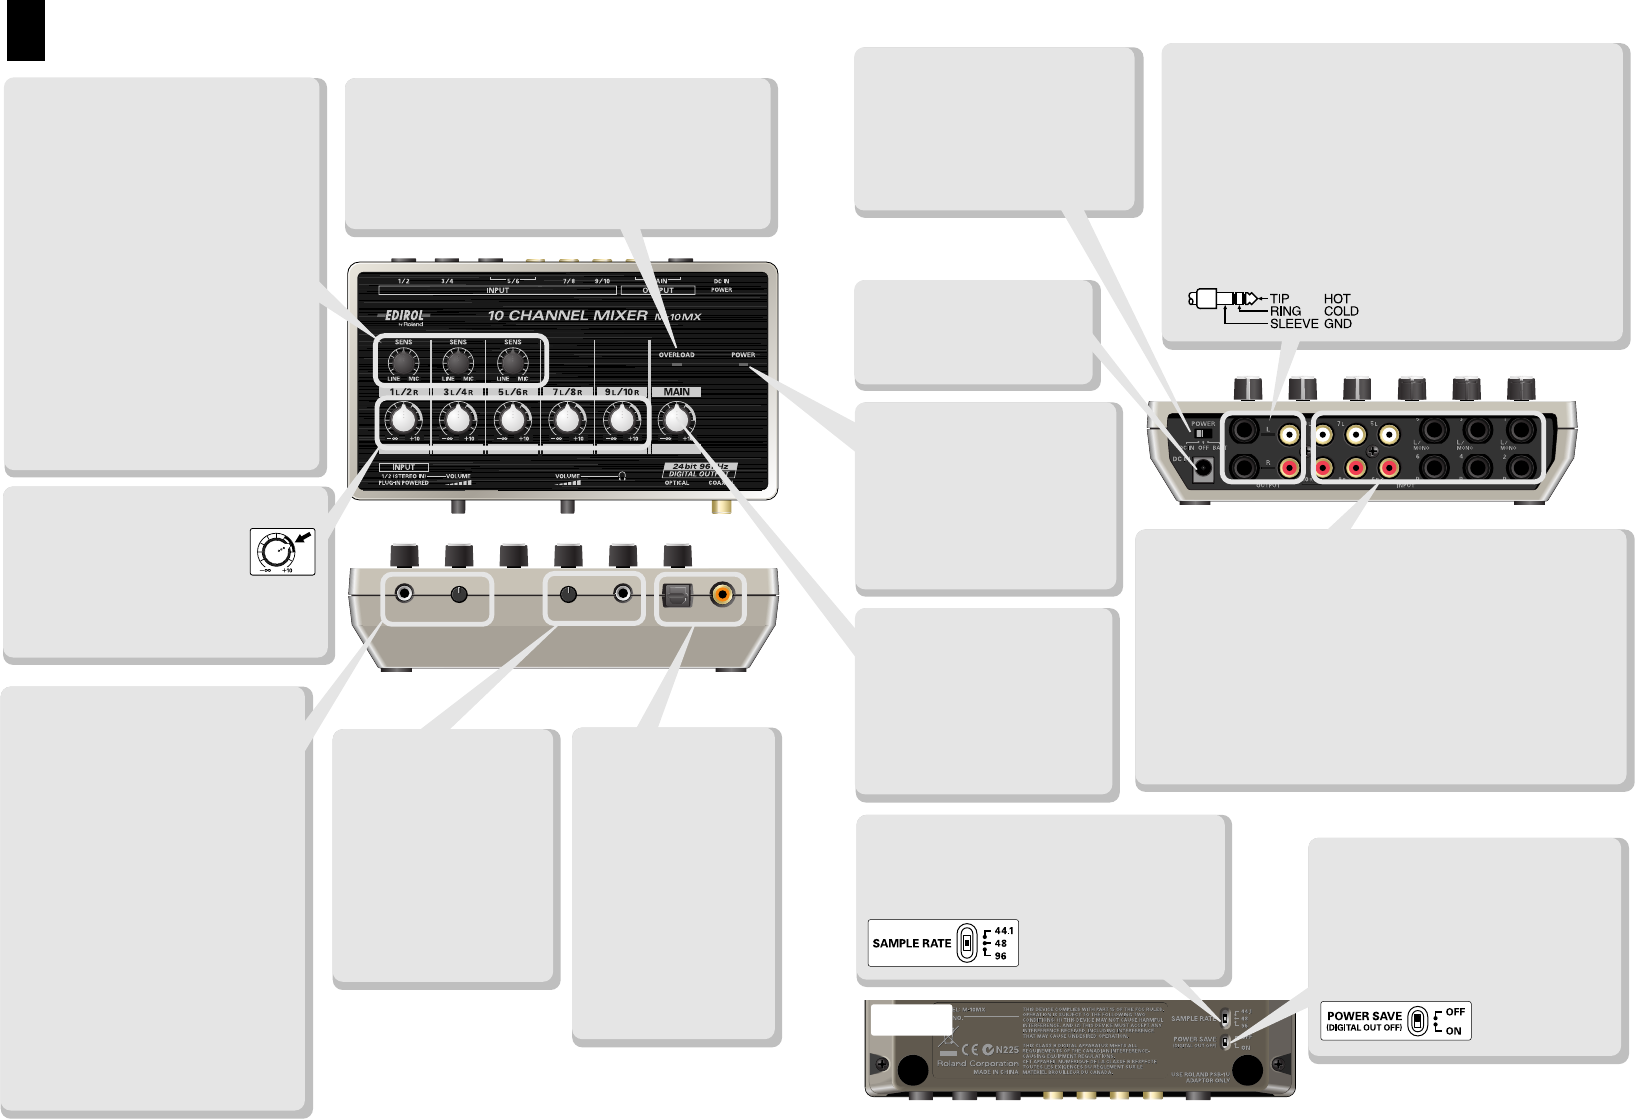
SAMPLE RATE Switch
Allows you to select 44.1, 48, or 96 kHz as the
sampling frequency (sample rate) of the digital
audio signal sent from DIGITAL OUTPUT.
POWER SAVE Switch
This turns the “power save” function
on/off.
If you turn this function on, the digital
output from the DIGITAL OUTPUT
connector will be turned off (no output),
reducing the power consumption.