


8
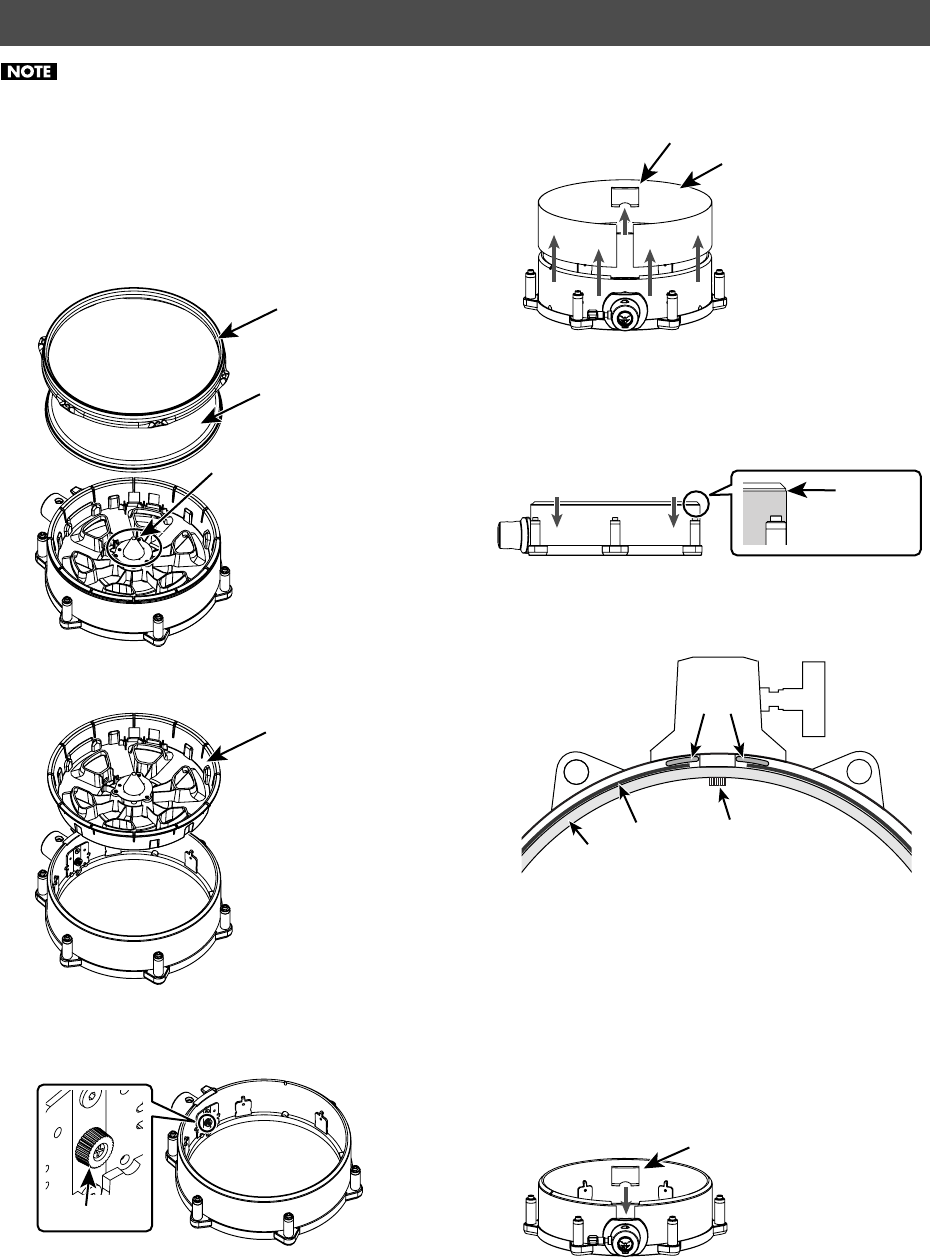
• Applying excessive force to the sensor located under
the head can damage it and/or interfere with
accurate triggering.
• Be careful not to hurt your fingers on the corners or
points of the metal parts.
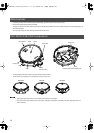
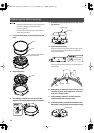
1.
Loosen all tuning bolts, and remove the hoop and
head.
2.
Remove the frame.
3.
Use a Philips screwdriver to loosen the screw that
fastens the covering by approximately two full turns.
4.
Pull the fastening clip upward and out, and remove
the covering.
5.
Attach the new covering.
Insert the lower part of the covering into the rubber groove
so that the upper edge of the covering is in the position
shown in the illustration.
Both edges of the covering will fit into the gap between the
shell and plate.
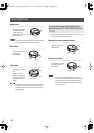
6.
While pulling on both ends of the covering so as to
eliminate any slack, finger-tighten the screw that
holds the covering in place.
7.
Using a
Philips s
crewdriver, securely fasten the
screw that holds the covering in place.
8.
Attach the fastening clip in the location shown in the
illustration, as if to pinch the two ends of the covering.
Replacing the Shell Covering
Do not touch the sensor located
at the top of the frame.
Head
Hoop
Frame
Screw
Covering
Fastening Clip
The upper edge
of the covering
Shell
Screw
Covering
Plate
Fastening clip
PD-125X_125XS_105X_e.book 8 ページ 2009年5月18日 月曜日 午前9時23分