5
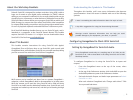
Selecting Audio to Record
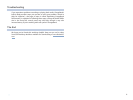
Create a new real instrument track.1
Select the Basic Track preset in the Track Info panel.2
After recording, you can select other presets for your track. They’ll
add pre-configured effects to the track, and change its icon.
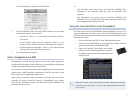
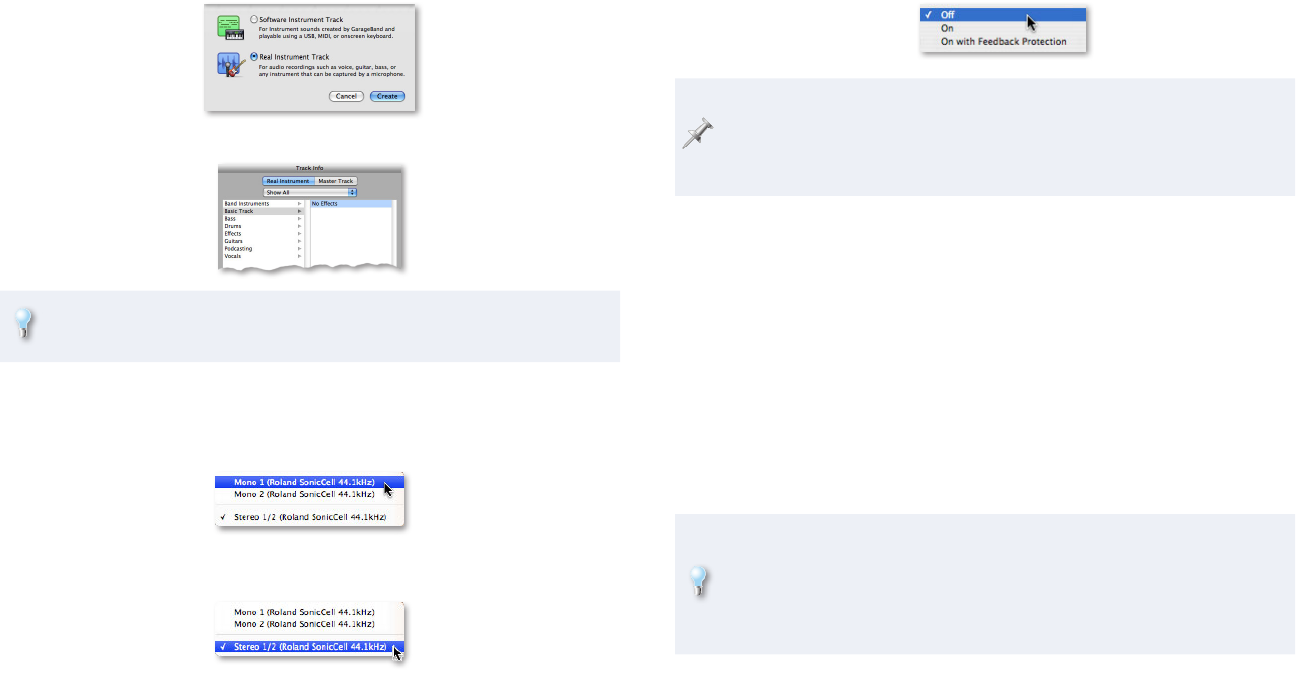
From the Input Source popup, select a SonicCell input. To record3
a mic or instrument connected to SonicCell’s Neutrik input jack—•
select Mono 1 (Roland SonicCell 44.1kHz).
a stereo device connected to SonicCell’s Neutrik and (LINE) R input •
jacks—select Stereo 1/2 (Roland SonicCell 44.1kHz).
a SonicCell synth patch in stereo—• select Stereo 1/2 (Roland
SonicCell 44.1kHz).
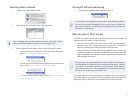
Turning Off Software Monitoring
Set the Monitor popup below Input Source to 1 Off.
As we noted in the Using the SonicCell with a DAW Workshop booklet,
you can listen through GarageBand if you want to hear its effects as
you record. However, we recommend listening directly through the
SonicCell to avoid latency.
What You Hear Is What You Get
SonicCell can produce synth sounds and pass live audio from its inputs at
the same time. This means a couple of things:
When you want to record a SonicCell patch as audio into Garageband—
•
disconnect any mic or instrument you’ve connected to SonicCell to
keep the resulting synth audio track free of surprise noises.
When you want to record live audio into Garageband—
• be sure not to play
any SonicCell patches while the live audio’s being recorded to keep the
audio signal clean. (You may even want to temporarily disconnect your
MIDI controller to be sure.)
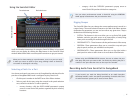
You can, if you like, record multiple live audio sounds at the same time
in GarageBand, thus capturing a more complete performance. Connect
one signal to SonicCell’s Neutrik jack and the other to the (LINE) R
jack. Send the first jack to one GarageBand real instrument track and
the other to a second real instrument track.
Once you’ve got your audio coming from SonicCell the way you want, record
your audio track as you would any other GarageBand real instrument track.
Repeat the steps to the left to record additional real instrument tracks.