


5
Using Your Q2 / Q3 Microphone
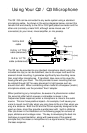
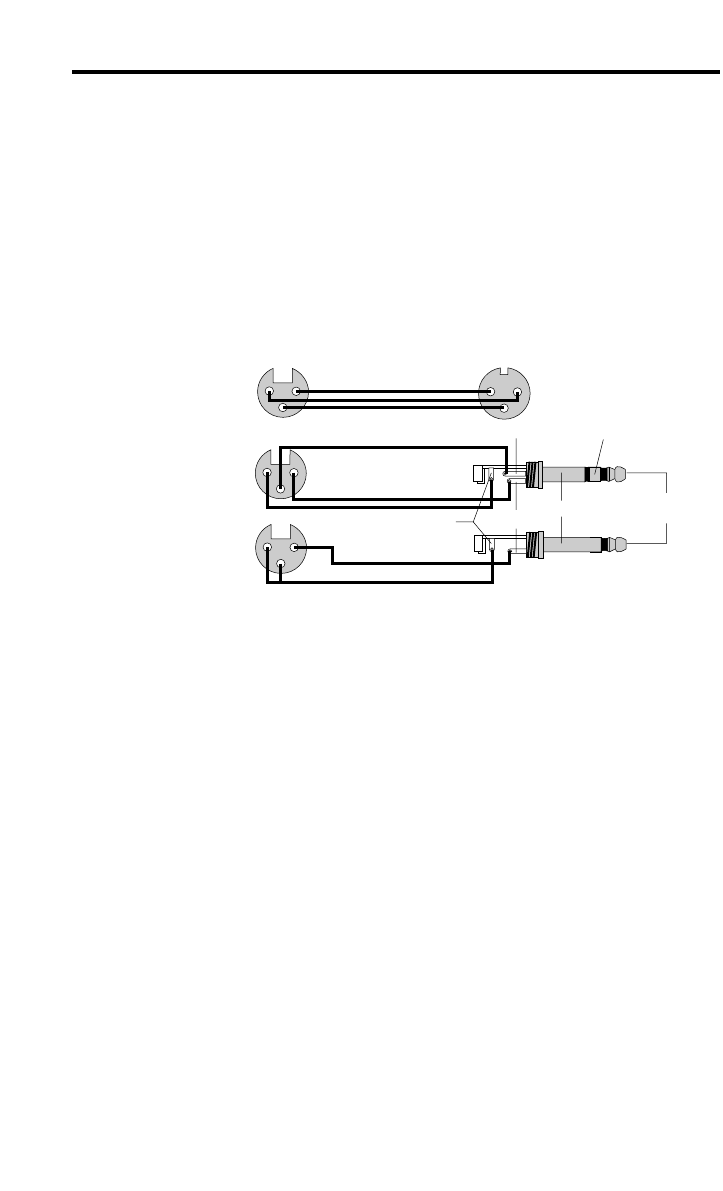
The Q2 / Q3 can be connected to any audio system using a standard
microphone cable. As shown in the wiring diagrams below, connect the
female XLR end directly to the Q2 or Q3’s gold-plated connector and the
other end (normally a male XLR, although some mixers use 1/4"
connectors) to your mixer, mixer/amplifier, or mic preamp.
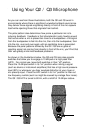
The Q2 can be mounted to any standard microphone stand (using the
included mic clip) or can be handheld; due to its unique multi-axis mic
element shock mounting, it generates significantly less handling noise
than most other microphones. If handheld, take care not to cover the
head grille with your hand. The Q3 provides its own mounting that can
be rotated through 90° for easy placement in tight spaces such as
around drum kits. When connecting either model to a European (metric)
microphone stand, use the provided “Euro” adapter.
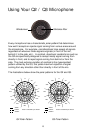
When positioning any microphone, be aware of a phenomenon called
the
proximity effect which causes a noticeable increase in low
frequencies (bass response) when a microphone is close to the audio
source. This can have positive impact—for example, it will cause your
voice to sound much fuller when you sing close to the mic than when you
sing at a distance. Both the Q2 and the Q3 are specially designed to be
used up close, since they provide a windscreen with built-in sibilance
filter (as shown in the illustration on the following page) for removal of
pops, sibilance and onstage noise. The key to developing the best mic
technique is experimentation, along with awareness of the general
principle that, the closer a microphone is to a signal source, the greater
the bass response.
1
2
3
1
2
3
1
2
3
1
2
3
Tip (hot)
Tip
Ring (cold)
Sleeve (ground)
Sleeve
Ring
XLR to XLR
cable
XLR to 1/4" TRS
cable (balanced)
XLR to 1/4" TS
cable (unbalanced)
F
F
M
F