


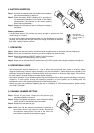
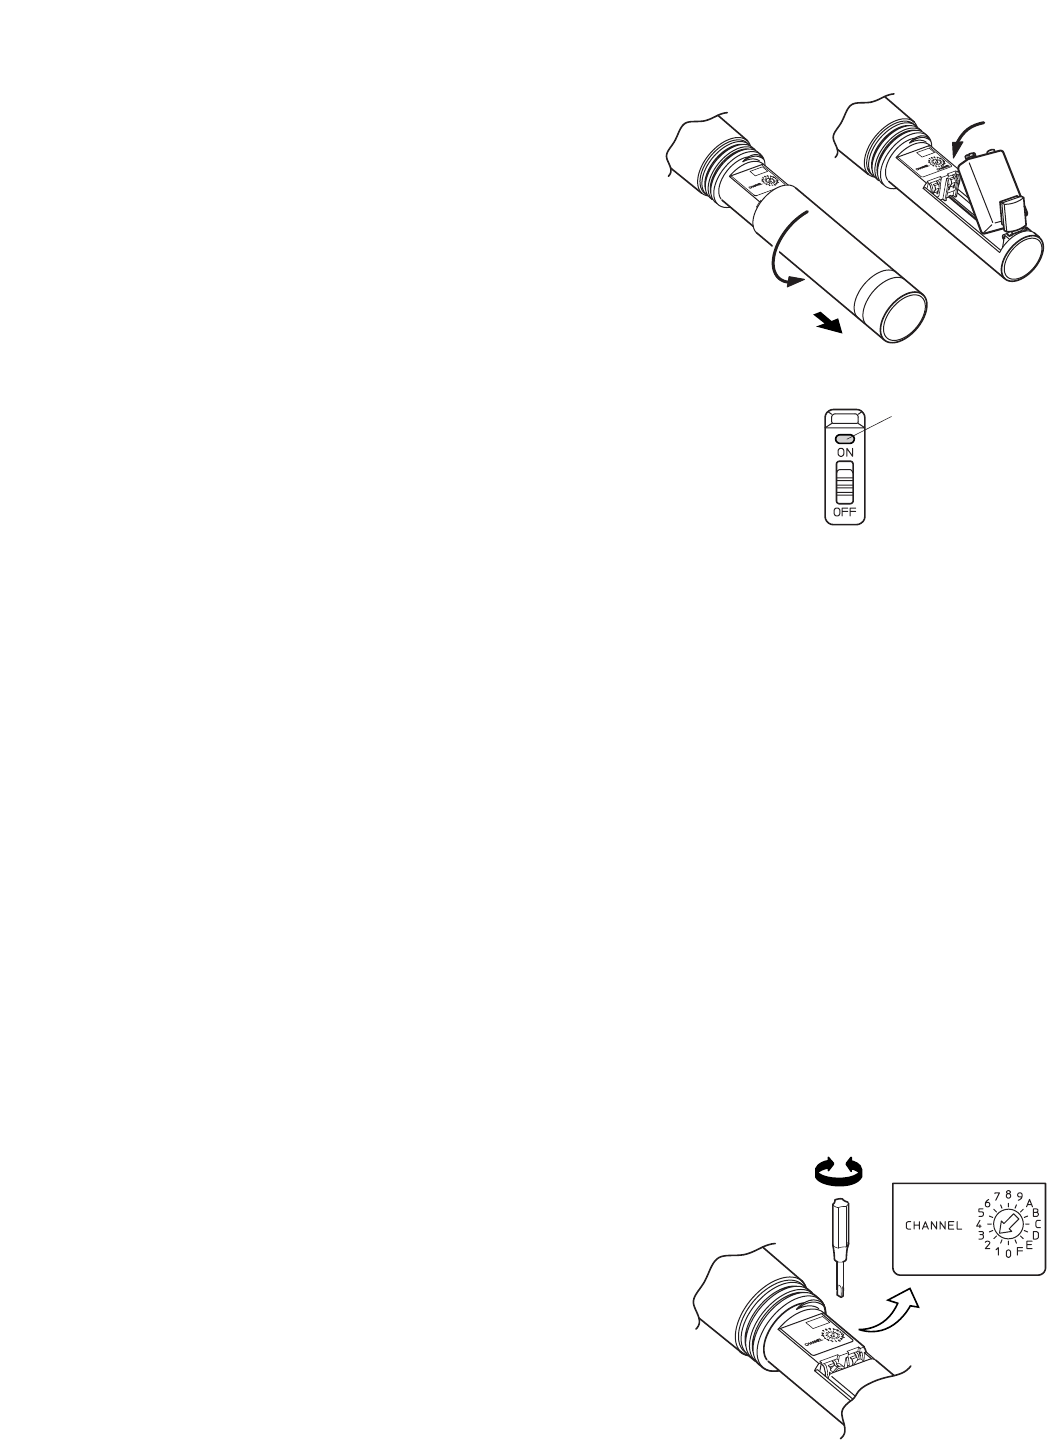
6. BATTERY INSERTION
Step 1. Hold the microphone body and rotate the microphone
grip counterclockwise to remove it.
Step 2. Insert the battery 6LR61 (Alkaline 9 V) according to
the instructions attached to the inside of the battery
compartment. Pay attention to the correct polarity
when inserting the battery.
Step 3. Replace the microphone grip by sliding and rotating it
clockwise.
Battery replacement
• A brand-new battery will provide the power enough to operate the unit
continuously for 10 hours.
• As long as the battery has sufficient power for the microphone to function
properly, the orange LED will light. When the orange LED starts to fade and
then flash, replace it with a new one.
7. OPERATION
Step 1. Make sure that the receiver and the wireless microphone are of the same channel (frequency).
Step 2. If they are not identical in channel, you have to adjust the channel switch.
Step 3. Place the microphone ON/OFF switch in the ON position.
The orange LED indicates the circuit is active.
Step 4. Make sure to shift the ON/OFF switch back to the OFF position after using the wireless microphone.
8. OPERATIONAL HINTS
• The microphone's service distance is 3 – 120 m. When the microphone user moves in a facility, signal
dropouts (momentary losses of signal reception) may be encountered. These dropouts are caused by the
building's architectural designs or materials which block the travel of or reflect the radio signal. If this occurs,
the user needs to change locations for better signal reception.
• The proper operation of your wireless system may be interfered with by other system operating on the same
frequency. In such cases, change the operating frequency of your system. (As to dealing with the
interference, refer to the operating instructions of the wireless tuner.)
• Should you have any questions regarding the use or availability of TOA wireless products, please contact
your local TOA dealer.
9. CHANNEL NUMBER SETTING
Step 1. Switch off the power. Rotate the microphone grip
counterclockwise to remove it.
Step 2. Using the supplied screwdriver, set the Channel setting
switch pointer to the desired channel number.
Step 3. Replace the microphone grip.
Note: Make sure that the wireless microphone is identical to
the wireless tuner in the channel number. Should the
microphone's setting differ from that of the tuner, the
tuner does not receive the microphone signal.
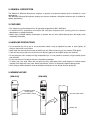
Orange LED
Indicates the battery
level by lighting or
flashing.
1
2