


11
Utility Mode
■ Creating a Program Change Table
With this procedure, a specific memory number in the DG100-212’s internal
memory can be recalled with a program change number received from an
external MIDI device.
* Factory Preset: Program Change Number = Memory Number.
1. Press and hold the button for more than one second. The
“UTIL.” mode display lamp will light. (Utility Mode)
2. Press the button.
3. Using the / buttons, select the program change number (1
– 2.8) that will be sent by the external device. The number will ap-
pear on the display.
4. Press the button.
5. Using the / buttons, select the memory number (1 – 2.8) to
be recalled from the DG100-212’s internal memory. The number will
appear on the display.
6. Depending upon your particular needs, repeat steps 2 through 5 as
needed.
■ Set the MIDI Receive Channel
Set the DG100-212’s MIDI receive channel.
* To transmit and receive MIDI data between MIDI devices, the MIDI channel on
both devices must be the same or data will not be successfully transferred. (The
factory preset is channel 1.)
1. Press and hold the button for more than one second. The
“UTIL.” mode display will light. (Utility Mode)
2. Press the button. The currently set MIDI receive channel
will appear on the display.
3. Use the / button to select a MIDI receive channel (1 – 16,
All, oF).
* With the “All” setting omni is set to on.
■ Set the MIDI Merge
If you want the MIDI signal received by the DG100-212’s MIDI IN jack to be
transmitted on to other MIDI devices via the DG100-212’s MIDI OUT jack,
set the MIDI Merge to “on” (ON). If you don’t want the data to be transmitted,
set to “oF” (OFF).
1. Press and hold the button for more than one second. The
“UTIL.” mode display will light.
2. Press the button. The currently set MIDI merge setting will
appear in the display.
3. Use the / button to select either “on” or “oF”.
■ MIDI Bulk Out
You can back up the data stored in the DG100-212’s internal memory by
saving the data to an external MIDI storage device (Yamaha MDF3, etc.).
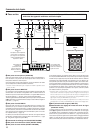
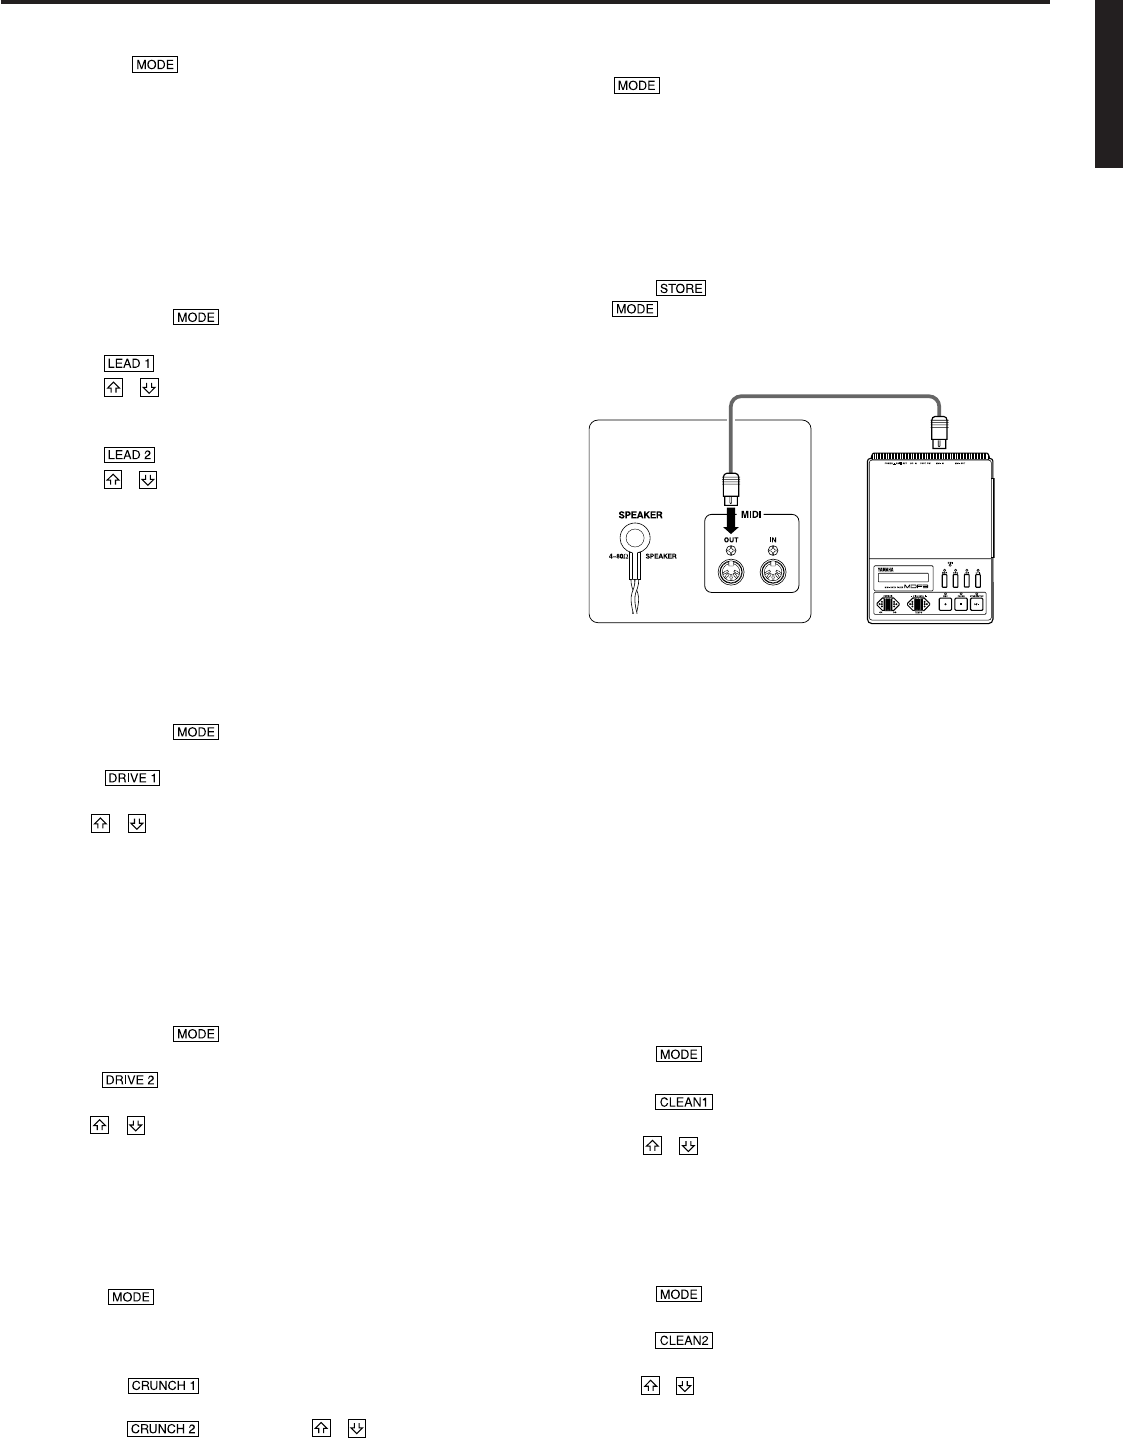
1. With a MIDI cable, connect the DG100-212’s MIDI OUT jack to the
MIDI IN jack on the external MIDI storage device.
2. Press the button for more than one second. The “UTIL.”
mode display lamp will light.
3. To transmit all memory (128 memory, plus Utility setting data) with
the Bulk Out operation:
→ Press the button. “All” will appear in the display.
To transmit a single memory:
→ Press the button. Use the / button to select the
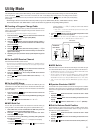
The Utility Mode is used to perform MIDI settings, set the speaker simulator and volume pedal position settings. To enter the Utility Mode,
press and hold the button for more than one second, the “UTIL.” mode display lamp will light. Each of the settings will be stored in
memory, even when the power to the amp is turned off. To exit from the Utility Mode, press the button, the “AMP” (amp mode) display
lamp will light.
* MIDI messages cannot be received when in the Utility Mode so, refer to the “MIDI Memory Recall”, “MIDI Volume Control”, “MIDI
Reverb Echo ON/OFF” and “MIDI Bulk In” sections in this manual to perform the corresponding MIDI operations.
memory number (1 – 128, All) that you want to save with the
Bulk Out operation.
* When “All” is selected in the Bulk Out operation, all memory data
(128 memory) will be transmitted.
4. Press the button to execute the Bulk Out operation. Press
the button to cancel the operation.
* The device number is the same as that of the MIDI receive channel. If the MIDI
receive channel is set to “All” (Omni ON) the device number will be 1.
■ MIDI Bulk In
With a MIDI cable, connect the DG100-212’s MIDI IN jack to the MIDI OUT jack
on an external MIDI device. Return your MIDI back up data to the DG100-212.
* The MIDI Bulk In operation is carried out in the AMP or TAPE ECHO modes
only. It can not be carried out in the Utility Mode.
* The device number is the same as that of the MIDI receive channel. If the MIDI
receive channel is set to “All” (Omni On), the MIDI channel will be set to 1.
The DG100-212 will not receive data if the MIDI channel is set to “oF” (OFF).
* “Ld” is shown on the display while the MIDI Bulk In operation is being ex-
ecuted.
■ Speaker Simulator ON/OFF
The DG100-212’s speaker simulator provides the line signal with a realistic
simulation of the natural sound of a speaker. The speaker simulator can be
used on the line signal when the LINE OUT jack is connected to a mixer or
recorder.
1. Press the button for more than 1 second. The “UTIL.” mode
display lamp will light.
2. Press the button. The current setting will be shown on the
display.
3. Use the / buttons to select either “on” or “oF” (ON/OFF).
■ Set the Volume Pedal Position
Set the position for where control of the volume, via MIDI, will take place.
(Refer to the “Using MIDI to Control Volume” section on page 10 for more
information on Volume Pedal Position.)
1. Press the button for more than 1 second. The “UTIL.” mode
display lamp will light.
2. Press the button. The current setting will be shown on the
display.
3. Use the / buttons to select the volume control position (bP,
Ap, Ar).
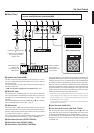
DG100-212
Rear Panel
MIDI Cable
External MIDI Device
MIDI IN
MIDI OUT