


97
Chapter 18 Master Class 1 — Onstage
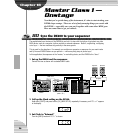
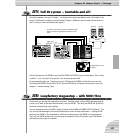
4 Start song or sequence playback on the other device.
When you start and stop playback on the connected MIDI device, the Pat-
tern or Song on the DX200 starts and stops at the same time. Naturally,
you can change the bpm on the other device, and the DX200 will instantly
and automatically follow right along.
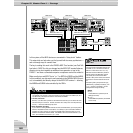
If you want, you can use the DX200 as the master device. Just make sure
the Clock on the DX200 is set to “Internal” — otherwise, you won’t be able
to start the Patterns or Songs from the DX200, nor control the other device.
For settings on the other device, refer to the relevant owner’s manual. (For
an example showing the DX200 as the master, see Tip 83.)
81 Changing the MIDI channels
In general, you won’t need to fool with these settings. But they’re here if you ever DO need them.
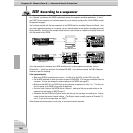
The four tracks of the DX200 — Synth and Rhythm 1 - 3 — are fixed to
receive/transmit data over MIDI Channels 1 through 4, respectively. To match
the tracks to a controlling MIDI keyboard or sequencer, you may have to
change these settings. Each track also features an “off” setting, so you can
disable a track’s MIDI reception if you want.
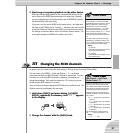
Here, we’ll show you how to change the MIDI Channel for the Synth track. The
Rhythm tracks can be changed in the same way.
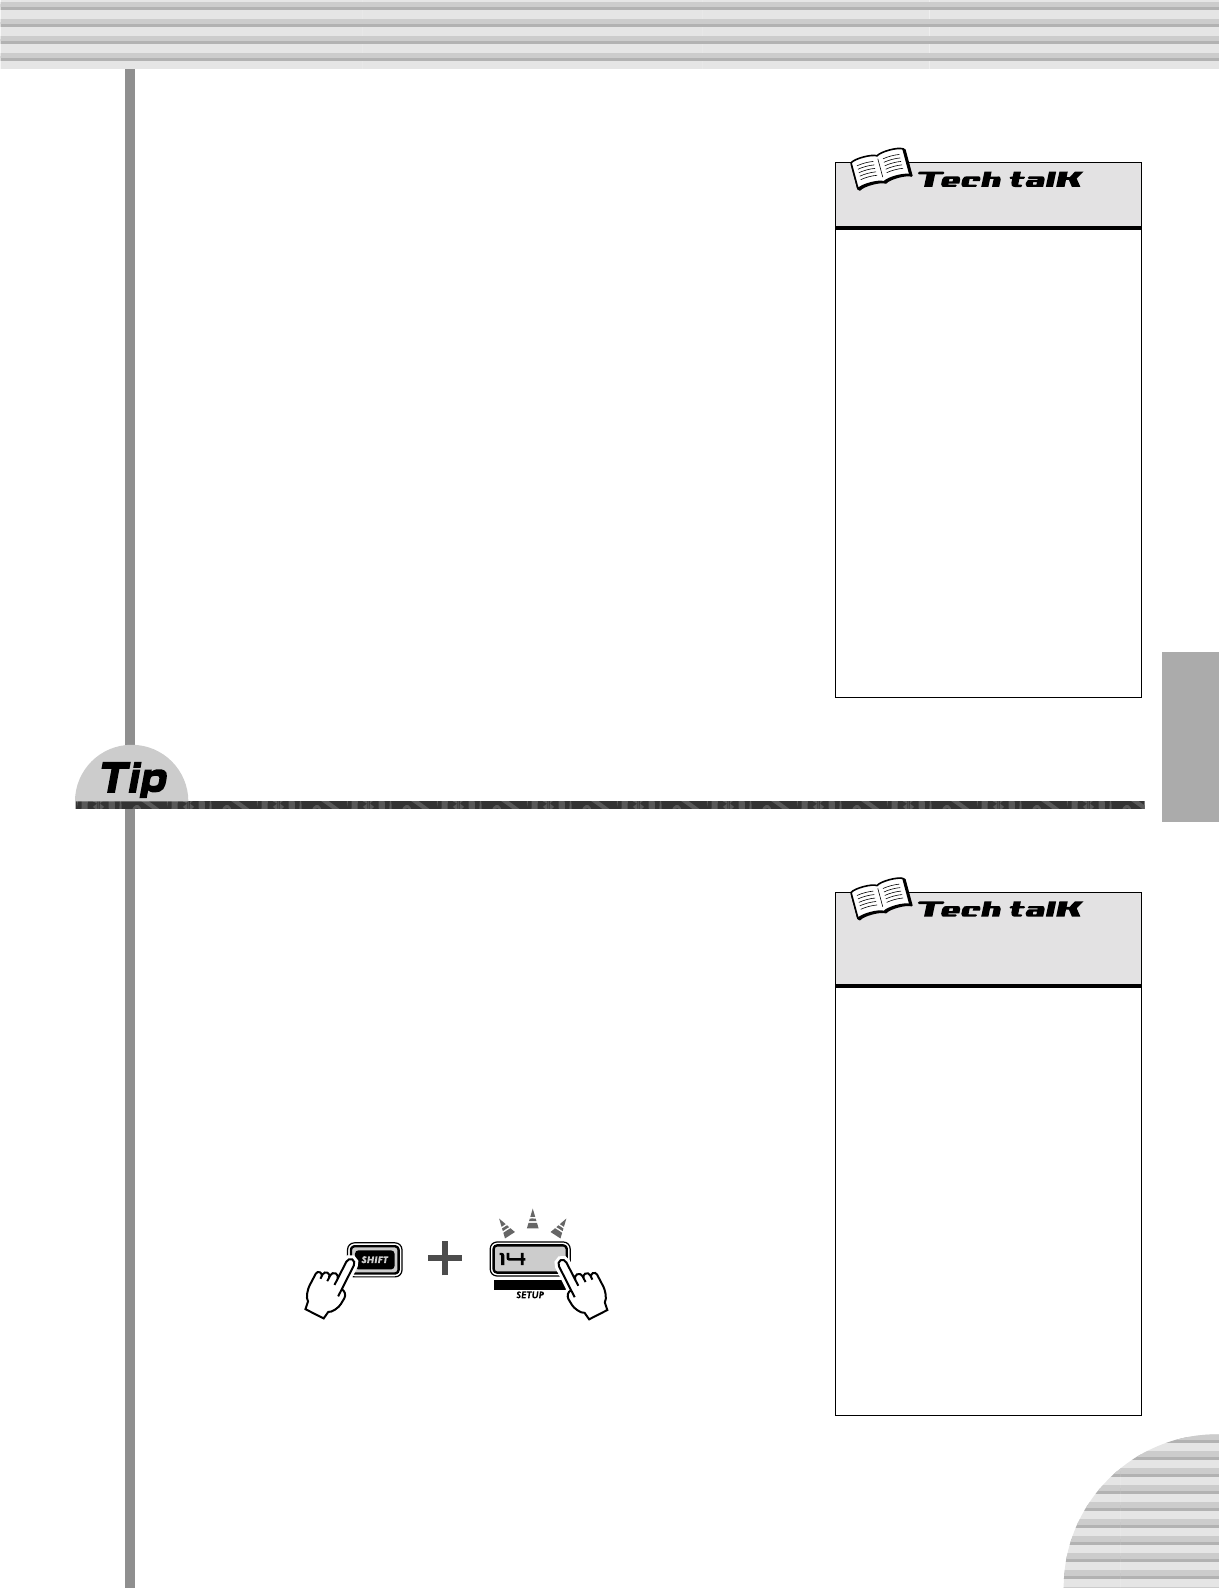
1 Hold down [SHIFT] and press button [14] (MIDI
SETUP), repeatedly if necessary, until “SY. 1” appears
in the display.
2 Change the channel with the [DATA] knob.
Clock
Sets the DX200 to either send or receive MIDI
clock messages. This determines whether
the DX200 functions as the master or slave in
MIDI sync applications. When using the
DX200 alone or to control a connected
device, set this to Internal (“int”). When
controlling the DX200 from a connected
device, set this to External (“E$t”). Keep in
mind, the Patterns or Songs cannot be
started from the DX200 if this is set to Exter-
nal.
Hold down [SHIFT] and press button [14]
(MIDI SETUP), repeatedly if necessary, until
“CLo)” appears in the display, then use the
[DATA] knob to make the desired setting.
Settings
int (Internal)
Sends MIDI clock messages, for control-
ling the sync of another device.
E$t (External)
Receives MIDI clock messages, for sync-
ing to another device.
MIDI Channel — Synth Track,
Rhythm Tracks 1 - 3
Determines the MIDI channel over which the
appropriate track receives/transmits MIDI
data. Make sure the Channel of the desired
track matches the Transmit Channel setting
on the controlling keyboard or sequencer.
Hold down [SHIFT] and press button [14],
repeatedly if necessary, until the desired set-
ting is shown:
“SY. 1” — Synth Track (set to default of
Channel 1)
“r1. 2” — Rhythm Track 1 (set to default
of Channel 2)
“r1. 3” — Rhythm Track 1 (set to default
of Channel 3)
“r1. 4” — Rhythm Track 1 (set to default
of Channel 4)
Use the [DATA] knob to change the value.
The “----” setting corresponds to “off.”
Settings
1 — 16, “----” (off)