


Copying Parts 71
MD8—Owner’s Manual
Copying Parts
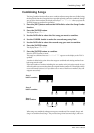
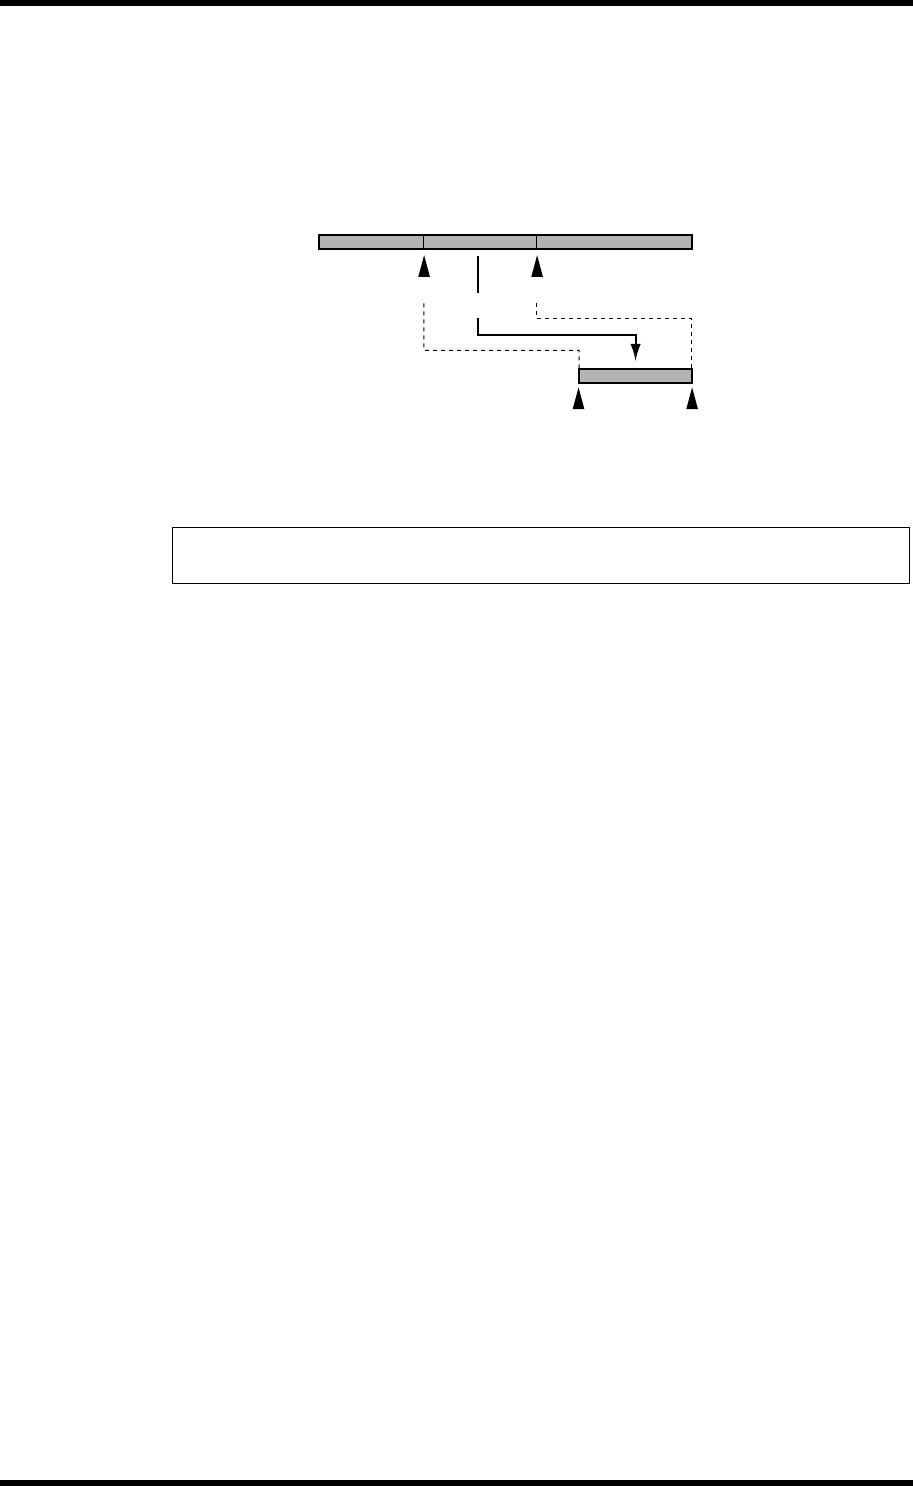
The Part Copy function allows you to copy a section of one track to another track. The sec-
tion of the source track to be copied is determined by the IN and OUT points. These points
can be set by holding down the [SET] button while pressing [IN] or [OUT] respectively. The
part is copied at the same volume level as the original.
1. Locate the point at which the part is to be copied into the destination
track (i.e., the destination track in point).
2. Press the [EDIT] button and use the DATA dial to select the Part Copy
function.
3. Press the [ENTER] button.
If nothing happens, you haven’t yet set the LAST REC IN and OUT points. See Setting the
In/Out Points “On-the-Fly” on page 32 for more information.
If you have set the IN and OUT points, the display shows
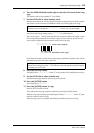
COPY T*¬T* .
4. Use the DATA dial to select the source track.
For example: COPY T8¬T* .
5. Turn the CURSOR shuttle to the right to make the asterisk (*) flash.
6. Use the DATA dial to select the destination track.
For example: COPY T8¬T3 .
Existing data between the IN and OUT points on the destination track is overwritten.
7. Press the [ENTER] button.
The display shows Copy EXE?
8. Press [ENTER] again to copy.
Press the [EXIT] button to cancel.
The display shows
Copy EXE. and the DIR indicator lights up, signalling that the Copy
operation is being performed.
You can abort the track copy operation at anytime by pressing the [STOP] button. Data up
to the point that you pressed the [STOP] button is copied.
Note: The destination track in and out points must be outside the area set by the source
track IN and OUT points. Also, the destination must be larger than the part being copied.
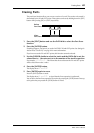
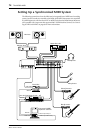
[IN] [OUT]
Source
Track
Destination
Track
Copy
in out