


MX12/6, 20/6 — Owner’s Manual
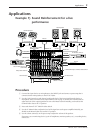
10 Applications
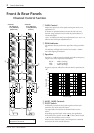
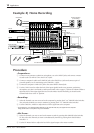
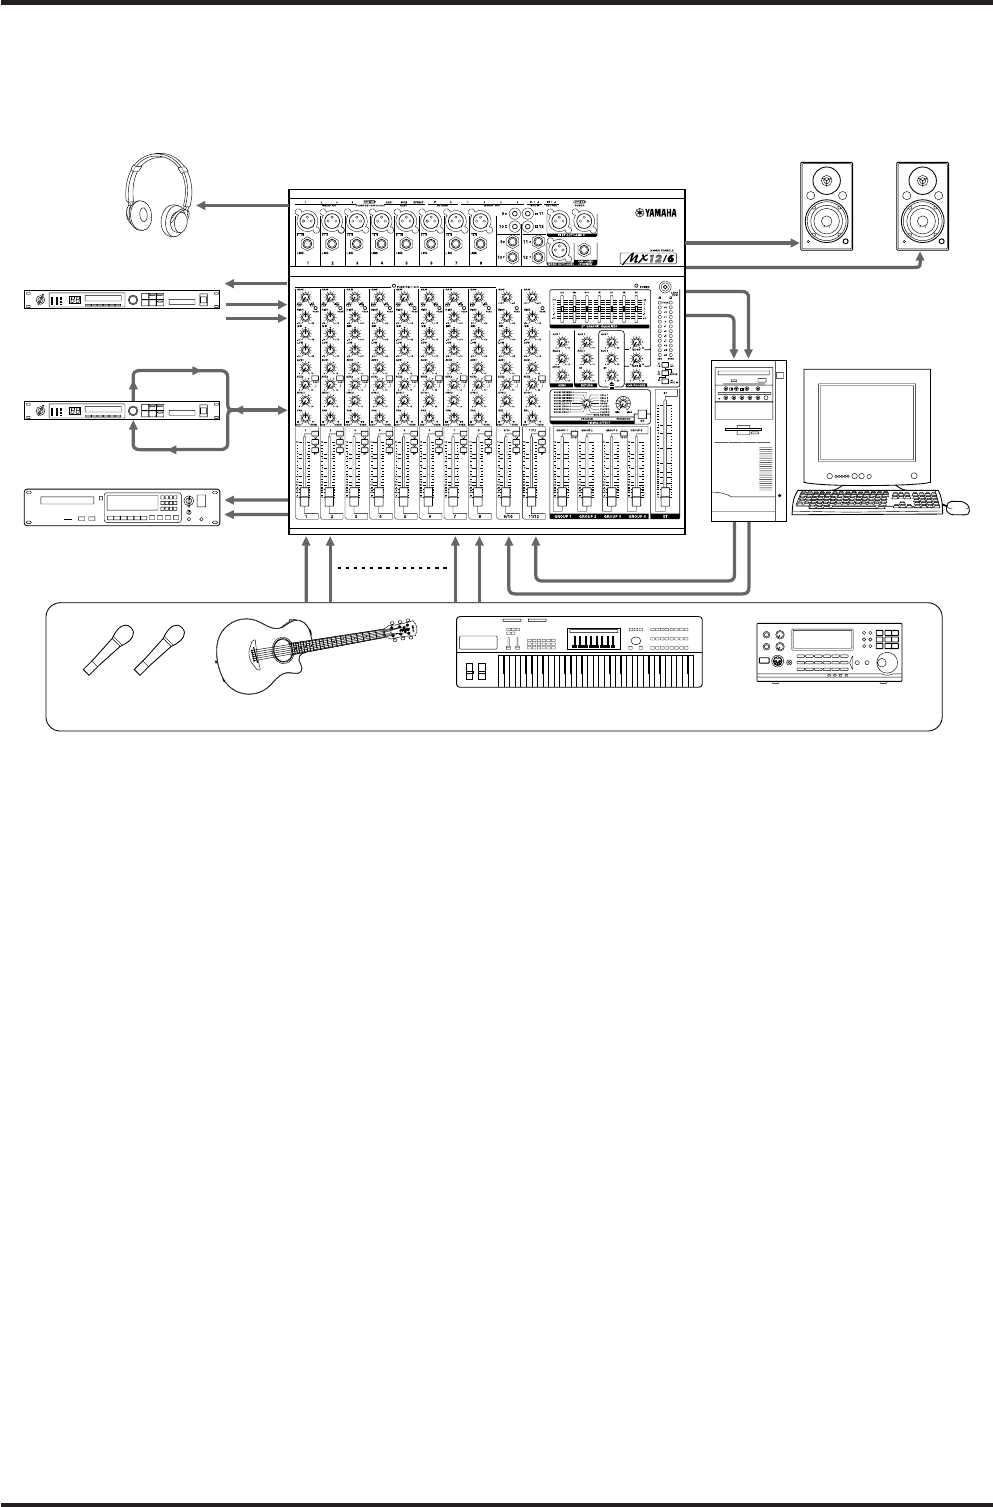
Example 2) Home Recording
AUX 2 (POST)
SEND
INSERT
I/O
C-R/PHONES
ST OUT
INPUT
(ST CH)
GROUP OUT
4
3
2
1
LINE OUT
LINE IN
RETURN
INPUT
Procedure
<Preparations>
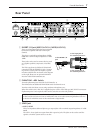
q Connect a tone generator, synthesizer, microphone, etc. to the INPUT jacks, and connect a master
recorder such as an MD or CD to the ST OUT jacks.
w Connect a computer’s audio card’s LINE IN jack to the GROUP 3, 4 jacks and connect a pair of
powered speakers, etc. for monitoring to the GROUP 1, 2 jacks.
e Connect the computer’s LINE OUT jack to the stereo INPUT channel jack.
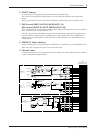
r Use the GAIN Control to adjust the level of the input signal from the tone generator, synthesizer,
microphone, etc. that is connected to each input channel (refer to page 2), and use the Channel Fader to
adjust the level of the output signal that is sent to the Master Section. Basically, you should set the
Channel Fader close to the “0” position.
<Recording>
q Select the channels you want to record to the computer by pressing their “3-4” GROUP Select Switches.
Also, select the channels you want to monitor by pressing their “1-2” GROUP Select Switches.*
w Use the GROUP 3, 4 Faders to adjust the level of the signal sent to the computer.
* Do not press the “3-4” GROUP Select Switches on the channels that carry the signal from the computer.
Doing so will result in a loop which may cause feedback.
<Mix Down>
q Select the channels you want to send to the master recorder by pressing their GROUP Select Switches
ST. Also, select the channels you want to simultaneously monitor by pressing their GROUP Select
Switches 1-2.
w Use the ST Master Fader to adjust the level of the signal output to the master recorder.
Tone Generator, Synthesizer, Microphone, etc.
Computer
(Audio Card, etc.)
Powered Speakers
(for monitoring)
(Audio Card, etc.)
Headphones
Master Recorder
Effector
Effector