3
Insert the Video
Connections
CD-
ROM into your CD-ROM drive. The
pre-installation check utility should
start automatically once the CD-ROM
is inserted into your CD-ROM drive.
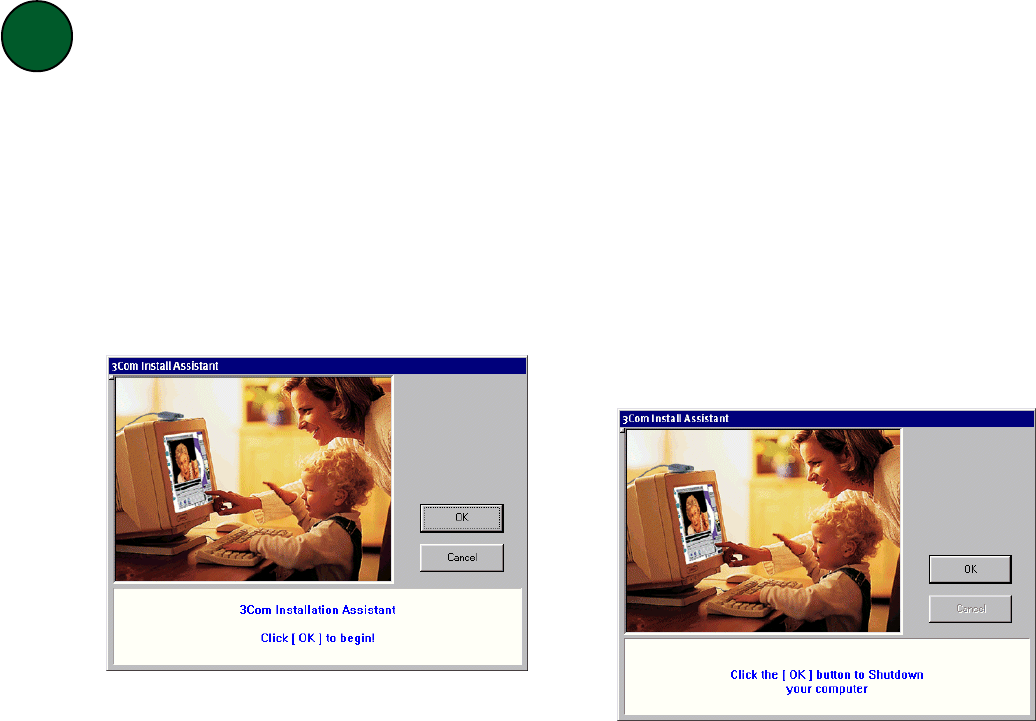
When you see the following screen,
click
OKOK
OKOK
OK to run the application.
To ensure the easiest installation, run the 3Com pre-installation
check before connecting your camera to your PC.
1
If the pre-installation check utility
does not start automatically, click
StSt
StSt
St
arar
arar
ar
tt
tt
t, click
RunRun
RunRun
Run, and type
d:\begin.exed:\begin.exe
d:\begin.exed:\begin.exe
d:\begin.exe (if your CD-ROM drive
uses a letter name other than “d”, type
that letter in place of “d”). Then press
ENTERENTER
ENTERENTER
ENTER.
The pre-installation check utility will
display a warning message and shut
down if either of the following criteria
are not met:
• Your computer’s video card must
be set for 16 bit color.
• You must be running Windows
95 (release 950b with the USB
supplement), Windows 98, or
Windows 2000.
If you see a message warning you
that either of these criteria have not
been met, see the “Troubleshooting”
section on the other side of this
guide.
Once the pre-installation check utility
is finished, you will see the following
screen:
Leave the Video
Connections
CD-
ROM in your CD-ROM drive. Click
OKOK
OKOK
OK. Windows will shut down.


