14
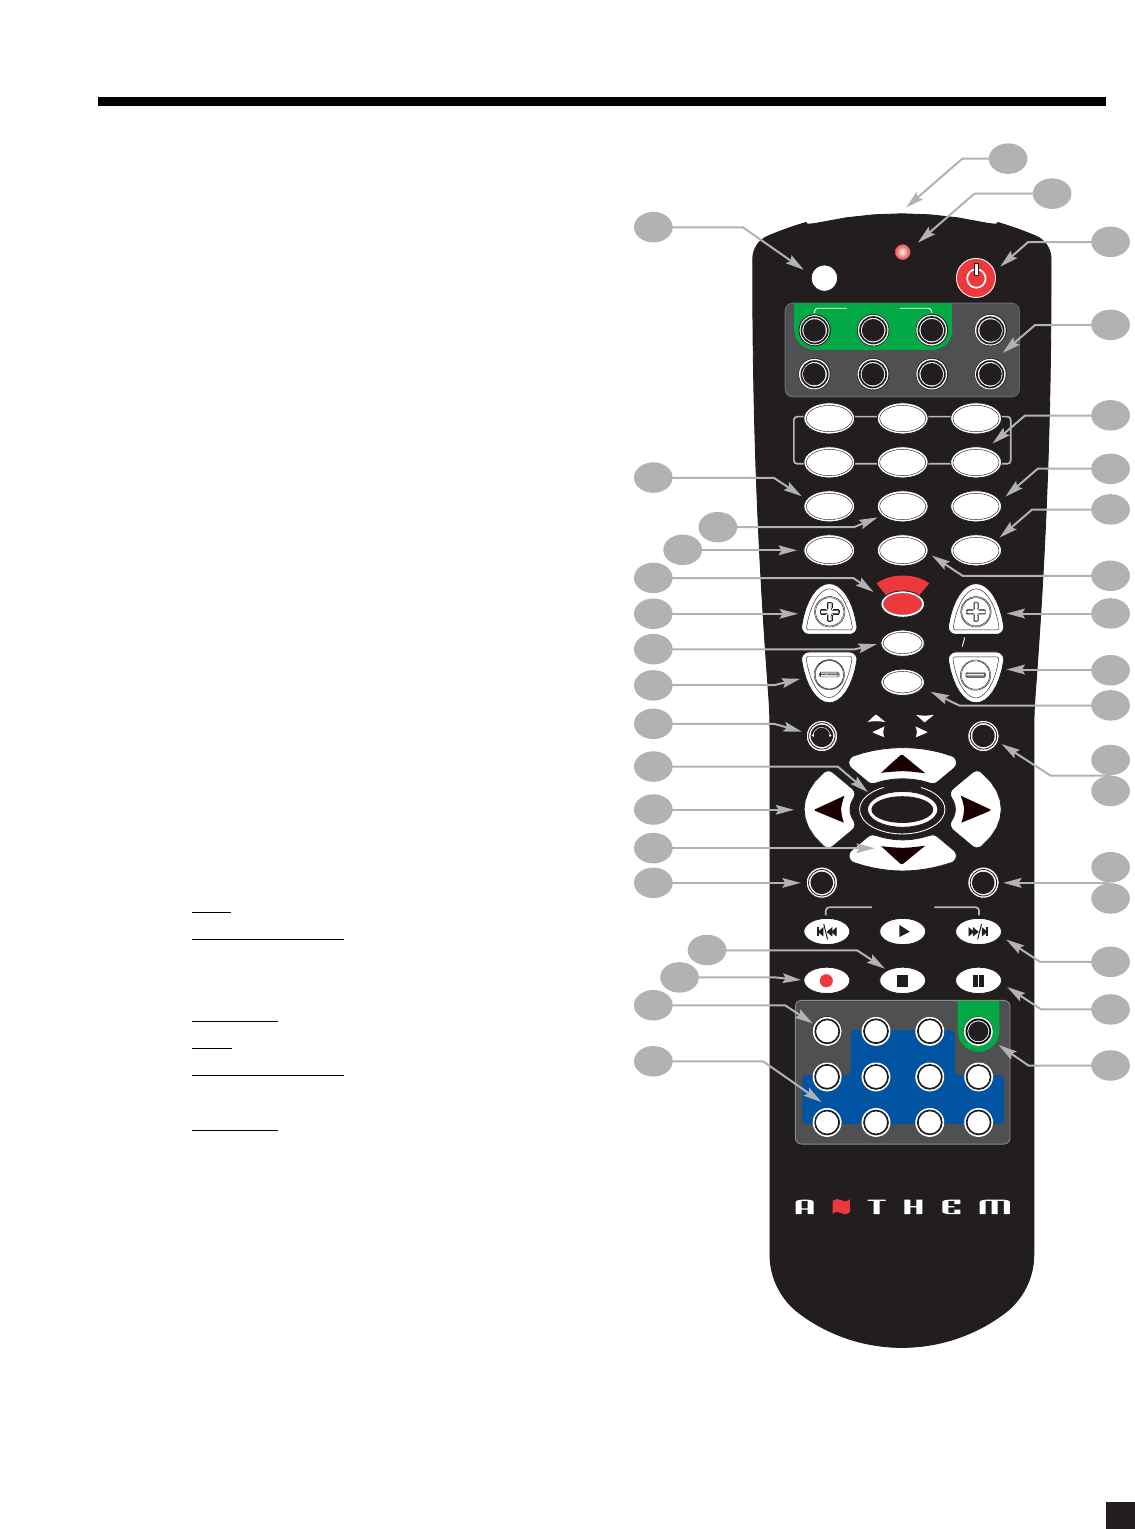
3.4 REMOTE CONTROL LAYOUT
1 – IR Transmitter (front face)
2 –Transmission Indicator LED (red)
3 – Power ON when in MAIN, ZONE2, or ZONE3 personality
Power ON/OFF for other components (see #4)
Note: This does not turn the AVM 30 off (see #31)
4 – Path / Component ‘Personality’ selection
5 –FM • AM Preset selection (6)
6 – Selects Tone Bypass
7 – Mode setting
8 – Dynamics setting
9 –FM • AM Preset Station Up
10 –FM • AM Preset Station Down
11 – THX Options settings
12 – Center Channel setting for Level / Bass / Treble
13 – Back (for Setup)
14 – Subwoofer / LFE Level settings
15 – Setup (Press & Hold for 3 seconds)
16 – Source Seek
17 – Balance setting
18 – RECORD Path selection (Must be in MAIN – see #4)
19 – Source selection (10 inputs)
20 – Copy MAIN when ZONE2, ZONE3, or RECORD is selected
21 – Bass setting
22 –Treble setting
23 – Surrounds / Rears setting for Level / Bass / Treble /
Balance
24 –• Tune for FM • AM
• Setting Adjustment
for Mode; DD Dynamics; THX
Options; Surround Mode Level / Bass / Treble; Path
Bass / Treble; Timers; Display Brightness
• Navigation
for Setup
25 –• Seek for FM • AM
• Setting Adjustment
for Surround Mode Balance;
Path Balance
• Navigation for Setup (North / South / East / West)
26 – Status / FM • AM Direct Entry / Setup selection
27 –Fronts / Headphones setting for Level / Bass / Treble / Balance
28 –Volume Down
29 – Sleep Timer selection / Timers setting
30 –Volume Up
31 – Power OFF when in MAIN, ZONE2, or ZONE3 personality
32 – Mute
33 –Front Panel LED / Display Brightness setting / Lip-Sync Delay
34 – On-Screen Display
35 – Learn (for customization of remote)
See section 6 for complete information on operation of the Remote Control.
3. PANELS / DISPLAY/ REMOTE LAYOUT continued …
