Macintosh
Canon USA S200 SH S2.ai
Clarity
7
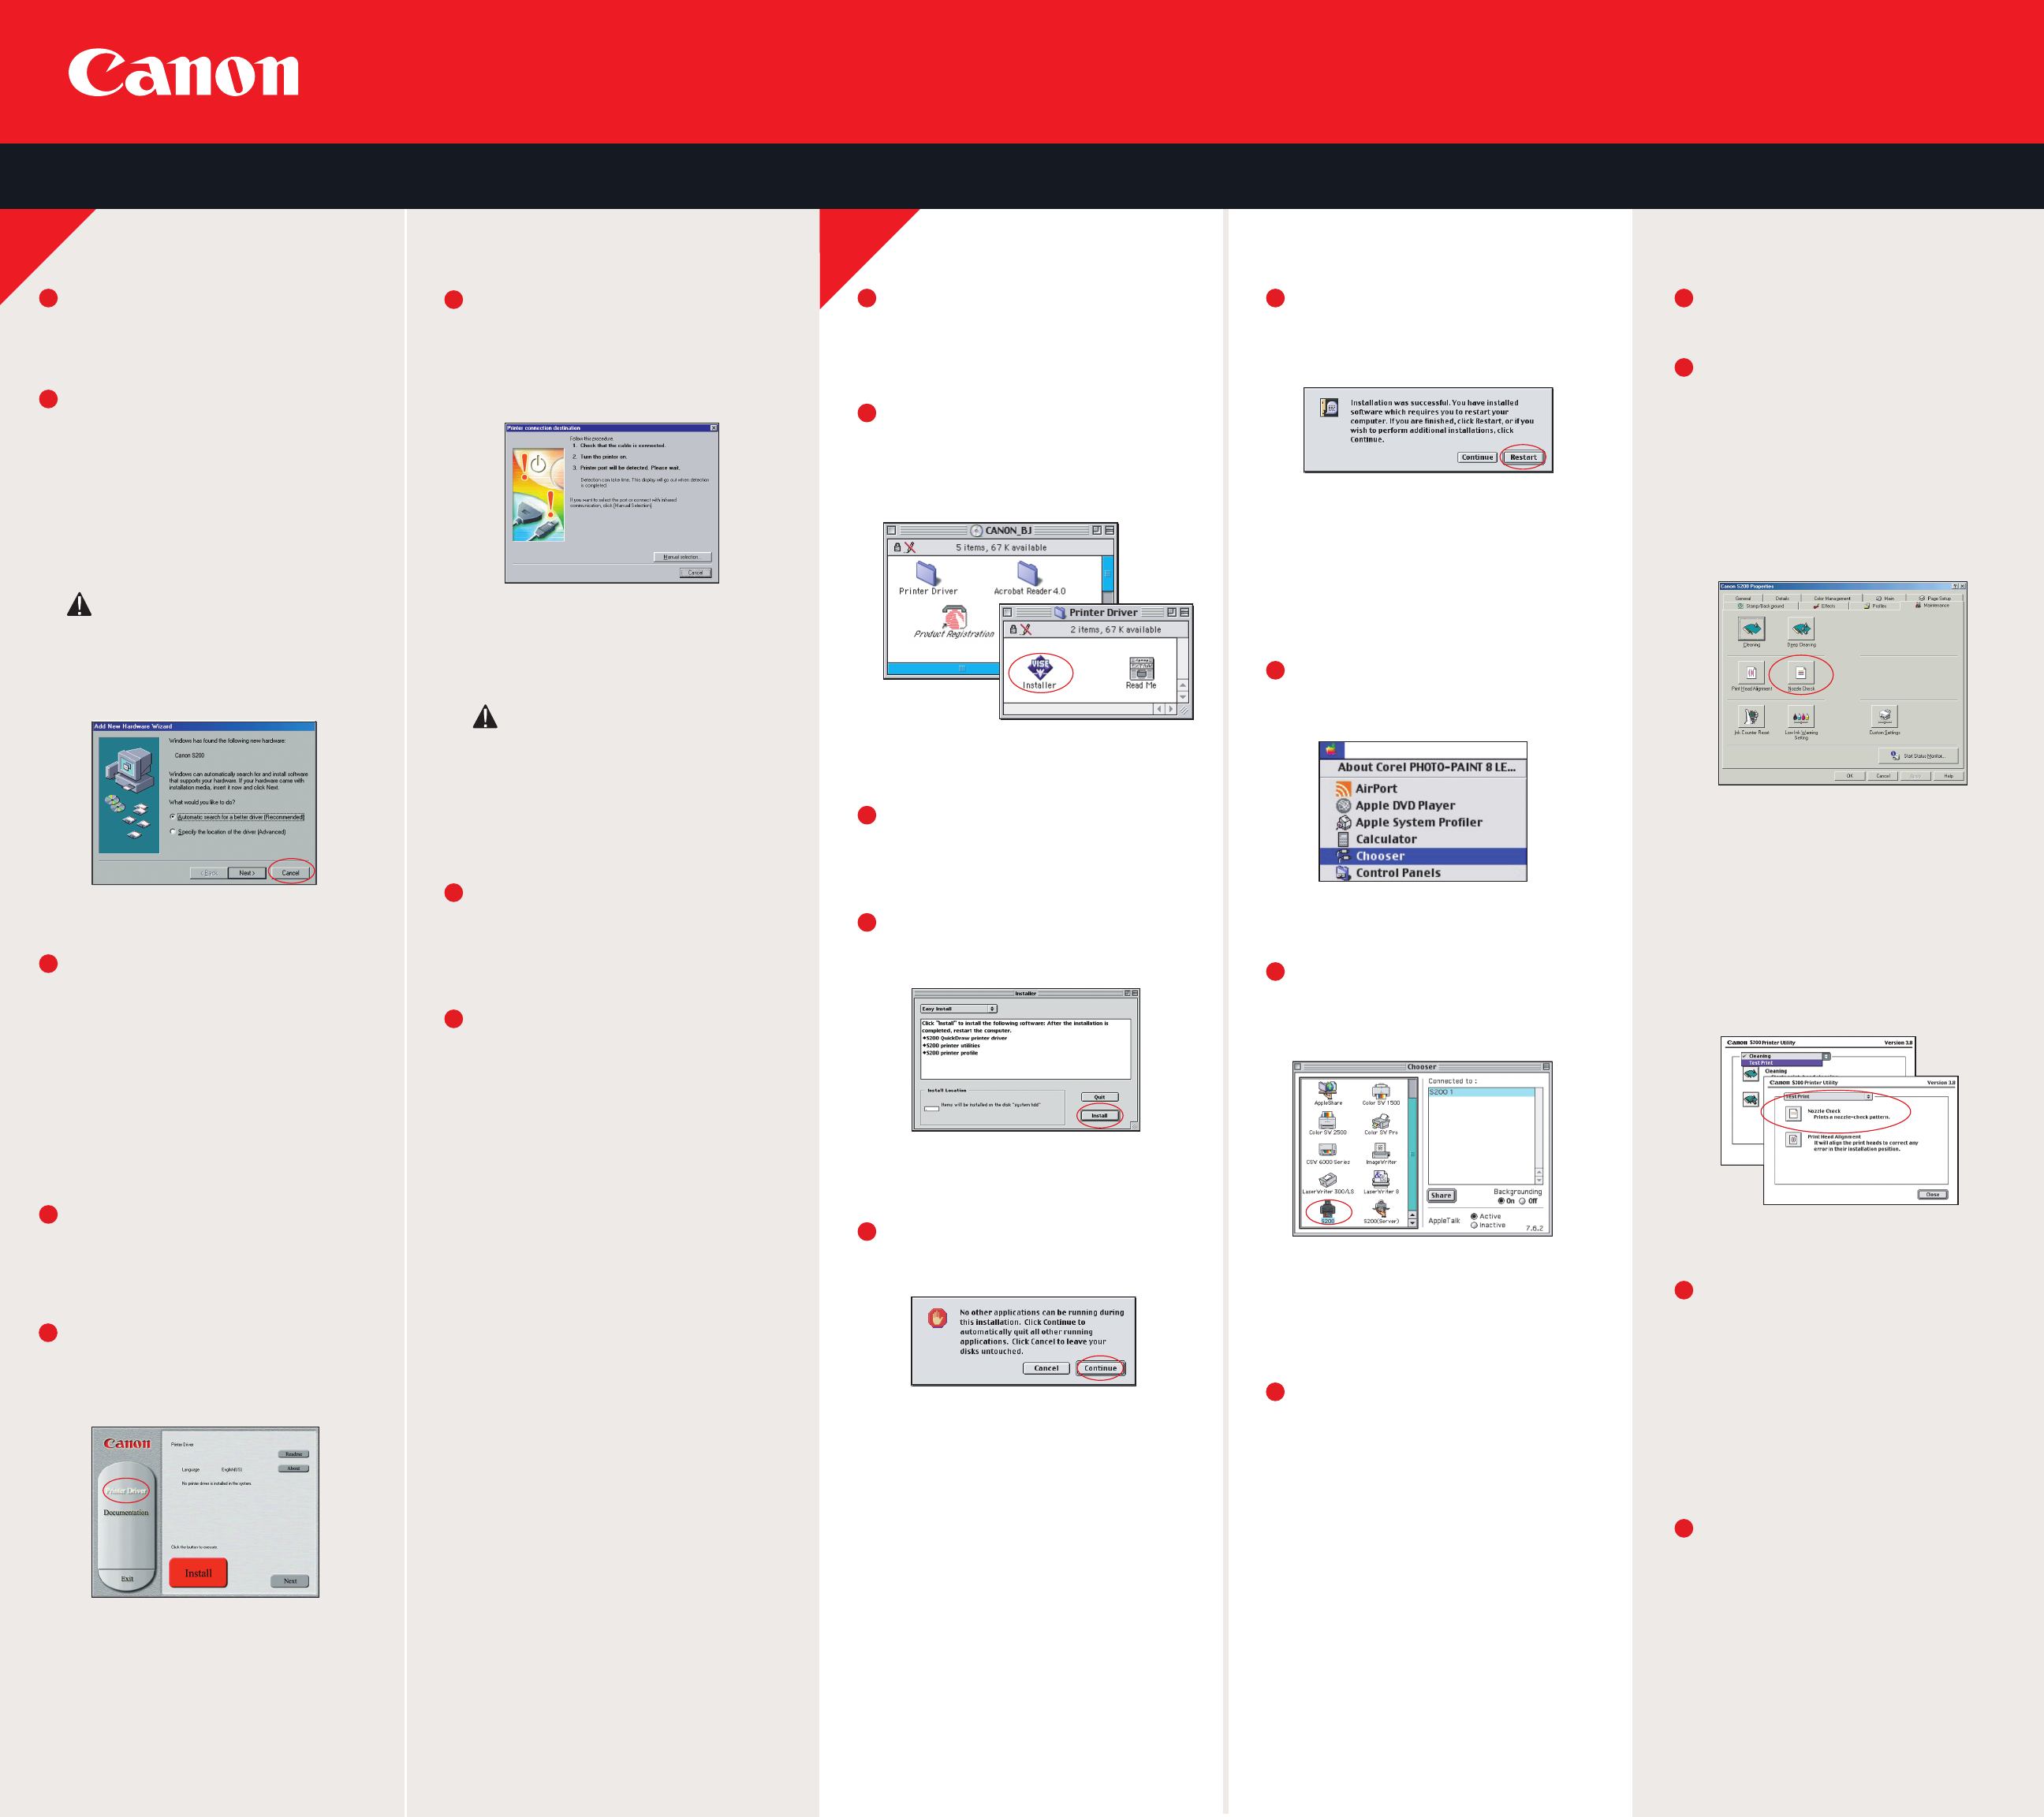
Check the Nozzle Pattern
With the printer on, place a stack of
blank paper in the paper rest.
Print a nozzle check pattern:
d. When prompted to print, click OK.
Macintosh:
a. From the File menu in a software
application, click Page Setup.
b. Click the Utilities button.
c. Click the down-arrow to select
Test Print.
d. Click the Nozzle Check icon.
e. When prompted to print, click OK.
Click OK (Windows) or Close (Macintosh)
when finished.
Windows:
a. Click Start, then Settings, then
Printers.
b. Right-click the Canon S200 icon,
then click Properties.
c. Click the Maintenance tab, then
click the Nozzle Check icon.
1
2
Examine the printed nozzle check
pattern to check if all colors (yellow,
magenta, cyan and black) are printed,
and all lines are drawn completely.
If there are any inconsistencies in
the colors or patterns, see the
S200 Quick Start Guide for how to
clean the printhead.
3
4
Part no. 0011X040
© 2001 Canon U.S.A. Inc.
Canon, BJ, BCI and Bubble Jet are trademarks of Canon Inc.
All other products and brand names are registered
trademarks or trademarks of their respective owners.
Specifications subject to change without notice.
PRINTED IN USA
After the computer restarts, select the
Apple menu, then Chooser.
Click the S200 icon in the Chooser. The
printer name will highlight and move to
the right panel.
NOTE: To use the BJ Print Monitor, set the
Backgrounding button to the On position.
Close the Chooser.
8
9
7
6
Open the printer driver folder on the
CD-ROM, then double-click the Installer
icon.
Read the License Agreement, then click
Accept if you agree.
Click Install. The printer driver will load
automatically.
If the message "No other applications can
be running..." displays, click Continue.
When the installation and registration
process has completed, click Restart.
NOTE: Remember to register your product to
ensure product support. The serial number is
located on the inside of the printer, to the
right of the printhead holder.
Be sure the printer is plugged in. Turn
your Mac on, then insert the S200
Setup Software & User's Guide CD-ROM.
5
4
3
1
2
When the Printer connection destination
window appears, PLUG THE PRINTER IN
so the printer port (connection) can be
automatically detected.
The software will begin identifying the
printer port being used.
IMPORTANT: If your computer cannot
detect a printer port, refer to the
Troubleshooting chapter in the
S200 Quick Start Guide for instructions.
When the Installation Complete window
appears, click OK.
When the installation and registration
process has completed, click Exit. If you are
prompted to restart the computer, click Yes.
6
7
8
NOTE: Remember to register your product to
ensure product support. The serial number is
located on the inside of the printer, to the
right of the printhead holder.
Be sure the printer is unplugged and your
computer is turned off before continuing.
Close any open software applications,
including any virus detection programs,
then insert the S200 Setup Software &
User's Guide CD-ROM. The setup program
should run automatically.
NOTE: For Windows XP
TM
and 2000, log on
to Windows as an Administrator before
continuing.
Driver features and screen shots shown here
may differ from your screen depending on the
version of Windows you are using.
NOTE: If the setup program does not run,
click Start, then Run, then type X:\msetup.exe,
where X is your CD-ROM drive.
Read the License Agreement, then click
Yes if you agree.
When the main menu appears, ensure that
the Printer Driver is selected, then click
Install.
NOTE: If you are prompted to restart Windows,
remove the CD-ROM, then click OK. After the
computer restarts, insert the CD-ROM and continue.
Turn your computer on.
IMPORTANT: Click Cancel if you see
a screen that says "New Hardware
Found", "Update Device Driver Wizard"
or "Add New Hardware Wizard":
1
2
3
4
5
Windows
6
Install the Printer Driver (Windows
®
)
6
Install the Printer Driver (Macintosh
®
)


