V7.1 1/08
4
1
2
3
4
5, 6
7
8
Software Installation
Installation instructions for models 42266 and 42276
Note: The software program and USB driver must both be
installed in order for the printer/meter to communicate with
the software. Please follow the installation instructions below.
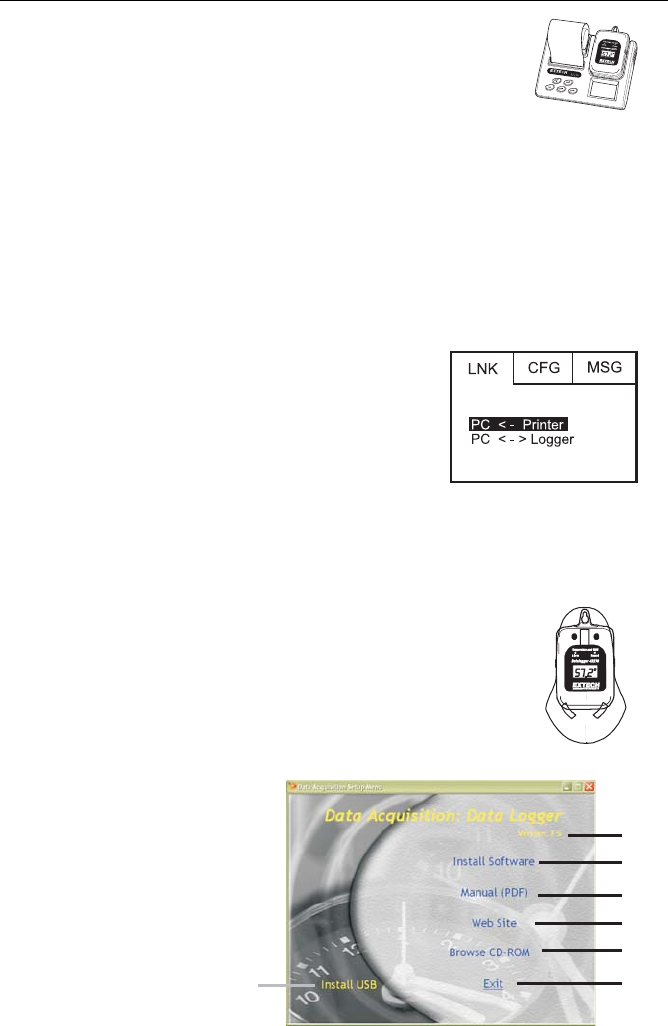
1. Place the supplied software CD in the PC CD-ROM. The Data Acquisition Setup
Menu will appear (see below).
2. Click on “Install Software” to start the installation of the software.
3. Click “Finish” to install the program to the default location or click on “Change” to
enter the directory in which to install the program.
4. Follow the on-screen instructions to complete the program installation.
5. Click “Install USB” and follow the on screen instructions to complete the USB driver
installation.
LNK PC Link Screen
The printer must be set to PC communication on the Link
screen before communication can occur.
1. Turn the printer on
2. Press the Menu button until the LNK screen
appears.
3. Press the Up or Down button to select the logger or
the printer memory.
4. Press Enter when the selection is complete
Installation Instructions for models 42265 and 42275
Place the supplied software CD in the PC CD-ROM drive.
1. Click on “Install Software” to start the installation of the software.
2. Click “Finish” to install the program to the default location or click
on “Change” to enter the directory in which to install the program.
3. Follow the on-screen instructions to complete the program
installation.
Setup menu description
1. Install USB driver
2. Exit: Close the Setup Menu
3. Software Version number
4. Software installation
5. Open the English manual
6. Open the Spanish manual
7. Visit the Extech website
8. View all items on the CD-ROM


