Model 42582 Version 6.0 Sept 2007
6
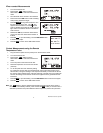
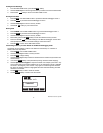
Viewing Stored Readings
1. From the WECLOME screen, press the F2 MEM softkey
2. Use the Arrow keys to scroll through the memory locations and view the stored data.
3. Press the F1 EXIT softkey to return to the WELCOME screen.
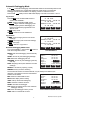
Printing Stored Data
1. Press F2 MEM from WELCOME screen to proceed to Manual Datalogger screen 1.
2. Press F4 NEXT to proceed to Manual Datalogger screen 2.
3. Use the Arrow keys to scroll to a memory location
4. Use the F3 PRN softkey to print a data record.
Erasing Data
1. Press F2 MEM from the WELCOME screen to go to Manual Datalogger screen 1.
2. Press F4 NEXT to proceed to Manual Datalogger screen 2.
3. Use the Arrow keys to scroll to a memory location.
4. Momentarily press the F2 CLR softkey to erase the selected memory location.
5. Press and hold F2 CLR to erase all readings in the Manual datalogger. Answer YES
when prompted to erase ALL recorded readings. Press NO to abort.
6. Press F1 EXIT to return to the WELCOME screen.
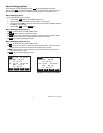
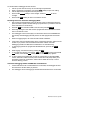
Customizing a Memory Location Header in the Manual Datalogging mode
The Header for each Memory location is the Date and Time stamp. To customize a
header, follow the steps below:
1. Press F2 MEM from the WELCOME screen.
2. Use the Arrow keys to select a memory location.
3. Press F3 EDIT to begin editing.
4. Use the Arrow keys to step forward and backward in the header line (characters will
not be erased)
5. Use the F3 BACK softkey to step backward (erasing characters while stepping).
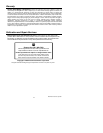
6. Use the Alphanumeric keypad to compose a header. For example, press the ‘2’ key
and a window with the characters related to the ‘2’ key will appear (namely, 2abcABC
as shown in the diagram). Then use the ‘2’ key again to scroll through the character
list. When the desired character is highlighted the meter will automatically place that
character in the header.
7. The F2 CLR softkey is used to erase the header.
8. The F4 ENTER softkey is used to save the header.
01:
T: 82.0l F
o
ABORT ENTERCLR
HEADER EDITING
BACK
2abcABC