40 4141
3. Use the Left/Right buttons to specify the direction
of picture taking, and then in 2 seconds the
panoramic sequence will commence automatically.
4. ComposeyourrstviewontheLCDscreenandpress
the shutter button.
5. Use "Stitching Mode" selected from the Menu.
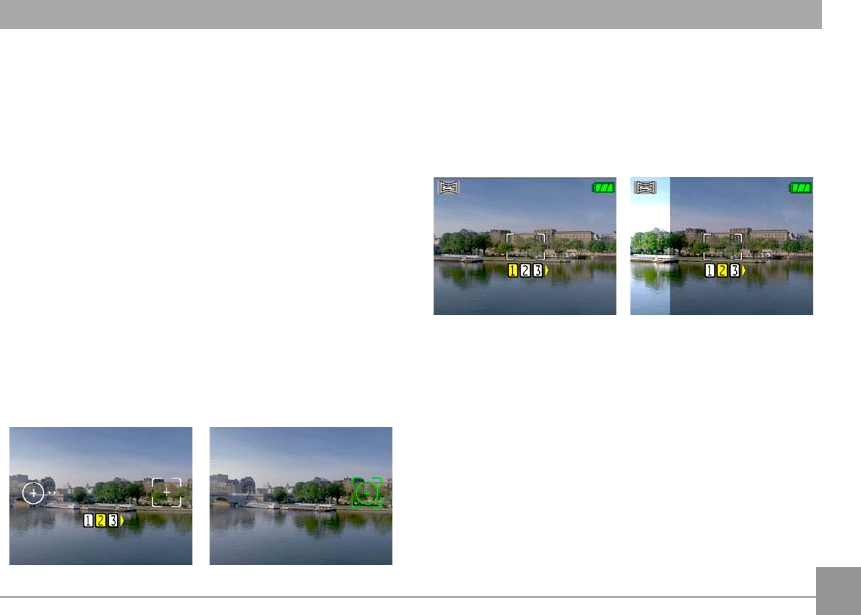
When Using Auto Stitching:
Aftertherstshotistaken,thecamerawillmakea
calculationandtwoiconswillappearontheLDCscreen.
Oncetheyappear,movethecameraandthecircleicon
onthescreenwillmovewiththesceneryuntilitreaches
the square frame icon. When circle icon and square
frame become green, the camera will take pictures
automaticallyandnishthestitching.
When Using Manual Stitching:
Aftertherstshotistaken,thesemi-transparentimage
oftherstshotwillappearattheedgeofthescreen.
You can use this image to compose your picture before
youpresstheshutterbuttontonishmanualstitching.
6. The camera will then stitch the pictures into a
panorama automatically.
7. Turnthemodedialtoplaybackmodetoviewthe
panoramic picture.
