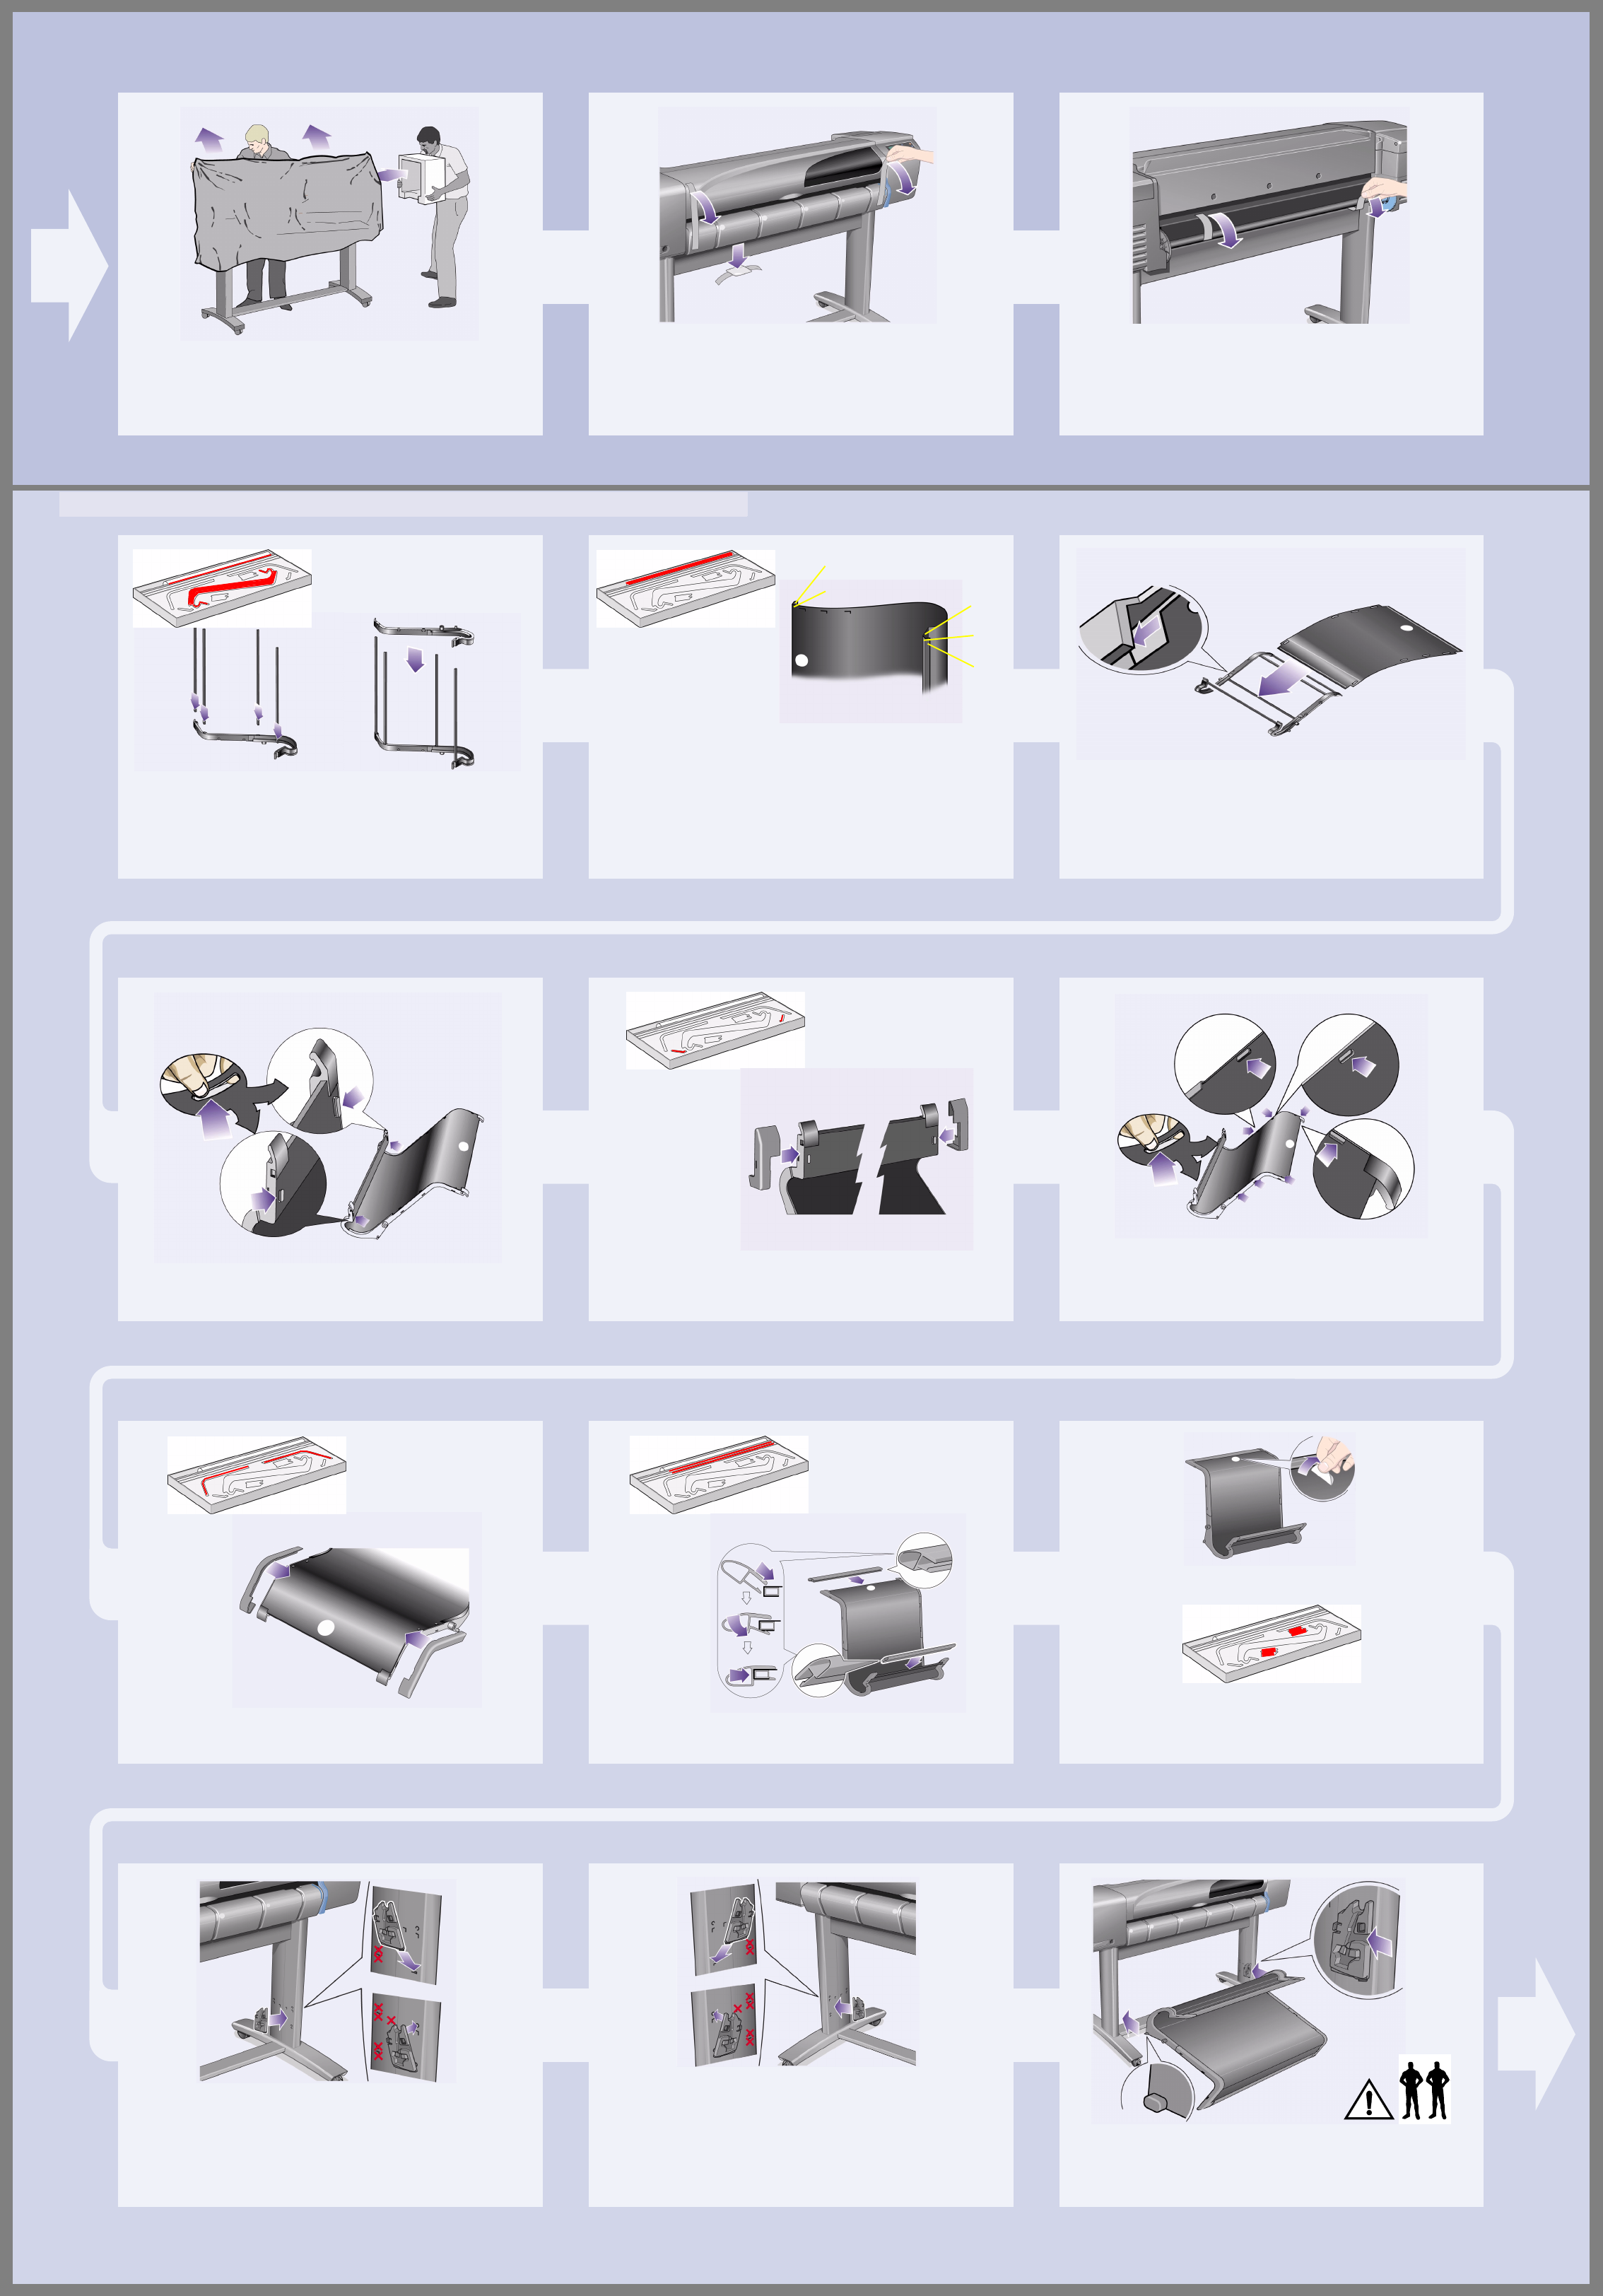
7–Remove the plastic covering and foam end
caps.
8–Remove the tapes from the window and the
spindle.
Remove also the small bag of desiccant
material.
9–Remove the tapes from the spindle at the
back of the printer.
1–Insert the four bars into the slots in the right
bin holder, and then mount the left bin holder
onto the four bars.
2–Remove the bin “film” from its container. You
will need to form five creases in the film so that it will fit
properly into the bin holders. Four of these creases are
1 cm and 2 cm from each end, both in the same sense,
with an orientation circle on the outside. The third
crease is also in the same sense, and 9 cm from the
end furthest from the circle.
1cm
1cm
1cm
1cm
7cm
3–Slide the bin “film” into the groove in the bin
holders, and bend it into position. Insert the end
with the two creases first. Slide the film fully to the end
so that the creases are in the correct positions.
4–Clip the film into place at one end...
5–...and attach the two caps to this end of the
film.
6–Clip the film into place at the other end...
7–...and attach the two caps to this end.
8–Clip the end pieces to the film and sides.
9–The paper bin is now complete. You should
now peel off the orientation circle.
In the next steps it will be attached to the printer stand
by two adapters which must first be located into the
printer legs; then the bin will be slotted into the
adapters.
10–Attach the right adapter to the stand. It is
marked with the letter ‘R’, and must be attached to the
front part of the right leg. First hook the bottom into its
slot and then raise it into place; you should hear two
clicks as the top is clipped in.
11–Attach the left adapter to the stand. It is
marked with the letter ‘L’, and must be attached to the
front part of the left leg.
If you ever need to remove an adapter, the two latches
near the top must be unclipped; insert a pencil or similar
tool into the hole to release each latch.
12–Insert the bin onto the adapters. Hold the bin
horizontally and insert the small pins into their slots. (It’s
easier if two people do this for the E+/A0+-size model.)
5. Assemble the Paper Bin (E+/A0+-size models and accessory with D/A1-size models)


