13–Raise the bin into its correct position.
Raise the bin until the large pins align with their slots
and the bin drops into place.
1–From the red documentation package
(the “installation pack”) remove:
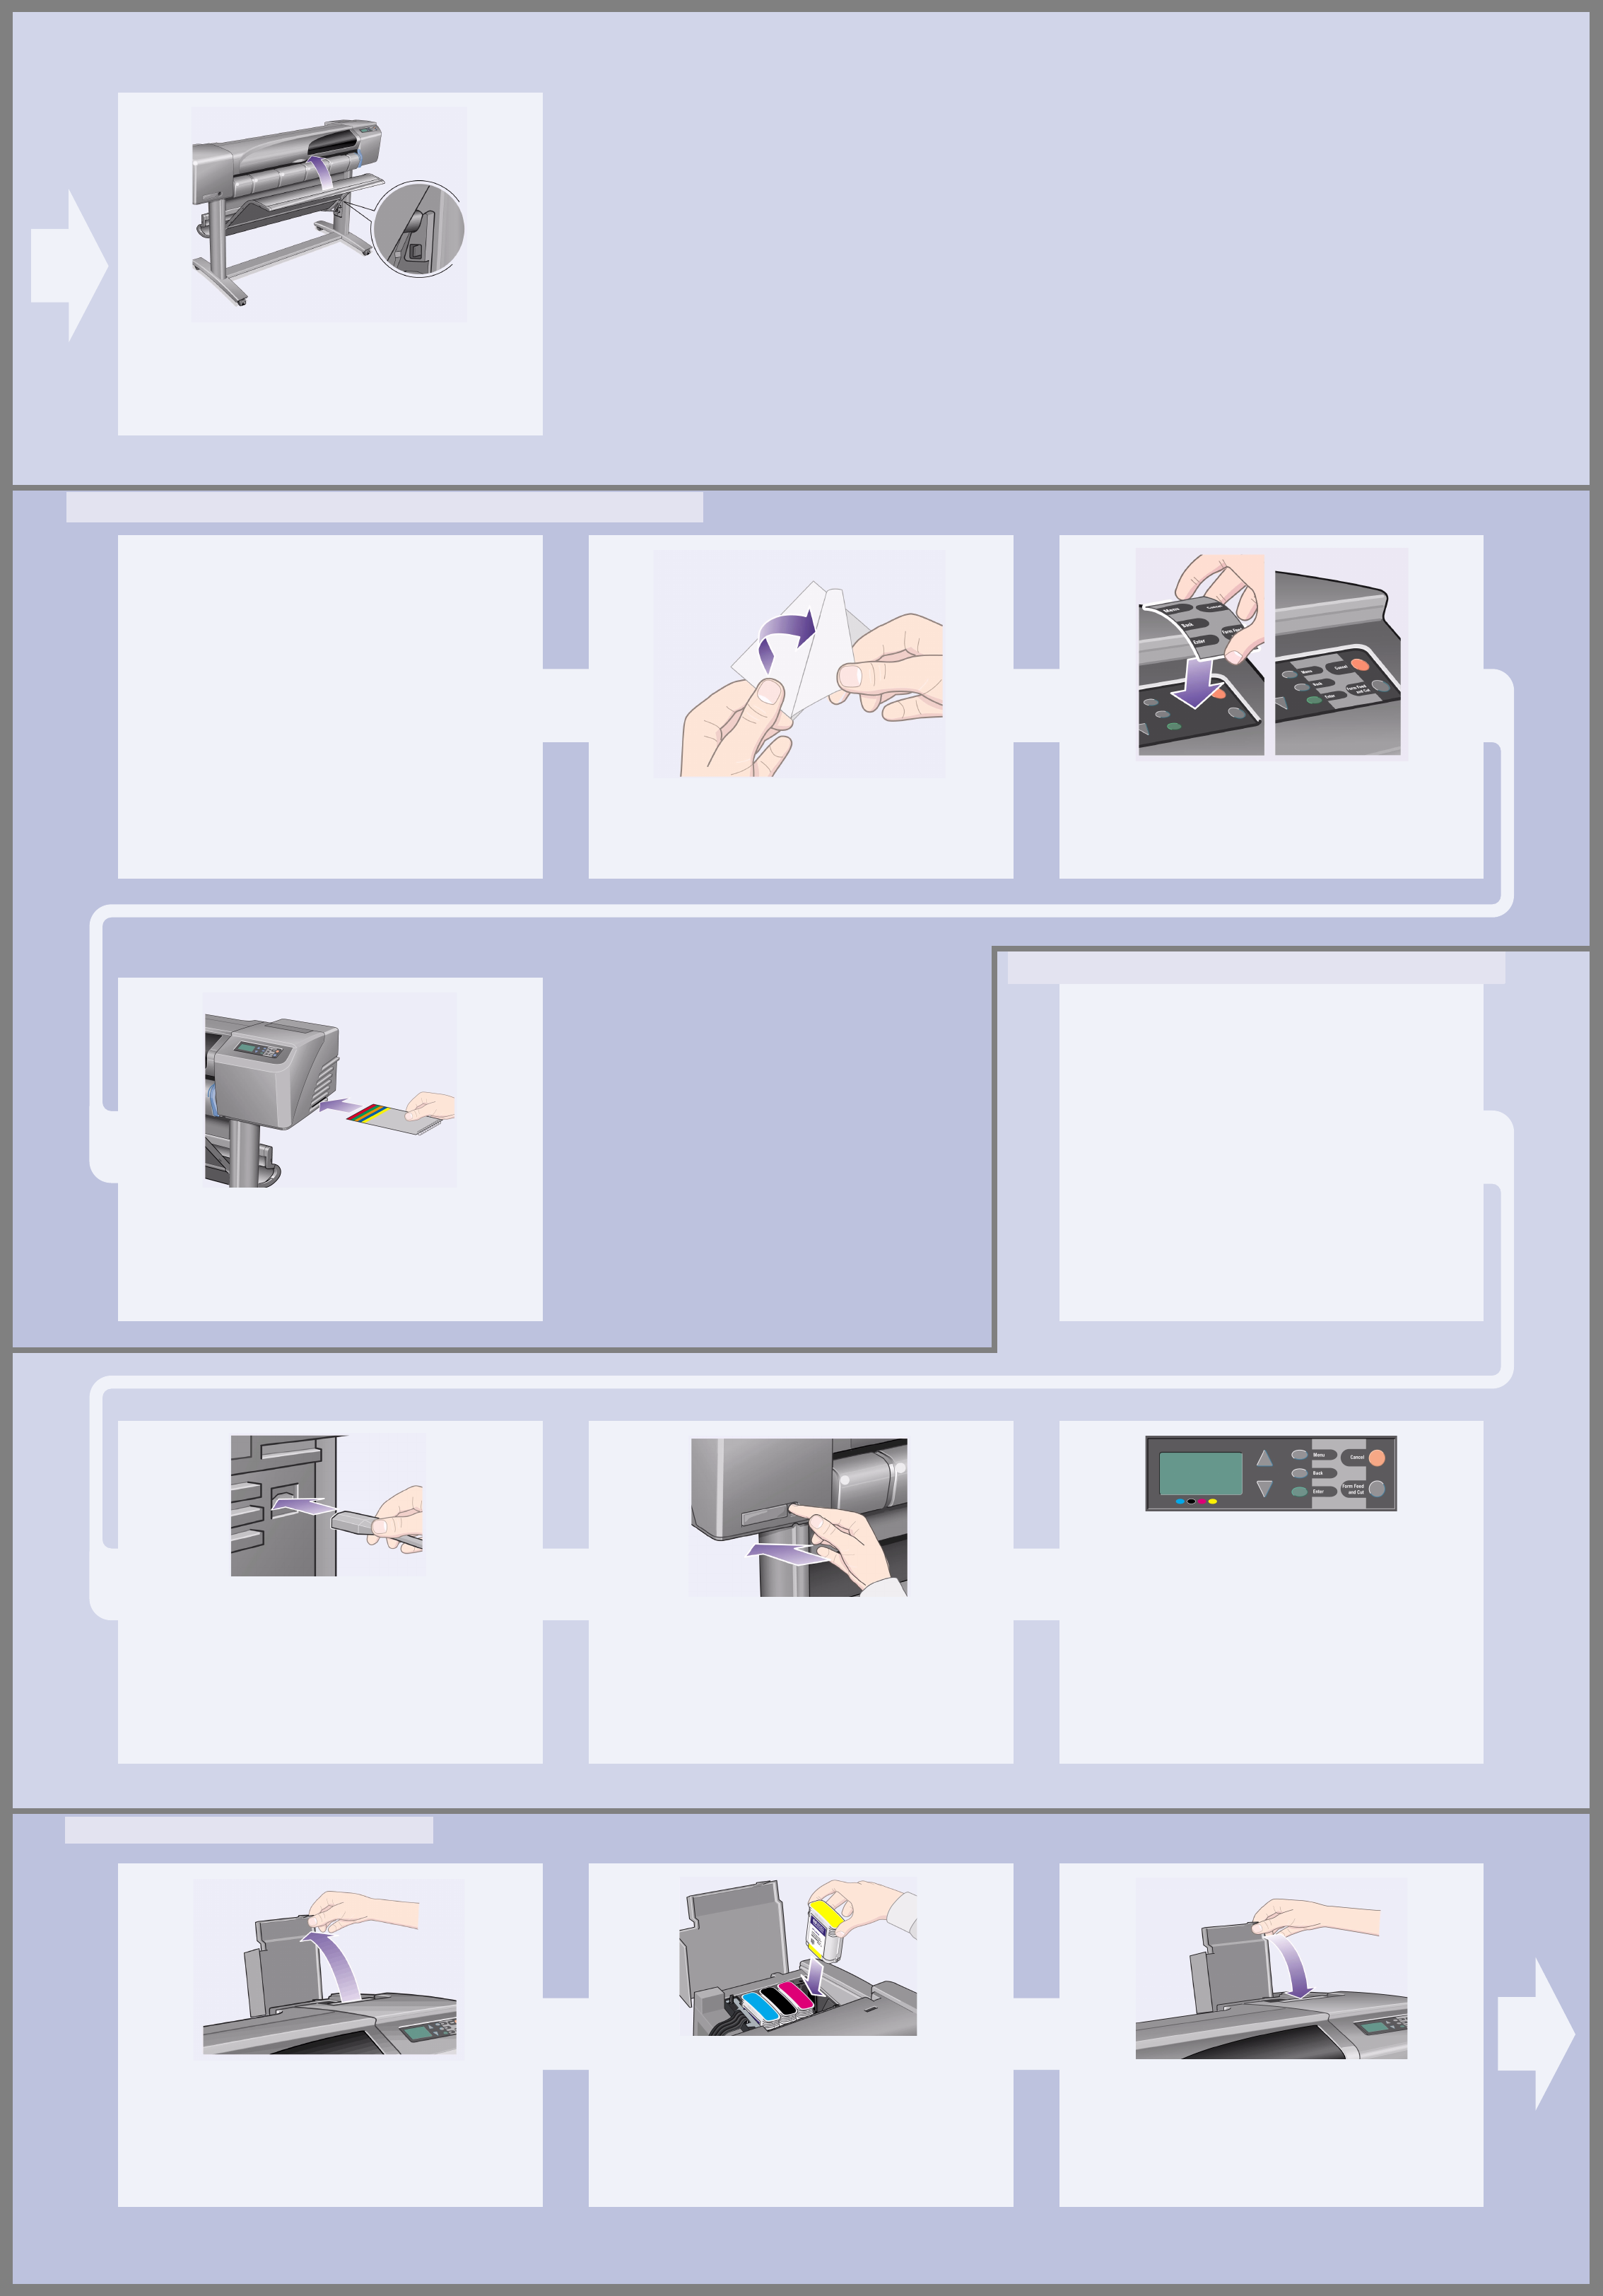
– The Front-Panel overlay, for use in the next step.
– The Pocket Guide, for use in the next step.
– The ink cartridges, for use in “Insert Ink Cartridges” on page 4.
– The printheads, for use in “Replace Set-Up Printheads with
Active Printheads” on page 5.
– The cables, for use in “Switch On and Choose a Language” on
page 4 and “Install and Connect a LAN Card” on page 7.
2–Front-Panel Overlay (1) The overlay for the Front
Panel of the printer is in the “Installation pack” of
documentation and other items. Peel off the backing.
3–Front-Panel Overlay (2) Carefully stick the
overlay onto the Front Panel, which is at the right side of
the front of the printer.
4–The Pocket Guide is also In the “Installation pack”
of documentation and other items. It contains important
information for the use of the printer. We strongly
recommend that you put the Pocket Guide into the
horizontal slot on the right-hand side of the printer, so
that users of the printer can refer to it when necessary.
WARNINGS
• When the printer is powered on, keep objects such as
hair, jewelry and clothing away from the printer
mechanisms.
• Make sure that the power cord supplied with your
printer matches your AC power outlet connection.
Only use a three-wire (earth-grounded) power cord
with this printer.
1–Plug the power cord into the socket at the back of
the printer and then into the AC power outlet.
2–Switch on if the printer doesn’t automatically
come on:
The printer’s On/Off switch is located on the
front left of the printer. It is a simple push-button switch
with a green light (LED) to indicate when it is On.
Switch the power on by pressing the button once.
If there is no sound from the printer and no light on the
switch’s LED, you have a power problem. Check the
power cord connections and power source.
3–Select a language: After up to a minute, the
printer’s front-panel menu will invite you to set the
language. The menus are available in the following
languages:
English, Italian, Portuguese, German, French,
Spanish, Catalan, Japanese, Korean, Traditional
Chinese, and Simplified Chinese.
On the front panel, press the ∆ or ∇ key until the
language you want is highlighted.
Then press the Enter key to select the language.
1–Open the ink cartridge cover and remove the
packaging from the ink cartridges, which are in the
“Installation pack” of documentation and other items.
2–Insert the ink cartridges into their correct
positions. Colored labels on the ink cartridges must
correspond with the same colored labels on the printer.
3–Close the ink cartridge cover. The printer starts
to initialize its ink system as soon as the last cartridge is
inserted. Wait for about a minute until this has finished.
6. Locate the Front-Panel Overlay and Pocket Guide (all models)
7. Switch On and Choose a Language (all models)
8. Insert Ink Cartridges (all models)


