Installing a blade server
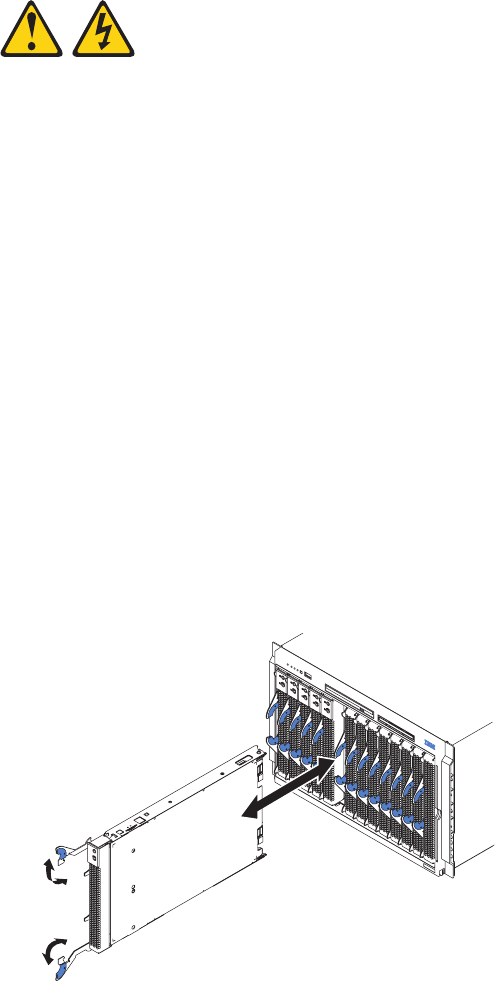
Complete the following steps to install a blade server in the BladeCenter unit.
Statement 21:
CAUTION:
Hazardous energy is present when the blade is connected to the power
source. Always replace the blade cover before installing the blade.
1. Read the “Important safety information” on page vii, “Installation guidelines” on
page 31, and “Handling electrostatic discharge-sensitive devices” on page 90.
2. Install any options needed, such as disk drives or memory, in the blade server.
See the documentation that comes with the blade server for instructions.
3. Select the bay for the blade server.
Notes:
a. If a blade server has an expansion option installed on it, the blade server
and expansion option require two adjacent blade bays.
b. If you install a blade server or option in bay 7 through 14, you must install
power modules in power bays 3 and 4.
4. Remove the filler blade from the bay, and store it in a safe place.
5. Ensure that the release levers on the blade server are in the open position
(perpendicular to the blade server).
6. Slide the blade server into the bay until it stops. The spring-loaded doors that
cover the bay opening move out of the way as you insert the blade server.
7. Push the release levers on the front of the blade server until they are closed.
8. Turn on the blade server by pressing the power-control button on the blade
server control panel. See the documentation that comes with the blade server
for more instructions.
9. Verify that the power LED on the blade server control panel is lit, indicating
that the blade server is receiving power.
Chapter 4. Installing options 43
