13
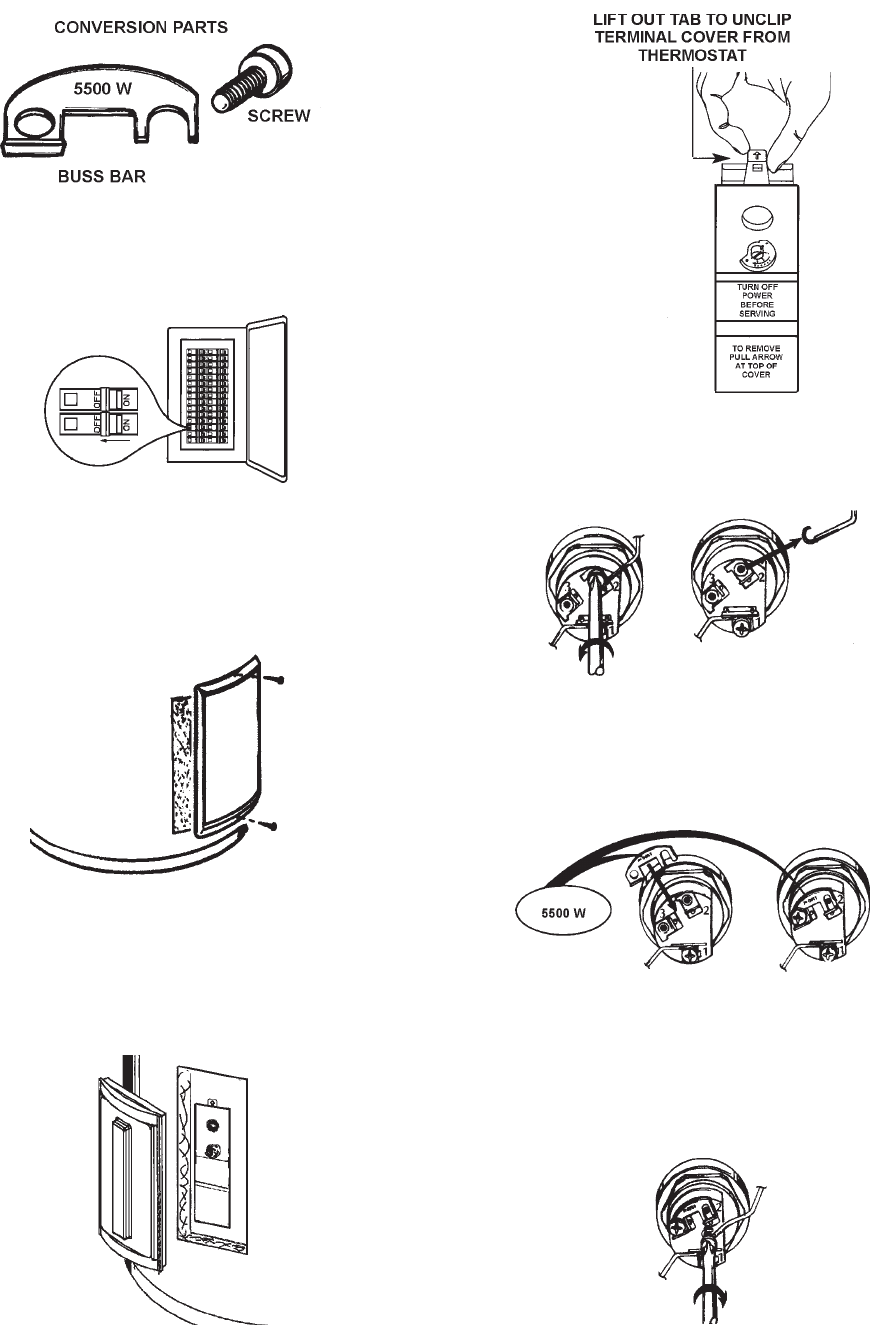
Necessary element conversion parts are located in a small bag
contained within the electrical junction box on top of the water
heater.
FIGURE 12.
1. Before beginning the conversion turn “OFF” electric power
supply to the water heater.
FIGURE 13.
2. The convertible element is located behind the lower access
panel of the water heater. Remove the two screws securing
the access panel, and remove panel.
FIGURE 14.
3. Remove the insulation cap with handle to expose the
terminal cover.
FIGURE 15.
4. Lower Element: Lift out the tab as shown to unclip the
terminal cover from the thermostat. The terminal cover can
now be removed from the thermostat.
FIGURE 16.
5. Remove the screws from terminal 2 of the element, and
move the looped end of the wire aside.
FIGURE 17.
6. The buss bar is labeled 5500 W. Place the buss bar over
terminals 2 and 3 with the 5500 W visible. Install the extra
screw provided into terminal 3.
FIGURE 18.
7. The wire removed from terminal 2 has a looped end. It
must remain looped and now be placed (as shown) on top
of the buss bar, over the opening of terminal 2, and secured
using the remaining screw.
FIGURE 19.
