5-4 Maintenance
Replacing the Toner Container
This section explains how to replace the toner containers. When
replacing the toner container of any color, always replace the waste toner
box at the same time. If this box is full, the printer may be damaged or
contaminated by the waste toner that may spill over the box.
IMPORTANT During toner container replacement, temporarily move
storage media and computer supplies (such as floppy disks and USB
memorys) away from the toner container. This is to avoid damaging
media by the magnetism of toner.
IMPORTANT Always clean the inside of the printer after replacing the
toner cartridge. For details, refer to Cleaning the Printer on page 5-8.
IMPORTANT Kyocera Mita Corporation is not liable against any
damages or problems arising from the use of toner containers other
than those designated as original Kyocera Mita toner containers. For
optimum performance, it is also recommended to use only the
Kyocera Mita toner containers which are specifically intended for use
in your country or region. If the toner container for another
destinations is installed, the printer will stop printing.
To replace the toner container, first make sure of the color of the toner
container requiring replacement. In this example, it is assumed that you
are replacing the yellow toner container.
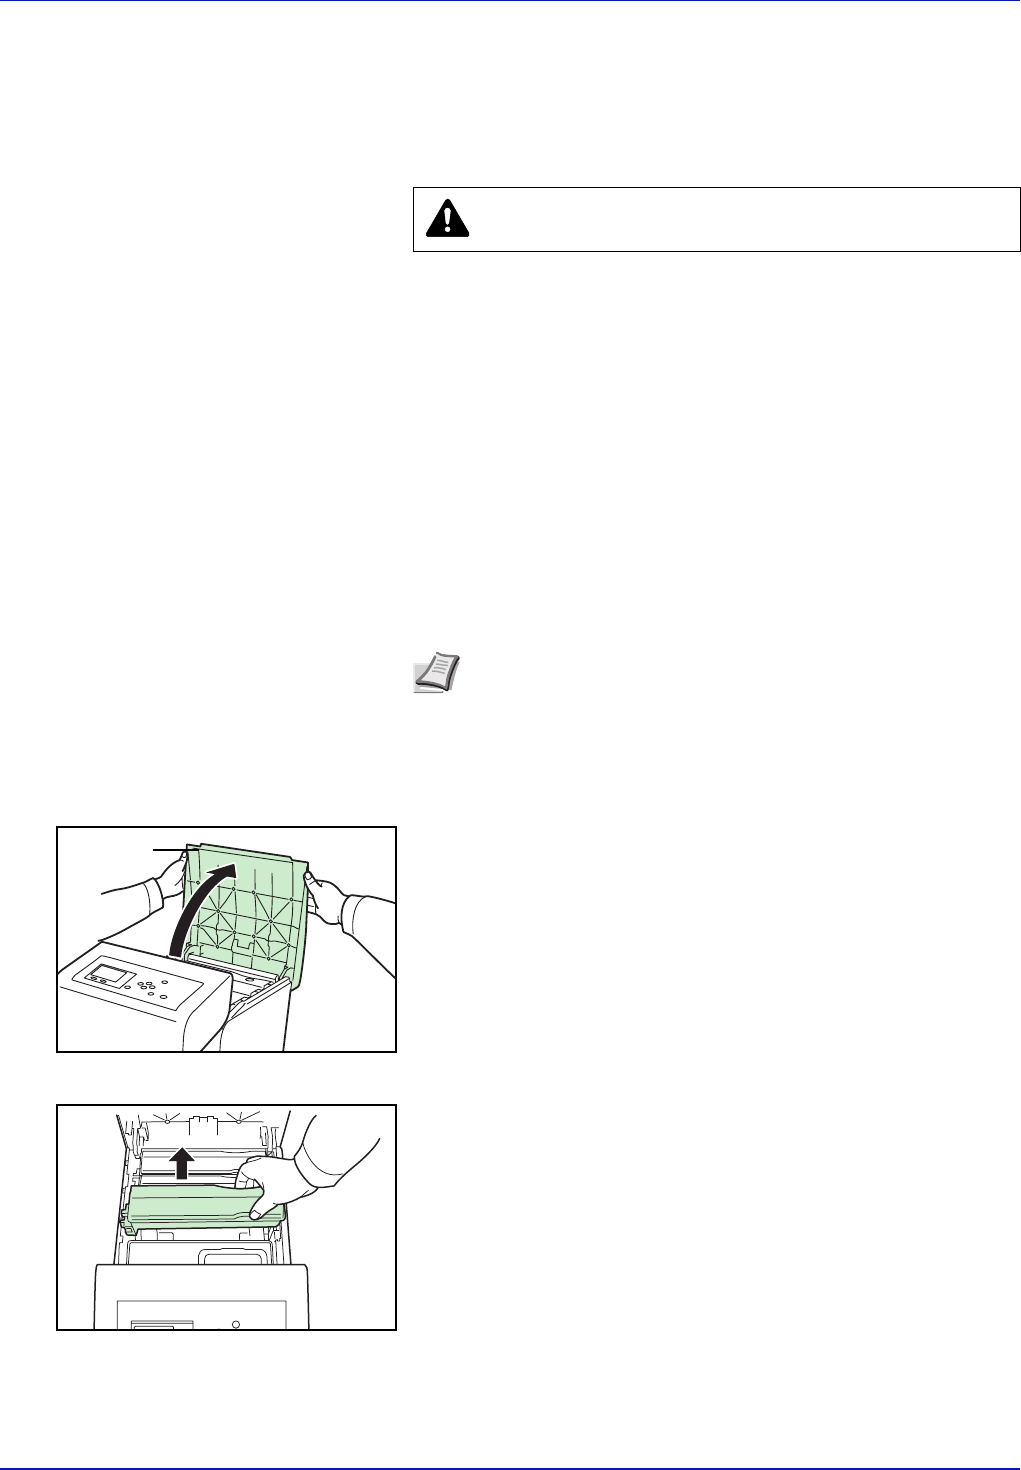
1 Open the top cover (top tray).
2 Carefully remove the old toner container from the printer.
CAUTION Do not attempt to incinerate the Toner
Container. Dangerous sparks may cause burns.
Note You do not have to turn printer power off before starting the
replacement. Any data that may be processing in the printer will
be deleted if you turn the printer power off.
Top Cover
(Top Tray)
