5-7
Section 5 COLOR COPY SETTINGS
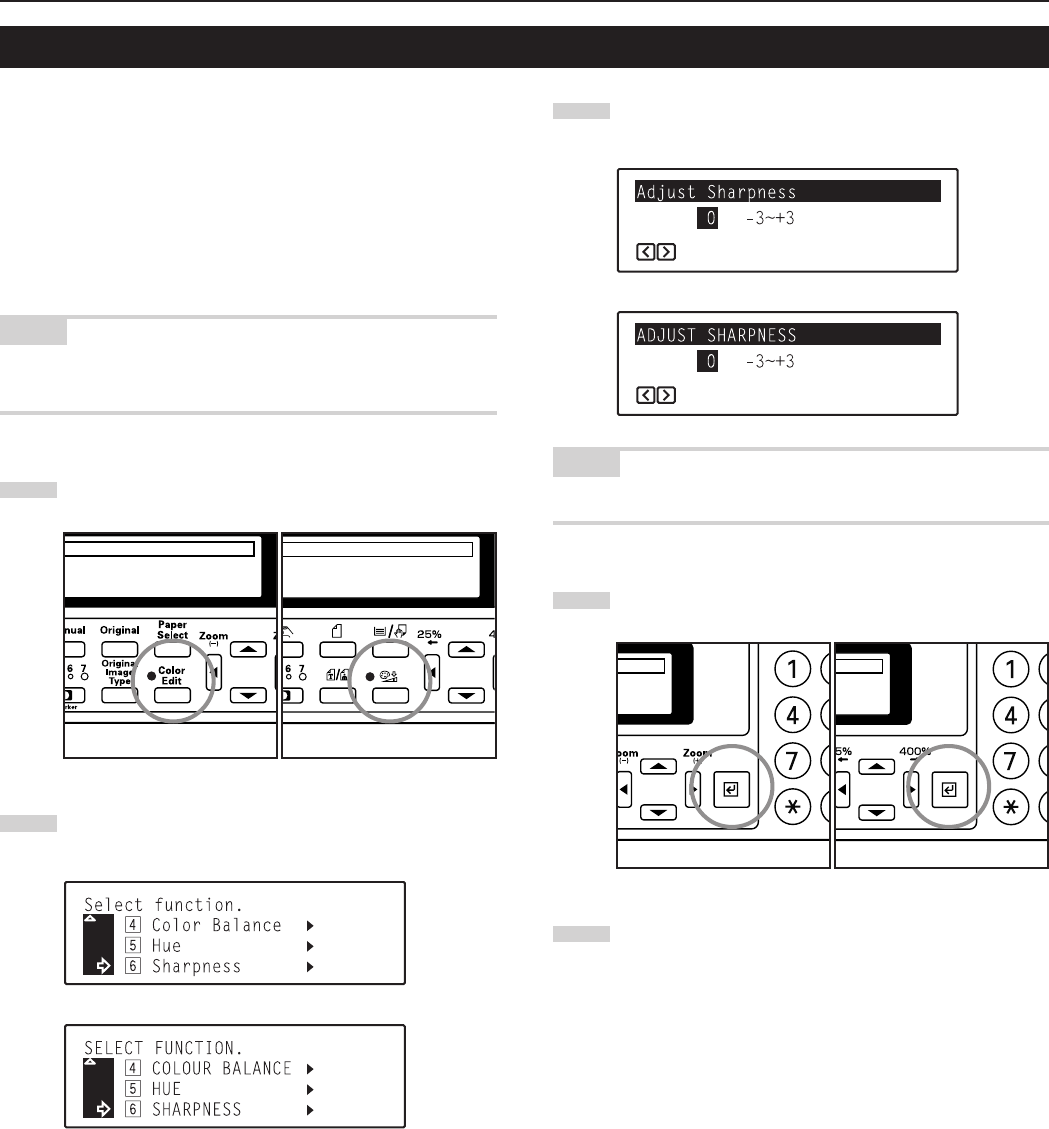
6. Adjusting the sharpness
This setting adjusts the contours of the image. When, for example,
copying originals that were written in pencil, if the text or lines are
blurred or broken, increase the sharpness setting (select a plus value)
and the text and lines should be copied more clearly. When copying
pictures from magazines and the like where the dots in the
photograph are evident and a moiré effect occurs (the phenomenon
where the dots do not appear to be lined up properly but seem to be
grouped together in patterns), decrease the sharpness (select a
minus value) to lighten the contours and reduce the moiré effect.
NOTE
For a sample of copies made with an adjusted sharpness, see
“Sharpness adjustment samples” on page iv.
1
Press the Color Edit key to light the corresponding indicator.
2
Use the M cursor or the N cursor key to select
“n Sharpness” and then press the Enter key.
Inch specifications
Metric specifications
3
Use the O cursor or the P cursor key to adjust the
sharpness as desired.
Inch specifications
Metric specifications
NOTE
Adjustment is possible in 7-step increments between -3 and +3.
4
Press the Enter key.
5
Use the M cursor key to select “z End” and then press the
Enter key. The message display will return to the “Ready to
copy.” screen.
Inch specifications Metric specifications
Inch specifications Metric specifications
