24 3. TV Connections
Composite Video Connection
Required: Analog stereo audio and composite video
cables supplied with the camcorder.
1. Connect a composite video cable from
VIDEO OUT
on the camcorder to
INPUT 3/VIDEO
or
VIDEO/Y
on
the TV.
2. Connect left (white) and right (red) audio cables
from
AUDIO OUT
on the camcorder to
INPUT 3/
AUDIO L
and
AUDIO R
on the TV.
I
N
P
U
T
L-AUDIO-R
VIDEO/Y
Pb
Pr
3
USB
L-AUDIO-R
VIDEO/Y
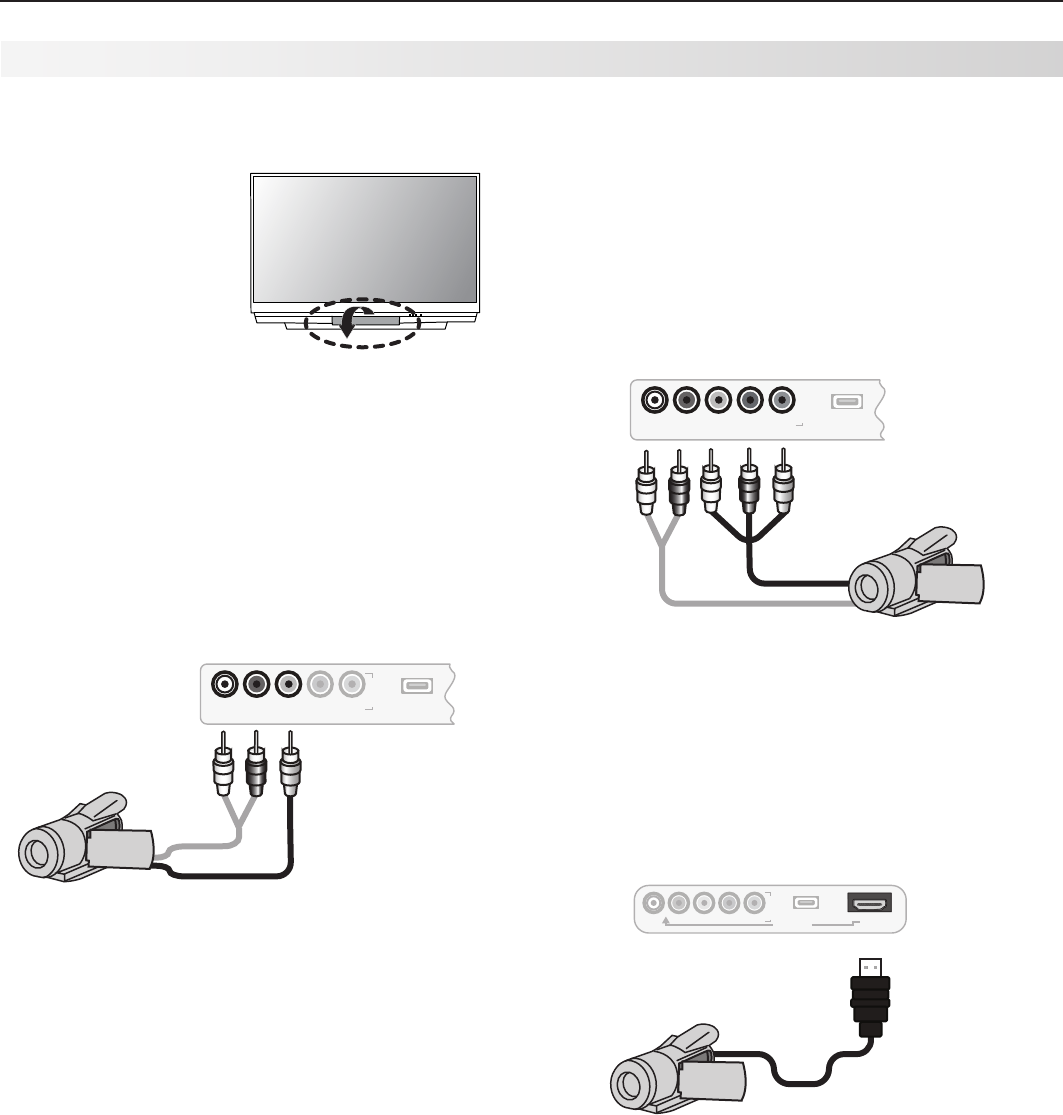
Figure 13. Composite video connections for a camcorder
HDMI Connection
Required: HDMI cable supplied with the camcorder.
Connect the camcorder to the TV’s
HDMI 4
jack on the
front panel.
I
N
P
U
T
L-AUDIO-R
VIDEO/Y
Pb
Pr
3
USB
HDMI 4
DVI AUDIO
HDMI 4
Figure 15. HDMI connection for a camcorder.
Component Y Pb Pr Video Connection
Required: Analog stereo audio and component video
cables supplied with the camcorder.
1. Connect component video cables from
VIDEO OUT
on the camcorder to the TV’s
INPUT 3
COMPONENT
jacks on the front panel.
2. Connect left (white) and right (red) audio cables
from
AUDIO OUT
on the camcorder to
AUDIO L
and
AUDIO R
on the TV.
I
N
P
U
T
L-AUDIO-R
VIDEO/Y
Pb
Pr
3
USB
L-AUDIO-R
VIDEO/Y
Pb
Pr
L-AUDIO-R
VIDEO/Y
Figure 14. Component video connections for a camcorder
Camcorder
Inputs on the front of the TV offer the most convenient
way to connect a camcorder.
Use jacks on the TV
front panel to connect a
camcorder


