41
The screens described below may not be necessary for your device setup. If it does not display automatically on-
screen, it is not required.
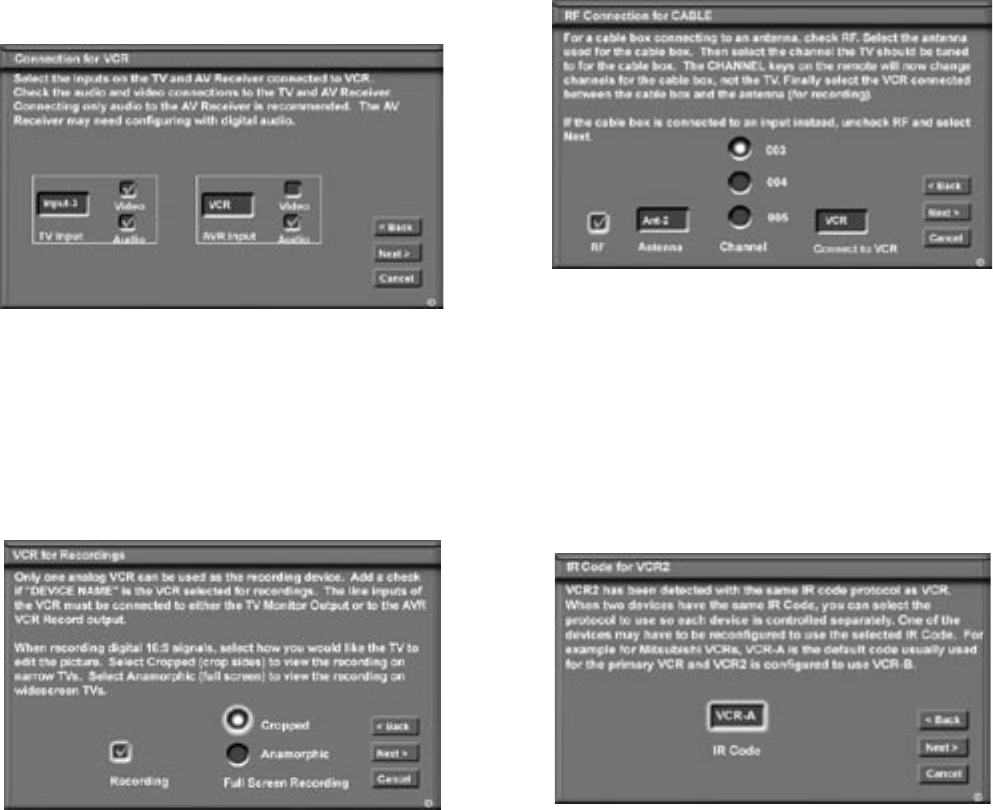
Connection for [Device] Screen
Figure 19
This screen allows the TV to learn the connection
between device(s) and input(s). Inputs 1-3,
Components 1 & 2, and/or the inputs for the A/V
Receiver all need to be checked, if connected. Add
or remove check marks to indicate what type of
connections (Audio, Video or Both) are used with each
TV and A/V Receiver input.
Note: Video inputs to the A/V Receiver are
normally used to transfer signals to the line input
of a VCR for recording. Mitsubishi recommends
leaving Video unchecked. If your VCR inputs
are connected to TV outputs Audio Video 1, then
you do not need to connect video to your A/V
Receiver.
Figure 19. Connection for [Device] screen
VCR for Recordings Screen
Figure 20
Select the VCR you would like to use for recording. You
may also select whether you want the recorded 16:9
signals from digital channels or IEEE-1394 devices to be
cropped (sides are cut off) or Anamorphic (full screen).
If Anamorphic is selected for viewing, choose the
Standard format for the best quality playback.
Figure 20. VCR for Recordings screen
Edit NetCommand
®
, Adding Devices, continued
RF Connection for Cable Screen
Figure 21
The RF Connection screen displays only when
adding or changing a cable box. If your cable box
is connected to a TV Antenna input, check the RF
checkbox. Select the TV antenna input that is used
with the cable box Select the channel number used for
output by your cable box. The default channel is 003. If
the cable box is also connected to a VCR for recording,
select that VCR.
If your cable box is connected using Audio/Video
cables, make sure the RF checkbox is unchecked.
Then the next screen will be Connection (Figure 19), to
allow the selection of the TV input used with the cable
box.
Figure 21. RF Connection for Cable screen
IR Code for [Device] Screen
Figure 22
This screen only displays if an added device has the
same IR code as a previously added device of the
same type and manufacturer. You can specify the IR
setting for the new device. For example, for the second
Mitsubishi VCR you can specify the IR Code setting to
VCR-B, if the primary Mitsubishi VCR is using the VCR-
A IR code.
Figure 22. IR Code for [Device] screen
