SDLT 600A Tape Drive Quick Start Guide
3
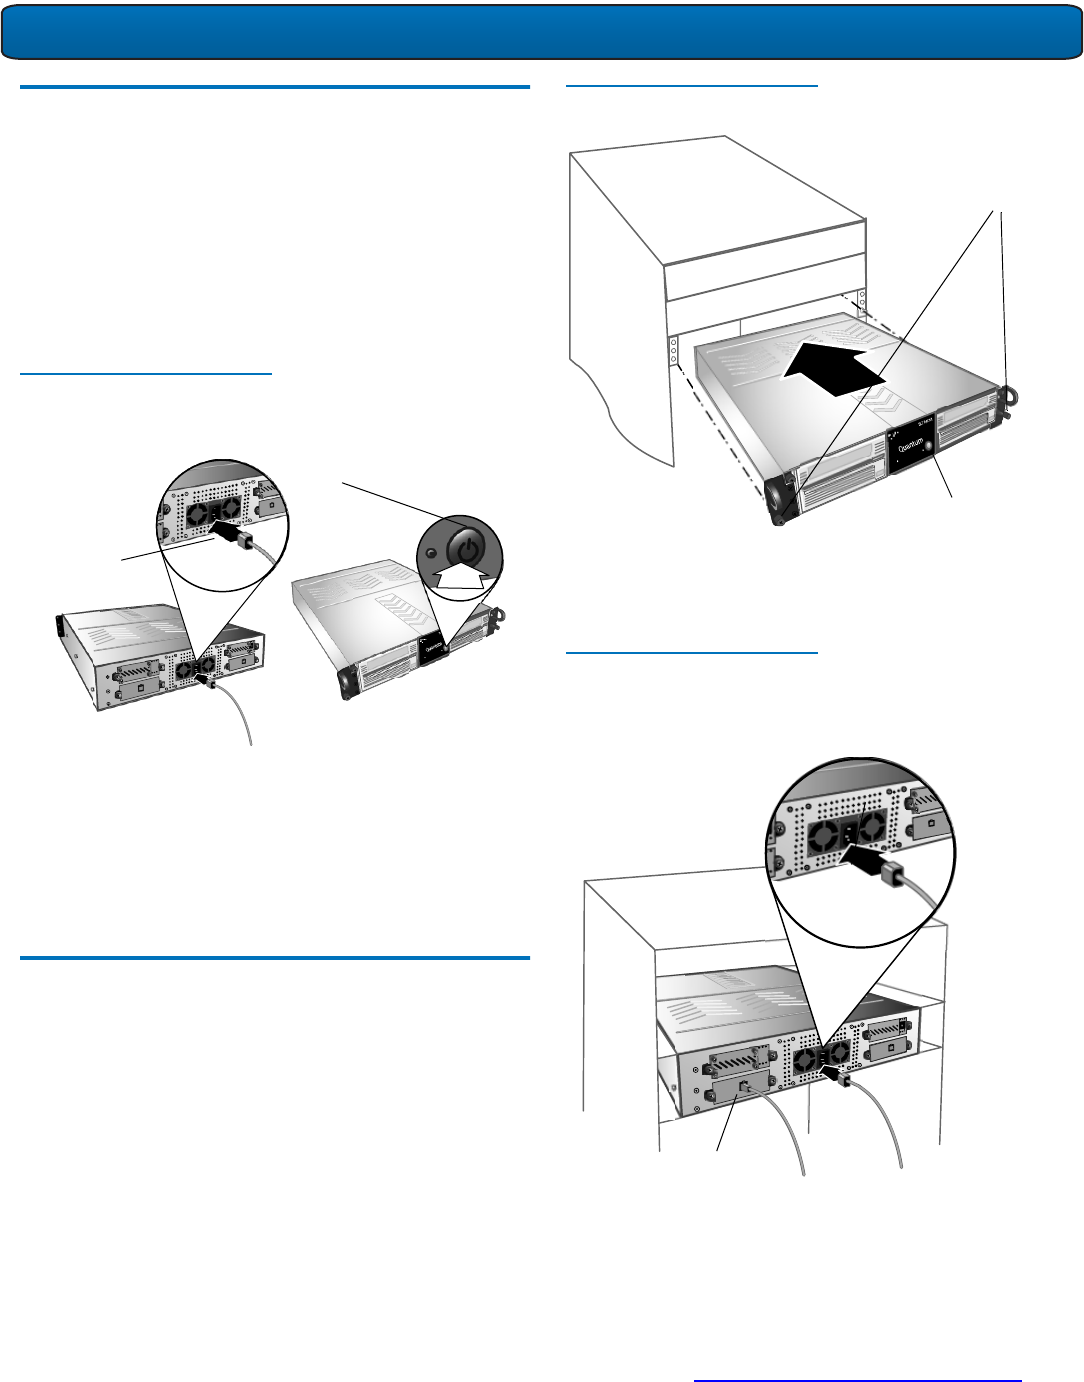
Checking the Rackmount Tape Drive 0
To check that the rackmount tape drive works and is not
damaged:
1 Connect one end of the power cord to the tape drive
power cord connector and plug the other end of the
power cord into an AC outlet.
2 Power on the tape drive using the switch on the front
panel (see figure 3).
Figure 3 Check the
Rackmount Tape Drive
The tape drive performs a self-diagnostic test, called a Power-
On Self-Test (POST), each time you power it on. During POST,
each LED lights in sequence. When POST has completed
successfully, the middle LED stops flashing and remains
illuminated and the left and right LEDs remain off.
Disconnect the power cord from the power cord connector.
Connecting the Rackmount Tape Drive 0
Install the rackmount tape drive in a rack and then connect the
drive to a network though the network (GigE) port located on
the rear of the drive:
1 Slide the rackmount tape drive into the equipment rack
(see figure 4).
Figure 4 Install the
Rackmount Tape Drive
2 Secure the unit to the rack with the thumbscrews.
3 Connect the power cable to the rear of the rackmount
SDLT 600A tape drive (see figure 5).
Figure 5 Connect the Power
and Network Cables
4 Connect one end of the Ethernet cable to the network port
located on the rear of the SDLT 600A tape drive and
connect the other end to a network switch or router.
5 Power on the tape drive using the switch on the front
panel of the rackmount unit.
6 Proceed to Configuring the SDLT 600A Tape Drive
.
Power cord
connector
On/off switch
Thumbscrews
Power button
Power cord
connector
To router or switch
Network port
To power


