VIZIO VX200E User Manual
Version 5/8/2009 17
www.VIZIO.com
SET TOP BOX
SET TOP BOX
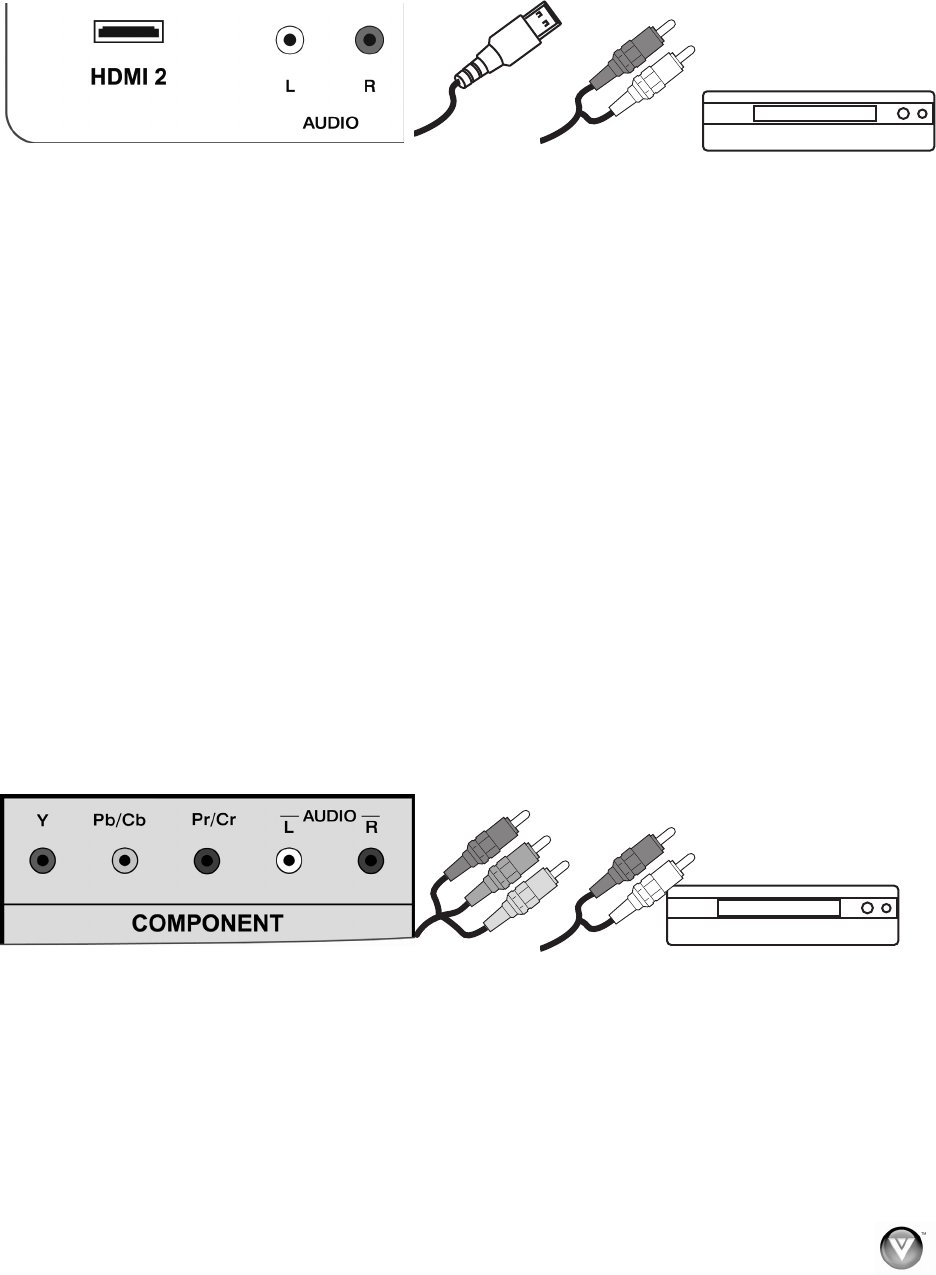
HDMI Connections for Cable or Satellite Boxes with DVI
1. Turn off the power to the HDTV and HDTV Set-Top Box.
2. Using a HDMI-DVI cable, connect the DVI end to your HDTV Set-Top Box and the HDMI end
to the HDMI 2 input at the rear of the HDTV.
3. Using an audio cable (white and red connectors), connect the cable to the audio output
connectors associated with the DVI output on your HDTV Set-Top Box and connect the other
end to the audio connectors associated with the HDMI input (white area) at the rear of the
HDTV.
4. Turn on the power to the HDTV and HDTV Set-Top Box.
5. Select HDMI 2 using the INPUT button on the remote, or directly by pressing the HDMI
button on the remote control.
Note:
The HDMI input on the LCD TV supports High-bandwidth Digital Content Protection (HDCP).
HDCP encrypts the transmission between the video source and the digital display for added
security and protection.
If you are already using the HDMI 2 input for another component, or you do not want to use the
HDMI 2 input for the Set-Top Box, you can connect the Set-Top Box to the HDMI1 connection.
The LCD TV will recognize the DVI connection and obtain audio information from the audio
connectors near HDMI 2 input.
Refer to your HDTV Set-Top Box user manual for more information about the video output
requirements of the product or consult your cable or satellite operator.
Using Component Video (Better)
1. Turn off your HDTV and set-top box.
2. Connect the component cables (green, blue, and red) from your set-top box to the
COMPONENT jacks on the back of your HDTV.
3. Connect the audio cables (white and red) from your set-top box to the adjacent
COMPONENT L and R Audio jacks on the back of your HDTV.
4. Turn on your HDTV and set-top box.
5. Press COMPONENT on the remote control to view the content. You can also press INPUT
on the remote control.
