Using the n8/n12 with Cubase 4/Cubase Studio 4/Cubase AI4
Owner’s Manual
36
English
8.
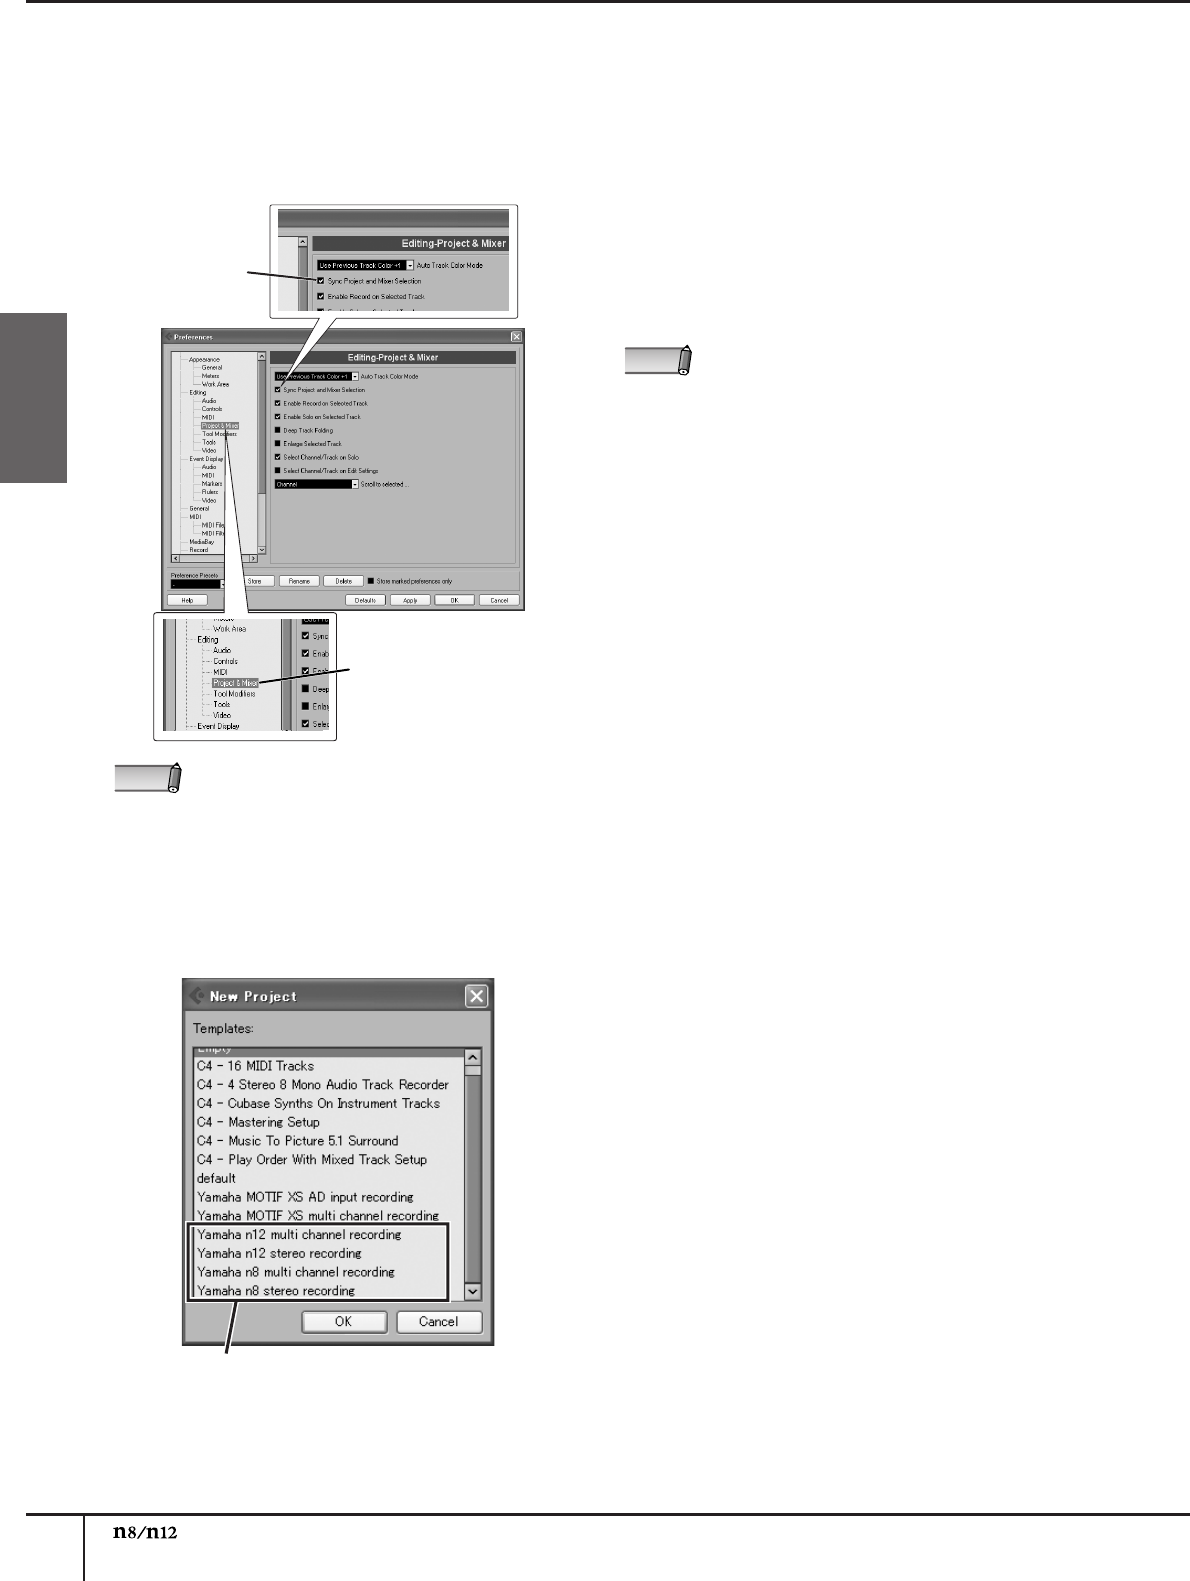
From [Editing], select [Project & Mixer], and in
the dialog box, make sure that “Sync Project and
Mixer Selection” is checked.
If this is not checked, click the check box so that a
check mark appears.
After you have verified this, click [OK] to close the
dialog box.
9.
Select New Project from the File menu to create a
new project.
The New Project panel opens.
Two templates each are provided for the n8 and
n12. These templates contain audio I/O and other
preset data. You can start recording immediately
after opening one of these templates.
■ Yamaha n12 multi channel recording
■ Yamaha n8 multi channel recording
An individual input channel signal on the n8/n12 will be
directly routed to each audio track in Cubase.
■ Yamaha n12 stereo recording
■ Yamaha n8 stereo recording
The REC bus signals on the n8/n12 will be routed to the
Cubase audio tracks.
10.
Click the name of the template you wish to use,
then click [OK].
11.
When the directory selection dialog box opens,
specify a folder in which you wish to store the
created project file and other audio files. Then
click [OK].
A project window based on the selected template
opens.
• If this is not checked, the TRACK CONTROL
switch of the DAW Remote Control section might
not operate correctly.
• This setting will be remembered the next time you
start up Cubase. There is no need to make the
setting each time.
Verify that
this is checked
Choose [Editing]
→
[Project & Mixer]
NOTE
project templates for n8/n12
• If an n8/n12 project template is not displayed, the
Extensions for Steinberg DAW may not be
installed correctly. Refer to the “TOOLS for n/
Cubase AI4 Installation Guide” for instructions on
installing the software again.
• For more information on the templates, please
refer to the Appendix.
NOTE


