DX5R™ Controls and Features Cont.
©American Audio® - www.AmericanAudio.us - DX5R™ Instruction Manual Page 10
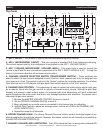
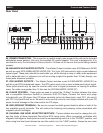
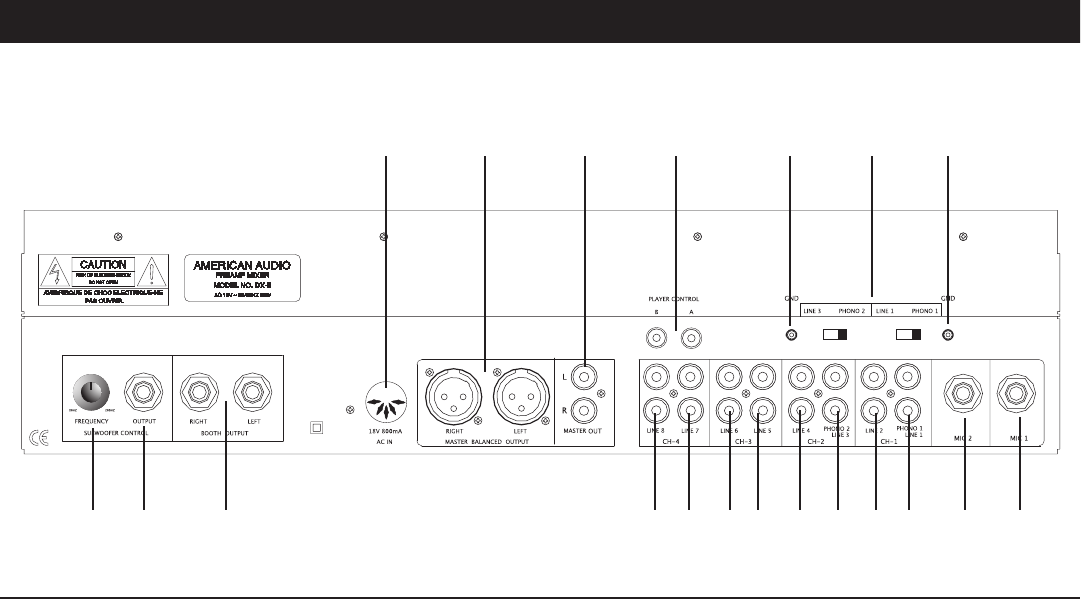
25. POWER CONNECTION - This connector is used to supply main power to the unit via the included
detachable power adaptor. Use only the supplied AC power adaptor. This cord is designed to fit in
one direction only. Do not attempt to force a cord in if it does not fit, be sure the cord is being inserted
properly
26. BALANCED XLR MASTER OUTPUTS - The Master Output includes a pair XLR Balanced JACKS
as well as a pair RCA UNBALANCED JACKS (28). The 3-pin XLR jacks send a high current balanced
output signal. These jacks should be used when you will be driving an amp or other audio equipment
with a balanced input, or whenever you will be running a signal line greater than 15 feet. Always, use
these jacks whenever possible.
27. RCA MASTER OUTPUTS - The Master Output includes a pair XLR BALANCED JACKS (27) as
well as a pair RCA Unbalanced Jacks. The RCA jacks send a low current unbalanced output signal.
These jacks should only be used for shorter cable runs to signal processors or looping to another
mixer. For cable runs greater than 15 feet use the XLR BALANCED JACKS (27).
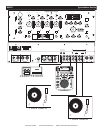
28. PLAYER CONTROL - These jacks are used to control the “Q-Start” function between the mixer
and a compatible American Audio® or American DJ® CD Player. Connect the mono mini plugs
included with your CD player from CD player controller jacks into these jacks, input CD 1 into jack A
and CD 2 into jack B and so on. Be sure to only use the mono tip mini plugs included with your CD
player to avoid damage to the mixer and/or the CD player.
29. GND (GROUND TERMINAL) - Be sure to connect turntable ground leads to either or both of the
two available ground terminals. This will reduce the humming and popping noises associated with
magnetic phono cartridges.
30. CHANNEL LINE LEVEL SELECTOR SWITCHES - These switches are used to change the volt-
age line levels of there respected Phono/Line RCA inputs jacks. When connecting turntables with
magnetic cartridges to these jacks be sure the corresponding switch is in the “PHONO” position, and
when using line level input devices be sure this switch is in the “LINE” position. Always be sure
main
Rear Panel
25
41 42 43
293029282726
33 34 35 36 37 38 39 4031 32


