


©American DJ® - www.americandj.com - Emerald Beam™ Instruction Manual Page 5 ©American DJ® - www.americandj.com - Emerald Beam™ Instruction Manual Page 6
Emerald Beam™ Control & Functions
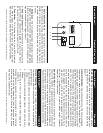
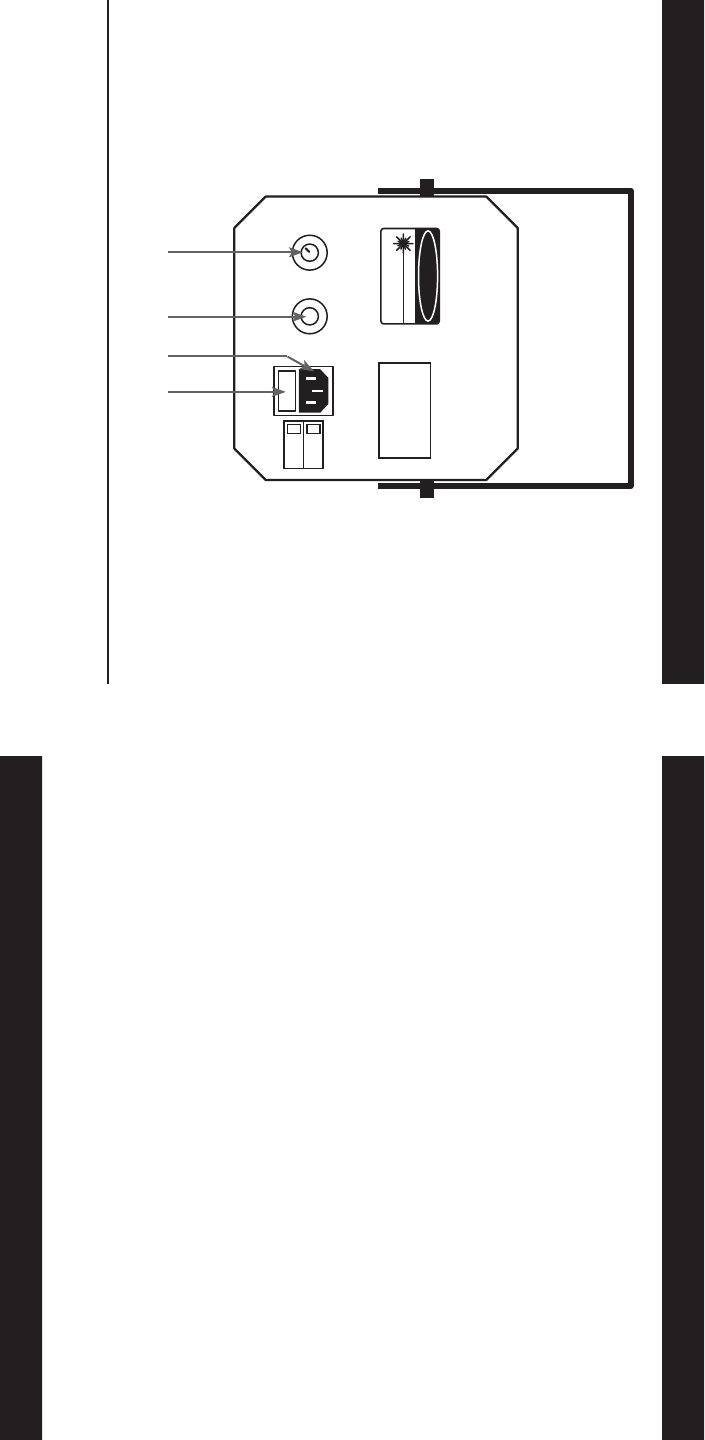
1. Audio Sensitivity Knob - This adjust audio sensitivity of the
internal microphone (2). Turning the sensitivity knob in the clockwise
direction will increase the sensitivity to sound. Turning the knob in
the counter clockwise direction will decrease the fi xture’s sensitivity
to sound.
2. Microphone - This microphone receives external low frequencies
to trigger the unit in Sound-Active mode. This microphone is designed
to receive low frequency sounds only, tapping on the microphone and
high pitch sounds may not trigger the unit.
3. Power Cord Connection - This connection is used to supply main
power to the fi xture. Use only the supplied I.E.C. power cord. Be sure
the main power matches the required power of your fi xture.
4. Fuse Holder - This housing stores the 2 amp GMA protective
fuse. Always replace with the exact same type fuse, unless other
wise instructed, by an authorized American DJ
® service technician.
Emerald Beam™ Operation
Power Supply: This unit is available in both 120v and 220v options,
before plugging your fi xture in be sure the source voltage in your
area matches the required voltage for your American DJ® Emerald
Beam.™
General Operation: Plug and Play operation. This fixture is designed
to operate as a stand alone unit to sound. The Emerald Beam™ is
ready to be plugged in, out of the box, there is no power switch. After
plugging the fixture in the laser will immediately begin to cycle through
the many built in programs. The programs cycle through automatically
when the unit is operating and may not be selected manually. The
unit requires sound to operate and will automatically blackout without
sound to conserve laser life. If the unit does not turn on after the unit
has been plugged in, be sure the sound sensitivity is tuned up (1),
fuse has not blown, and the unit is properly plugged in to a matching
wall outlet. If problem continue to persist, please contact customer
support for further instructions.
Sensitivity Knob: A sound sensitivity knob is located on the rear of
the unit. Use this knob to regulate the amount of sound it takes to trig-
ger the unit. Turning the knob in a clockwise direction will increase the
units sensitivity to sound, turning the knob in a counterclockwise direc-
tion will decrease the units sensitivity. Turning the knob completely to
the counter-clockwise direction will turn off the sound-active mode.
Fixture Cleaning: Due to fog residue, smoke, and dust cleaning
the internal and external lenses should be carried out periodically to
optimize light output.
1. Use normal glass cleaner and a soft cloth to wipe down the outside
casing.
2. Clean the external optics with glass cleaner and a soft cloth every
20 days.
4. Always be sure to dry all parts completely before plugging the
unit back in.
Cleaning frequency depends on the environment in which the fixture
operates (I.e. smoke, fog residue, dust, dew). In heavy use we recom-
mend cleaning on a monthly basis. Periodic cleaning will ensure
longevity, and crisp beam output.
Emerald Beam™ Cleaning
SOUND
MIN MIN
LEVEL
FUSE
AC 100-120V
AC 200-240V
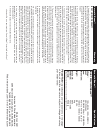
Model : Emerald Beam
Serial No : ____________
Power : ___________
Fuse : ___________
Bulb : ___________
DANGER
VISIBLE LASER RADIATION
-AVOID DIRECT EYE EXPOSURE
LASER DIODE
WAVELENGTH : 532 nm
Max Output : <4.9mW
Class IIIa Laser Product
1432