


OPERATING INSTRUCTIONS Cont.
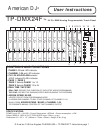
TP-DMX24F™ Instructions page 7
3. RECORD / CHASE cont.
There are 3 ways to control the chase program 1. CHASE, 2. AUDIO, 3. MANUAL
3.1. CHASE control
A. Set (FIG13.) CHASE FADER to SHOW position > 10 min.
The Chase will be controlled by what ever time was programmed in section 2.1
( The default setting is 0.3 sec)
B. Set (FIG13.) CHASE FADER to any position up to 10 min
The Chase will be controlled by what ever time selected, all steps will be the same duration.
C. Tap (FIG 5.) REAL TIME /TAP SYNC 2 times
The Interval between the 2 Taps controls the chase steps.
3.2. AUDIO control
A. Touch (FIG 7.) AUDIO PERCENT TRAITS CHASE AUDIO LED lights.
Chase is controlled by bass beats of Music. Sensitivity is adjusted by (FIG13.) CHASE FADER.
If you have a line connected to EXT AUDIO input built in MIC is disabled.
3.3. MANUAL control
A. Touch (FIG 8.) MANUEL / STEP LED lights up and AUDIO and CHASE LED’s of (FIG 7.) AUDIO
PERCENT TRAITS CHASE button turns off. Unit is in MANUAL control. Tap (FIG10.) SINGLE
CHASE / MIX CHASE / STEP to step thru program.
4. ASSIGN SCENE
Once you have programmed TP-DMX24F and it is in MANUAL mode
A. Touch (FIG 6.) ASSIGN SCENE /BLIND for 0.5 sec. LED lights up indicating unit is in ASSIGN
SCENE
B. When you want to assign Channel 2 to Channels 1-8 , touch (FIG 2.) CHANNEL 2, LED lights,
(FIG14.) LCD DIGITAL DISPLAY reads 02,Channels 1-8 LED’s are on and their output is turned on.
Touch (FIG 3.) CH 1-24 HOLD/FLASH until Hold LED is lit, then touch (FIG 2.) CHANNEL 2 , LED
remains on as does Channel 1-8 LEDs.They remain on until (FIG 2.) CHANNEL 2 is touched again.
5. REAL TIME EDIT (USING (FIG 6.) ASSIGN SCENE /BLIND BUTTON)
5.1 EDIT OUTPUT LEVEL while using CHASE MODE
Press (FIG 6.) ASSIGN SCENE /BLIND + touch the (FIG 2.) CHANNEL 1-24 button of the
CHANNEL, you wish to adjust, twice. The LED will blink rapidly use (FIG12 ) DIMMER FADER
to change the value.
WHEN YOU EXIT FROM RECORD CHASE MODE EDIT IS CANCELED
4. BLACKOUT
BLACK OUT (no output) is engaged by touching (FIG11.) BLACK OUT LED blinks rapidly.
To return to normal operation touch (FIG11.) BLACK OUT until LED turns off.